Check your Agents
The Agents Agent machines are the machines on which you execute your tests. They host the Agent Service and the Runners. The Agent Service receives the Flow from the server and directs it to the required Runner. The Runner actually executes the test. tab in the Elastic Execution Grid user interface shows you which Agents are ready to receive and run your tests.
The Agents tab displays the following information:
Which Agents are currently connected to the Cloud server. Only connected Agents can receive and run tests.
When an Agent was last updated. Agents are updated when they switch between connected and disconnected state, or when you restart them.
To keep the Agents tab easy to navigate, remove disconnected Agents that you no longer need.
Access the Agents tab
To access the Agents tab, click on ![]() Agents in the menu bar on the left.
Agents in the menu bar on the left.
You can also check your Agents via REST API. For information on how to do so, see the Elastic Execution Grid API Swagger documentation.
Navigate the Agents tab
You can ![]() search for Agents or Characteristics in the table header, or you can sort and filter Agents.
search for Agents or Characteristics in the table header, or you can sort and filter Agents.
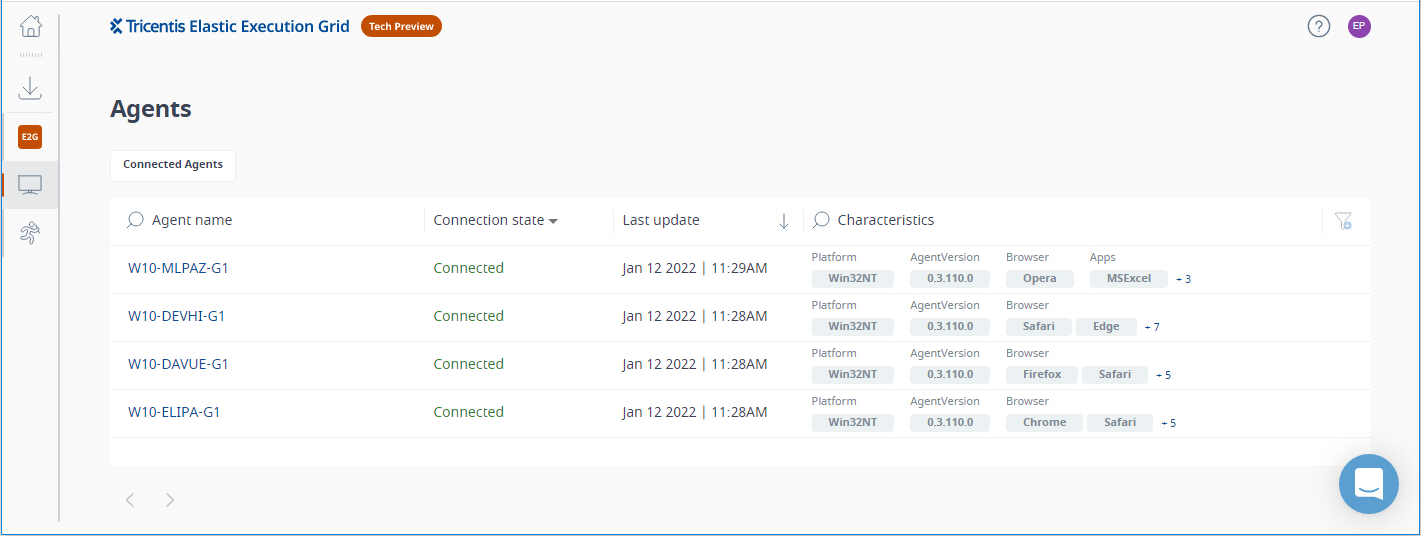
Agents view of Elastic Execution Grid
Some Agents may have more Characteristics than Elastic Execution Grid can display in the Agents tab. In this case, Elastic Execution Grid adds a + <number of additional Characteristics> next to the Characteristics on the screen.
To see all Characteristics, click onto the Characteristics or the Agent name.
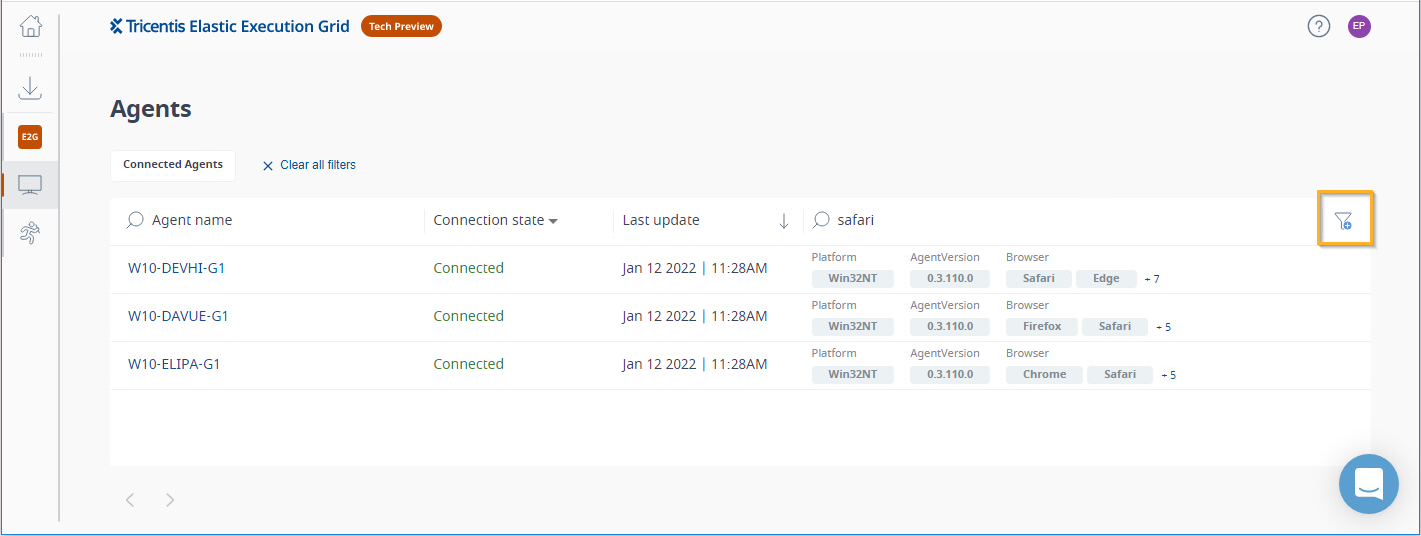
Sort and filter Agents
You don't have to wade through the whole list of Agents to get the information you need. Instead, you can sort and filter:
Sort in
 ascending or
  descending order.
Filter by selecting options from the
 drop-down menu.
Forward filter results
You can forward the results of your filters to other users, for instance for reporting purposes.
When you apply a filter, the URL changes. To forward results, copy and forward the filter URL.
Create custom filters
If you find yourself using the same filters over and over, you can save them as permanent custom filters. Then you don't have to filter manually every time.
You can create up to 3 additional custom filters.
To create a custom filter, follow the steps below:
Filter your data as needed.
Applying filters activates the
 Create custom filter button. Click the button to create a new custom filter.
Create a new custom filter
This adds a new filter field to the top of the table. Name your custom filter.
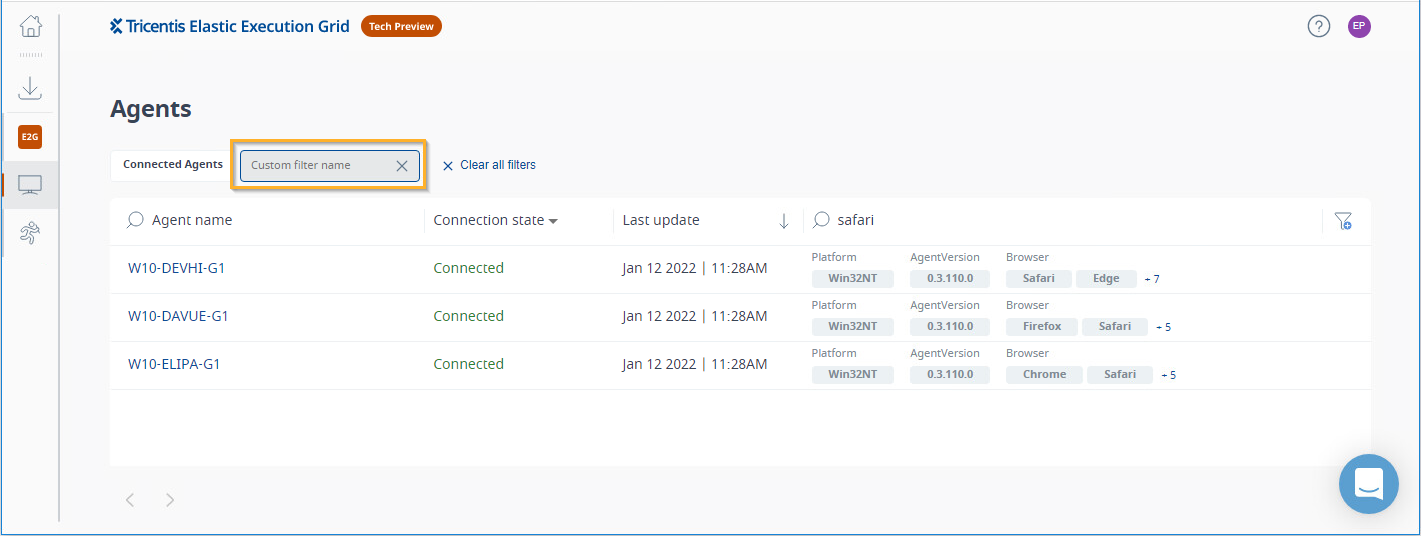
Name your custom filter
To delete a custom filter, click the x in the custom filter field.
Clear filters
To remove any filters that you have currently applied, click Clear all filters. This clears the current filters; it doesn't delete your custom filters.
Remove Agents
Over time, your Agent needs can change. You may want to retire Agents, for instance because you switched them to a better machine or you don't need them anymore.
Even if you don't use an Agent machine, it still shows up as Disconnected in the Agents tab. If you only want to see the Agents you actually work with, remove retired Agents from the Agents tab.
To remove a disconnected Agent, hover over the Agent and click the ![]() button.
button.
Note: this doesn't delete or uninstall the Agent. If you need the Agent after all, simply start it again to add it to the Agents tab.
What's next
If you have available Agents, trigger test runs.