Creating Test Repositories
Test Repositories allow LiveCompare to connect to the following testing tools.
- Tosca
- qTest
- HP ALM
- Microsoft Azure DevOps
- Worksoft Certify
Test Repositories are used by actions that require access to their associated test projects. For example, the Search Test Repository action is used to find test assets in the associated object that match a supplied set of tokens.
If you have LiveCompare Administrator privileges, a Test Repository may be created by carrying out the following steps. LiveCompare Editors may also create Test Repositories if this has been permitted by your installation.
- Select the Administrator/Test Repositories folder in the LiveCompare hierarchy and choose ‘New > Test Repository…’ from the context menu.
- Complete the Add Test Repository screen as follows:
| Field | Description |
|---|---|
| Name: | A unique name that will identify the Test Repository. |
| Description: | A description for the Test Repository. |
| Type: | Select the type of Test Repository to create, then complete the remaining screen fields as described in the sections below. |
| Add to Projects: | If LiveCompare is project-controlled, deselect the appropriate check boxes to exclude the Test Repository from one or more projects. If you have LiveCompare Editor privileges, the check box for your current project may not be deselected. If you have LiveCompare Administrator privileges, a Test Repository will not be accessible unless it is assigned to at least one project. |
For Tosca
| Field | Description |
|---|---|
| Url: | The URL used to access Tosca, for example, http:/<server name>:<port number>/rest. |
| Project: | The name of the Tosca project to which to connect. |
| Username: | The Tosca username to use for the connection. |
| Password: | The Tosca password to use for the connection. |
| Confirm Password: | Enter the same password for confirmation. |
If timeout errors occur when connected to a Tosca Test Repository, the Tosca REST client timeout value may be configured by creating the following DWORD registry setting on the LiveCompare server:
HKEY_LOCAL_MACHINE\SOFTWARE\Tricentis\LiveCompare\3.9\Settings\RestClientTimeout
This should be set to a Tosca REST client timeout value in seconds.
For qTest
| Field | Description |
|---|---|
| Url: | The URL used to access qTest. |
| Project: | The name of the qTest project to which to connect. |
| Username: | The qTest username to use for the connection. |
| Password: | The qTest password to use for the connection. |
| Confirm Password: | Enter the same password for confirmation. |
For ALM
Before creating your first HP ALM Test Repository, carry out the following steps:
- Log in to HP ALM at least once from your LiveCompare server machine to download the appropriate HP ALM client components.
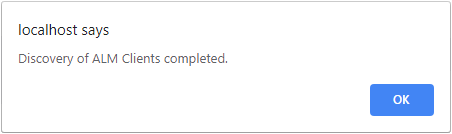
- Select the Administration/Test Repositories folder in the LiveCompare hierarchy and choose Discover ALM Clients from the context menu. Click ‘OK’ to close the following message box:
| Field | Description |
|---|---|
| Client: | Select one of the discovered ALM clients. Each client is identified by the hostname of the machine from which the client components were downloaded. |
| Url: | The URL used to access HP ALM. |
| Project: | The name of the HP ALM project to which to connect. |
| Domain: | The HP ALM domain. |
| Username: | The HP ALM username to use for the connection. |
| Password: | The HP ALM password to use for the connection. |
| Confirm Password: | Enter the same password for confirmation. |
For Azure DevOps
| Field | Description |
|---|---|
| Url: | The URL used to access Azure DevOps. |
| Project: | The name of the Azure DevOps project to which to connect. |
| Team: | The name of the Azure DevOps team to use for the connection. |
| Personal Access Token: | Paste in your Azure DevOps personal access token. |
| Confirm Personal Access Token: | Paste in the same personal access token for confirmation. |
For Certify
| Field | Description |
|---|---|
| Project: | The name of the Certify project to which to connect. |
| External Data Source: | This field should be set to a SQL Server External Data Source which connects to a Certify database. The External Data Source should be configured to read a small table, for example, CertifyVersion. |
- Click ‘Save’ to save the Test Repository.
When a Test Repository has been created, it appears in the LiveCompare hierarchy underneath the Administration/Test Repositories folder.
To access a Test Repository from a workflow, assign it to a Test Repository parameter.