Create and configure a monitor
Create a monitor
Creating a monitor is easy with the wizard. The wizard is identical to the monitored machine creation wizard.
The name of the monitored machine is pre-entered in the Enter Hostname field.
To create a monitor, follow these steps:
-
Select the machine in the monitored machine tree.
-
In the right-hand panel, click on the New Monitor button.
Configure a monitor
The role of a monitor is to group all counters and indicators set on a given server. It also tells NeoLoad how to connect to the monitored system.
Here is the configuration screen with a Linux monitor as an example:
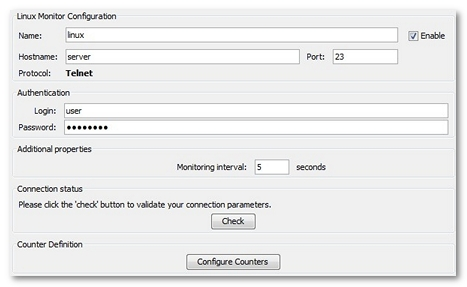
Definition
A monitor definition contains at least the following information:
-
Name: Visual name used to represent the monitor in NeoLoad.
-
Hostname: Machine physical name (hostname or IP address).
Note: The monitor host name may be changed independently of the name of the monitored machine in which it is located. This may be useful for example where the monitor is only available on a particular network interface within the monitored machine.
Additional information may be required, depending on the type of monitor. This may include (non-exhaustive list):
-
Port: Network port number.
-
Connection URL
-
Domain
Contextual help for each monitor can be obtained by pressing F1.
Properties
The following property is common to all the counters within a monitor can be set in the monitor panel:
-
Monitoring interval: This refers to the interval between two monitor value readings for that connection. The recommended default interval is 5 seconds. Too short an interval could have a negative effect on the server performance.
Connection status
The Check button allows testing the connection to the server. If it fails, it is necessary to check the monitor settings. A specific error message helps identify the possible cause of the connection failure. Pressing F1 gives a list of prerequisites for each type of monitor.