Create Shell Agent from Launch
Shell Agent Introduction
The Shell Agent has a different approach to creating automated Test Cases and Test Runs compared to the existing built-in agents (e.g. TestNG. jUnit, Cucumber. JBehave. UFT.. The other built-in agents scan your automated test scripts for Test Cases and create them into Test Design. Instead, the Shell Agent allows you to define which Test Runs get executed and how the results will be passed into Test Execution by using APIs.
The Shell Agent offers a high level of flexibility including:
-
The ability to schedule automated test executions for tests in any framework and language, including custom frameworks
-
The ability to kick off shell or batch scripts that are executable from your console or terminal.
-
The ability to kick off the scripts which are located on a shared network directory. Keep in mind that the shared network directory should be mounted to a logical directory on your local machine since the network directory path is not supported.
-
The ability to define which Test Runs get executed and how the results will be passed into Test Execution by using APIs.
-
The ability to pass data not only the system, custom fields in qTest Manager but also the dynamic object into automation project through parameters or an URL
When building custom script that is executed (or kicked-off) by the Shell Agent, make sure it performs these actions:
-
Execute automated tests
-
Collect test results
-
Submit automated test logs to qTest using APIs (this will create automated Test Cases, create automated Test Runs, and submit Automated Test Logs)
Prerequisites
Create Shell Agent from qTest Launch
In this guide, we will show an example how to create and configure a new Shell Agent to a specific automation agent host machine from qTest Launch. This example uses a sample automation project hosted in GitHub that:
-
shows the ability to kick-off a shell command or batch script
-
shows the ability to pass data as parameters to the shell command or batch script
-
demonstrates how to parse a test results (under NewMan format) and submit to qTest Manager as automated test logs via APIs.
Prerequisites
This example requires nodejs that you can download it here. After downloading, make sure you install it to the automation agent host machine where you are going to create a Shell Agent.
Step 1
Download the sample Shell automation project at https://github.com/QASymphony/shell-agent-samples/tree/master/postman-nodesjs and save it to your host machine where you installed the automation agent host.
-
On Windows: D:\shell-agent-samples\postman-nodesjs
-
On Linux or Mac: /usr/local/shell-agent-samples/postman-nodejs
Step 2
Access to qTest Launch then locate the automation agent host that you want to create a new agent and open its detail dialog.
On the host detail dialog, click on Agents tab then Click on + New Agent button. You will be presented with the New Agent dialog, as shown below:
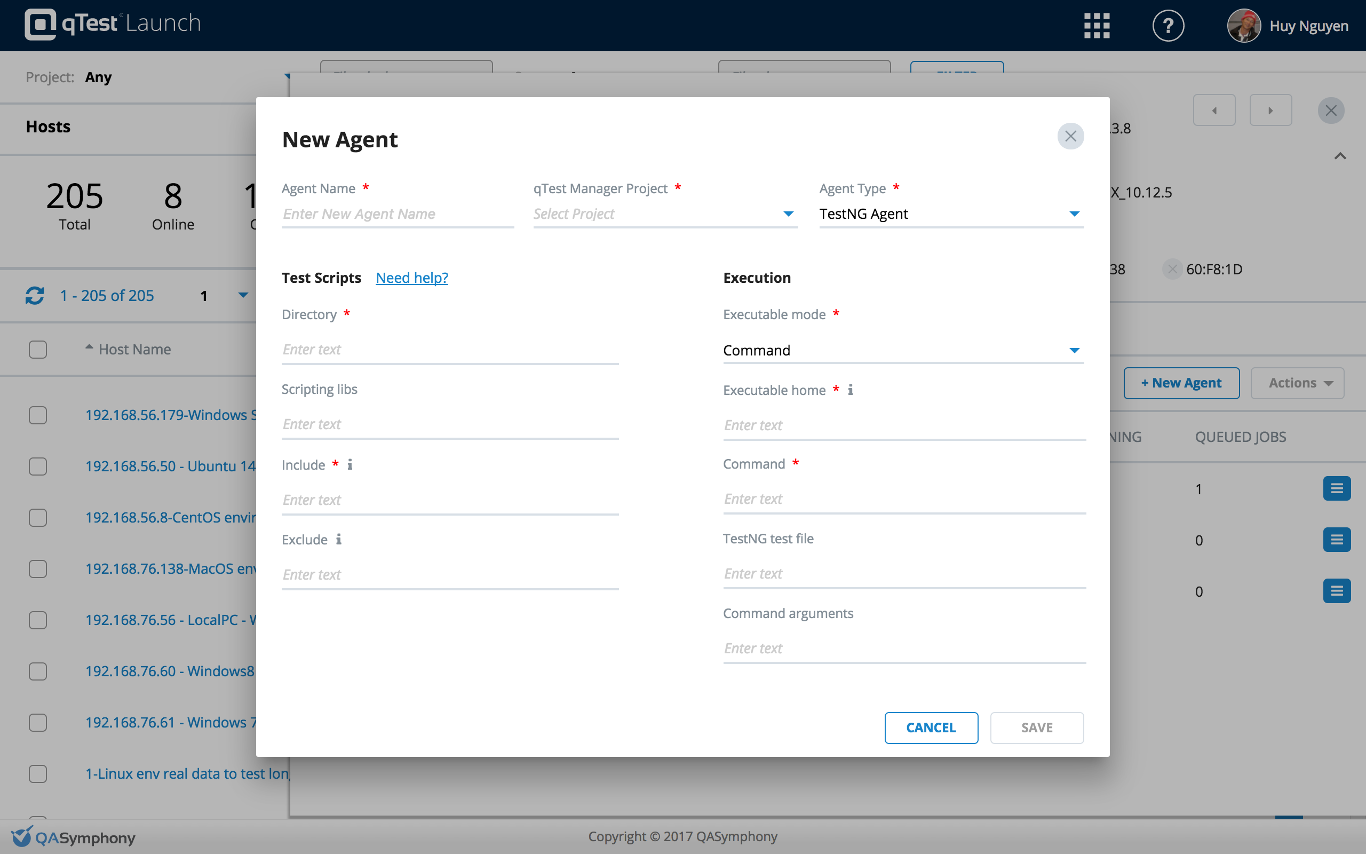
General Information
-
Agent Name: name of the new agent, e.g. New Agent
-
qTest Manager Project: select a project that the new agent will be associated with, e.g. qConnect - Sample Project
-
Agent Type: Shell Agent

Test Scripts
-
Directory (required): define a directory under which the kick-off scripts will be executed
-
Allocated Execution Time (required): specify how long you expect the next execution will be kicked-off (in minutes) after the last execution gets done.
-
Kick-off scripts (required): define the scripts to be kicked off by the Shell Agent. In general, the scripts should execute your automated tests, collect the test results, and report them to qTest Manager using our APIs. You can define the scripts using 1 of 3 options:
An executable file stored on your local machine. You can use either absolute path or relative path under the working directory above to specify the executable file
An executable file stored on a shared network directory. Keep in mind that the shared network directory should be mounted to a logical directory on your local machine since the network directory path is not supported
A command entered directly
We will configure a script that kicks off the sample automation project that we have downloaded in step 1. The sample automation project, when being kicked-off by the shell command or batch scripts, will upload a test result contained in a text file (under NewMan format), including the execution status to qTest Manager.
To submit automated test result to qTest Manager, the automation project needs to know which project to upload the test result to it so we will configure the kick-off scripts to pass the project id, project name, the execution status as parameters of the shell command or batch script.
Since the qTest Manager project that we want to submit the automated test result to it is varied between qTest account, we will not use the hard-coded value in our Kick-off script but parameterizing it using the variables, as shown below:
-
$QTE.projectId: ID of qTest Manager Project
-
$QTE.projectName: Name of qTest Manager project
-
$QTE.jobStatus: the status of this job execution
The automation project, when being kicked-off by the Shell Agent, will obtain these parameters and call qTest API to resolve the values of those parameters.
Test Scripts example
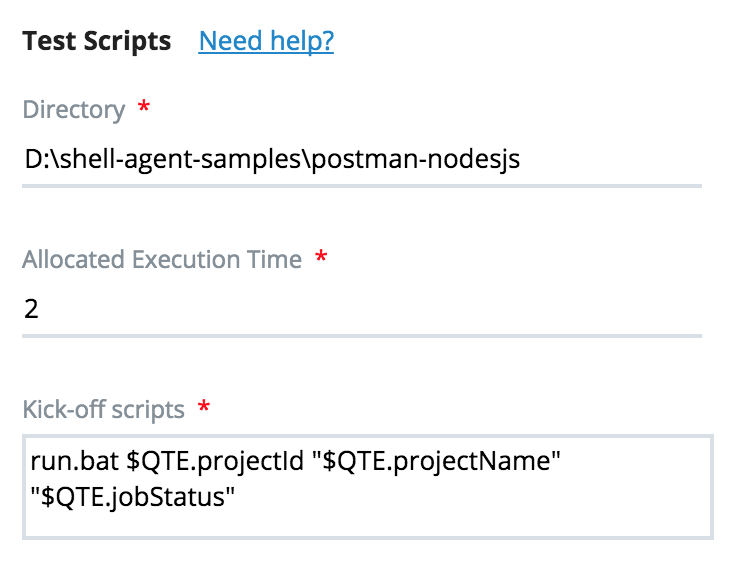
On Windows:
-
Directory: D:\shell-agent-sample\postman-nodesjs
-
Allocated Execution Time: 2
-
Kick-off scripts: run.bat $QTE.projectId "$QTE.projectName" "$QTE.jobStatus"
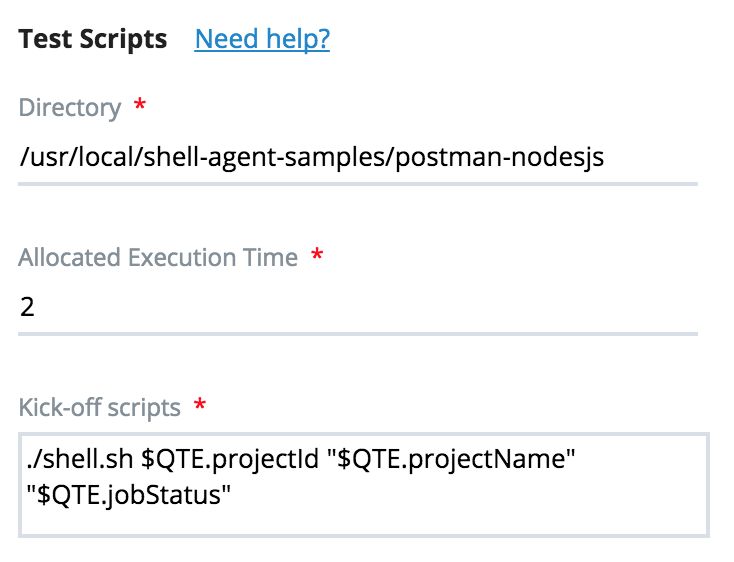
On Linux or Mac
-
Directory: /usr/local/shell-agent-samples/postman-nodesjs
-
Allocated Execution Time: 2
-
Kick-off scripts: ./shell.sh $QTE.projectId "$QTE.projectName" "$QTE.jobStatus"
Configure the new Shell Agent in Agent Host machine
Access to your agent host machine, which you just created the new shell agent to it from qTest Launch. then navigate to the extracted sample project folder.
Windows:
> cd D:\shell-agent-sample\postman-nodesjs
Mac:
$ cd /usr/local/shell-agent-samples/postman-nodesjs
/usr/local/shell-agent-samples/postman-nodesjs $ chmod a+x shell.sh
Execute below command to install node modules
npm install
Next, open and edit creds.json file in the root of the sample source code, like below.
{
       "email": "your qTest Manager login email",
       "password": "your qTest Manager password",
       "qTestUrl": "your qTest Manager URL"
}
Example:
{
       "email": "huynguyen@qasymphony.com",
       "password": "admin123",
       "qTestUrl": "https://demo.qTestnet.com"
}
Execute below command to create automated Test Runs to qTest Manager's qConnect Sample Project, we will need these Test Runs to schedule tests later.
node submitTestResultToqTest.js -f newman-json-result.json -c creds.json -o <qTest_project_id>
Note: replace <qTest_project_id> with your actual project id. One way to obtain project id is to login to your qTest Manager and switch to your project then look for the project id in the URL, like below:
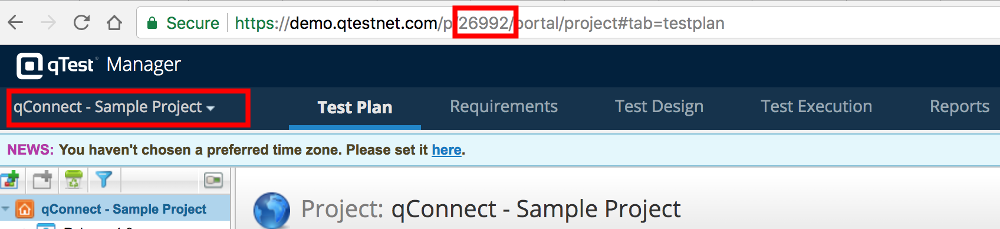
So our command should look like below:
$ node submitTestResultToqTest.js -f newman-json-result.json -c creds.json -o 26992
After the command is executed, the result should look like below:
$ node submitTestResultToqTest.js -f newman-json-result.json -c creds.json -o 26992
projectId: 26992
jobStatus: undefined
projectName: undefined
Successfully uploaded test case [18111655] with status PASS to Test Run TR-228
Successfully uploaded test case [18111656] with status PASS to Test Run TR-229
Successfully uploaded test case [18111655] with status PASS to Test Run TR-230
Successfully uploaded test case [18111657] with status FAIL to Test Run TR-231
Successfully uploaded test case [18111658] with status PASS to Test Run TR-232
Successfully uploaded test case [18111659] with status PASS to Test Run TR-233
Successfully uploaded test case [18111660] with status FAIL to Test Run TR-234
Successfully uploaded test case [18111661] with status PASS to Test Run TR-235
Successfully uploaded test case [18111662] with status FAIL to Test Run TR-236
Successfully uploaded test case [18111663] with status FAIL to Test Run TR-237
Successfully uploaded test case [18111664] with status FAIL to Test Run TR-238
Successfully uploaded test case [18111659] with status FAIL to Test Run TR-239
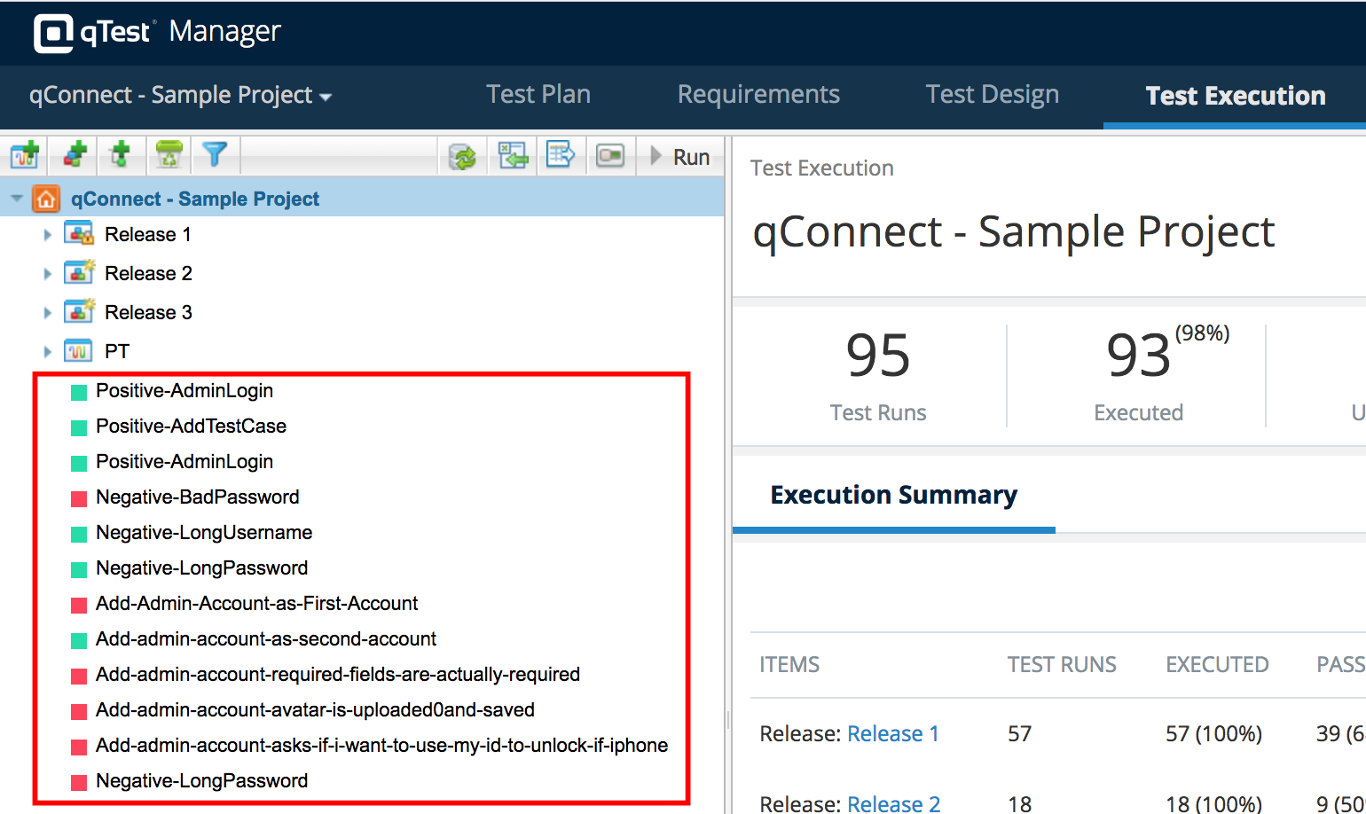
Next, access to qTest Manager's Test Execution tab, you will see the automated Test Runs got created as shown below.
Schedule tests
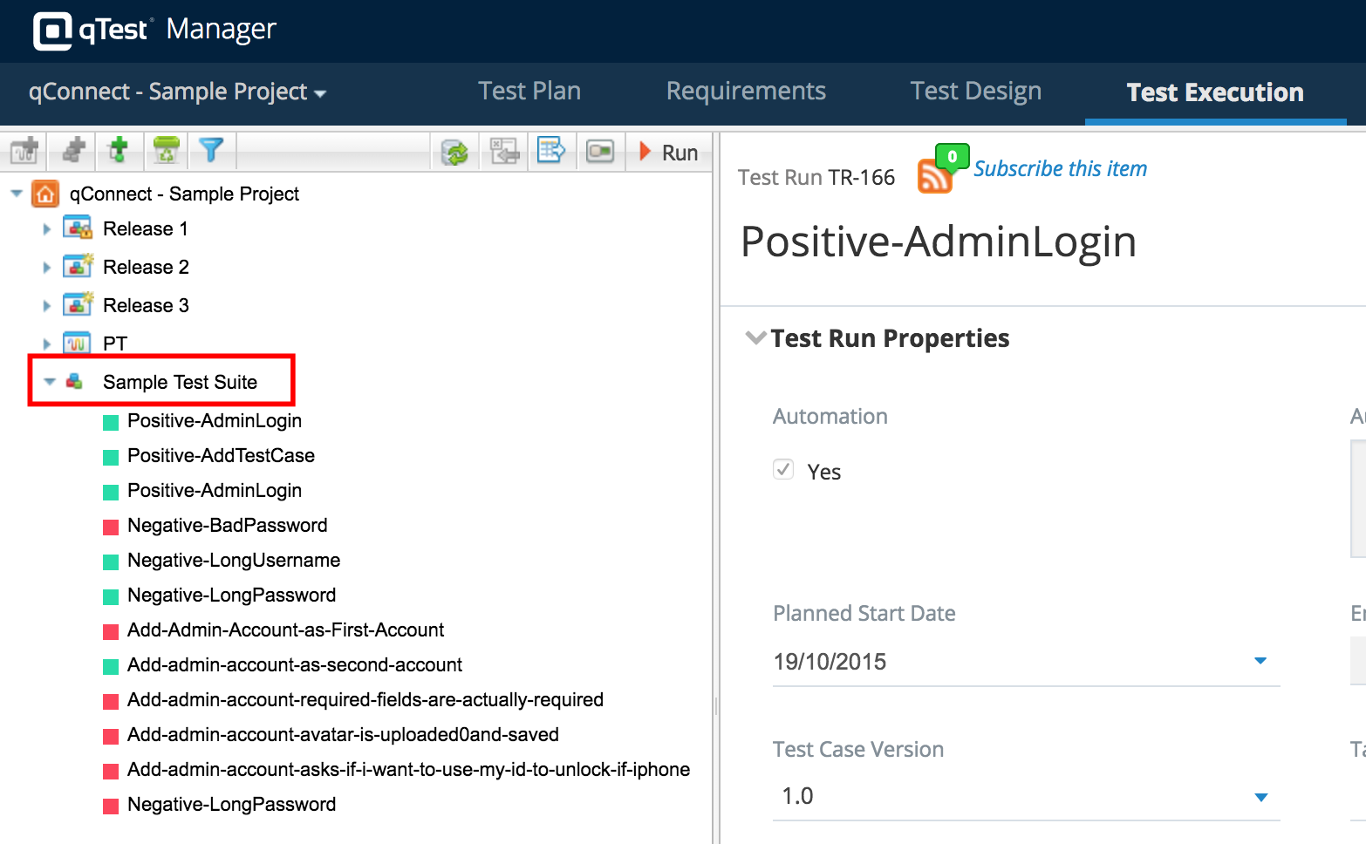
Next create a new test suite named Sample Test Suite and move all the newly-created Test Runs into it, as below screenshot.
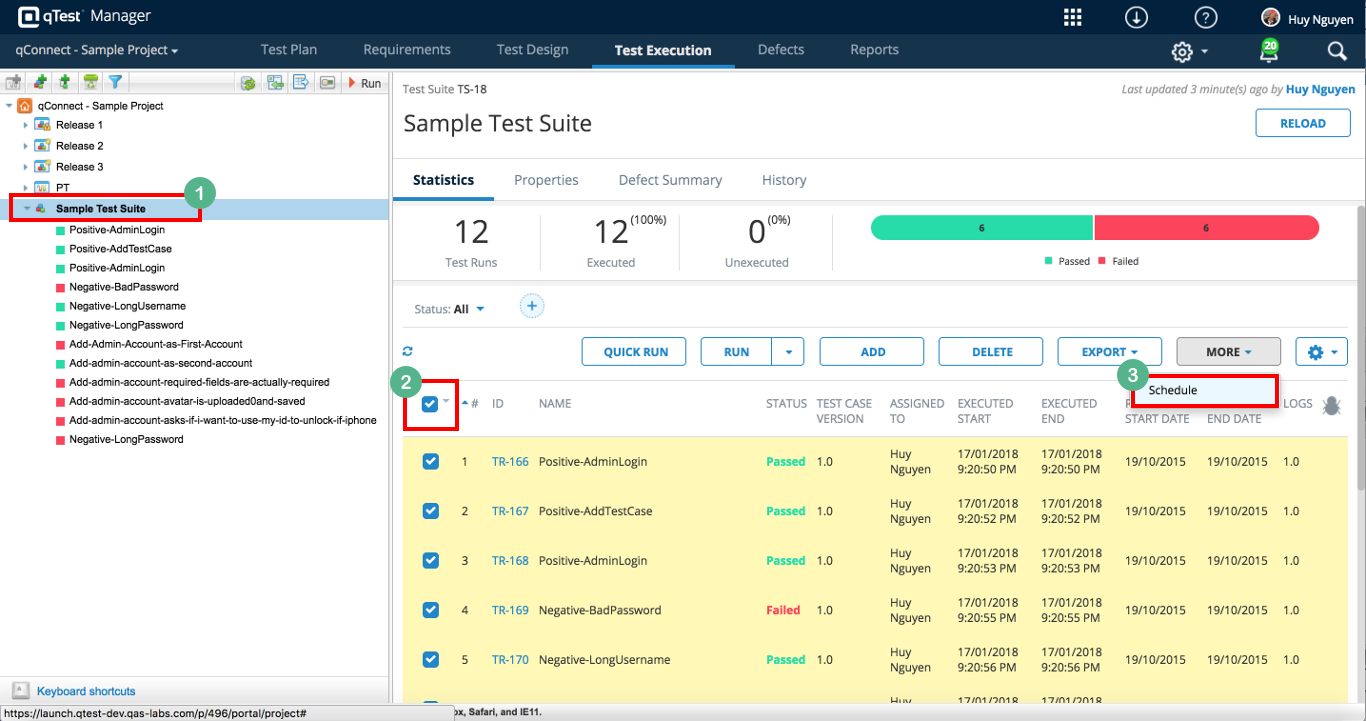
Next, perform the following:
-
Select the Sample Test Suite in the left panel
-
Click on the check all checkbox to select all the Test Runs
-
Click on More button and select Schedule
Below screenshot shows how to perform those steps.
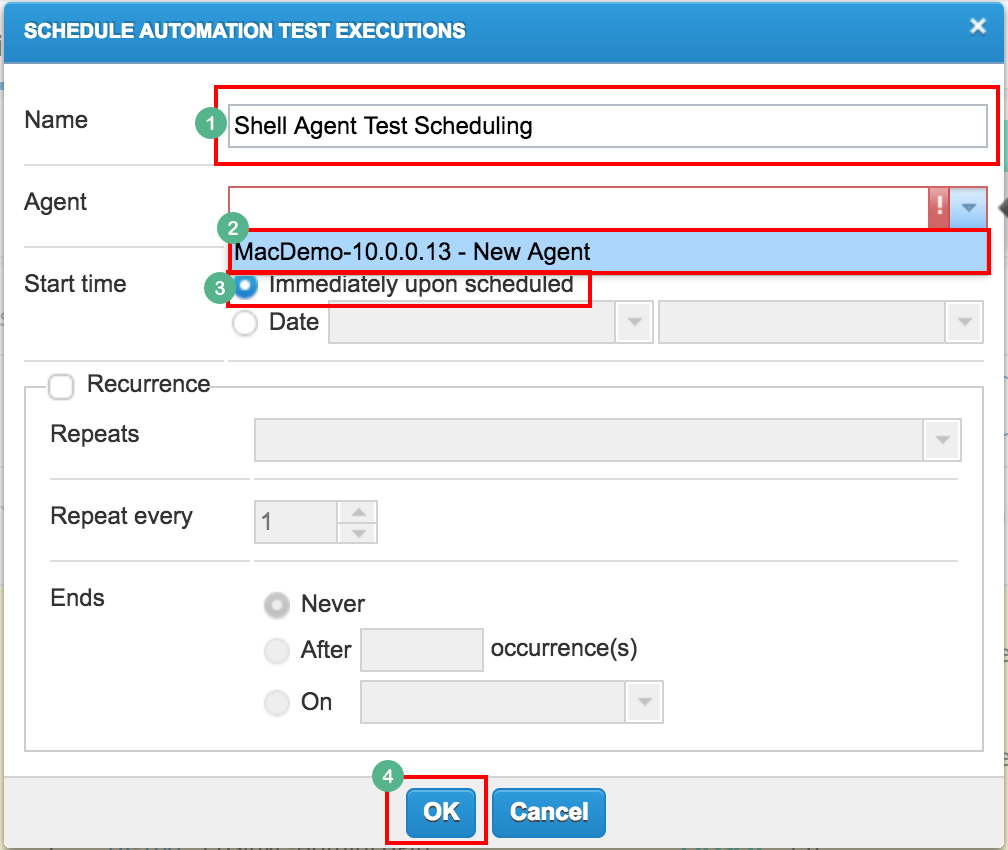
In the opening SCHEDULE AUTOMATION TEST EXECUTION dialog, enter the following:
-
Name: Shell Agent Test Scheduling
-
Agent: MacDemo-10.0.0.13 - New Agent. Note: replace the actual Shell Agent name in your environment
-
Start time: keep the option Immediately upon scheduled
-
Click OK button
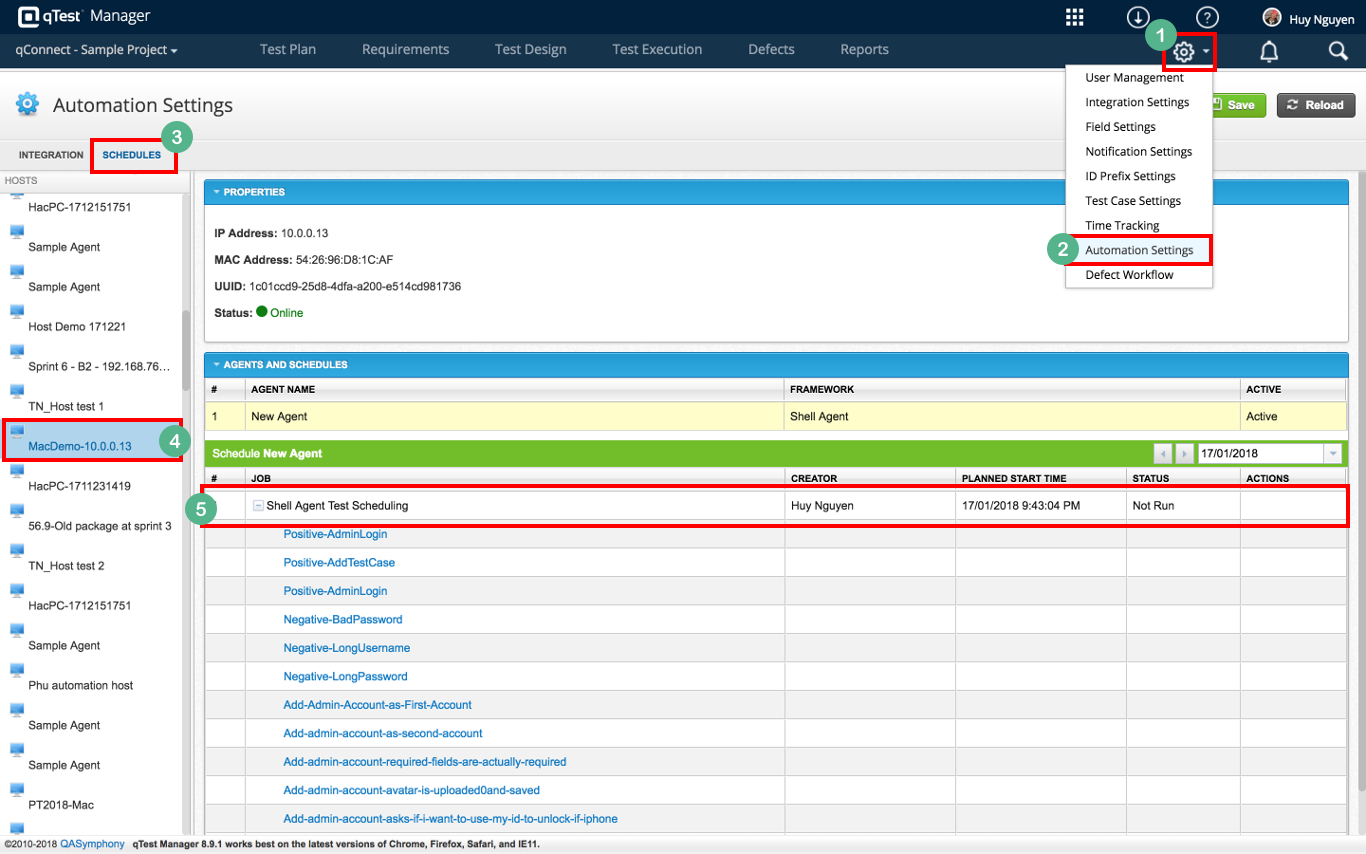
Now, the automation Test Execution has been scheduled. You can view it by following below steps
-
Click on gear icon
-
Select Automation Settings
-
Click on SCHEDULES tab
-
Look for your automation agent host machine, in our example it is "MacDemo-10.0.0.13", then click to select it
-
In the right panel, you will see our automation Test Execution has been scheduled
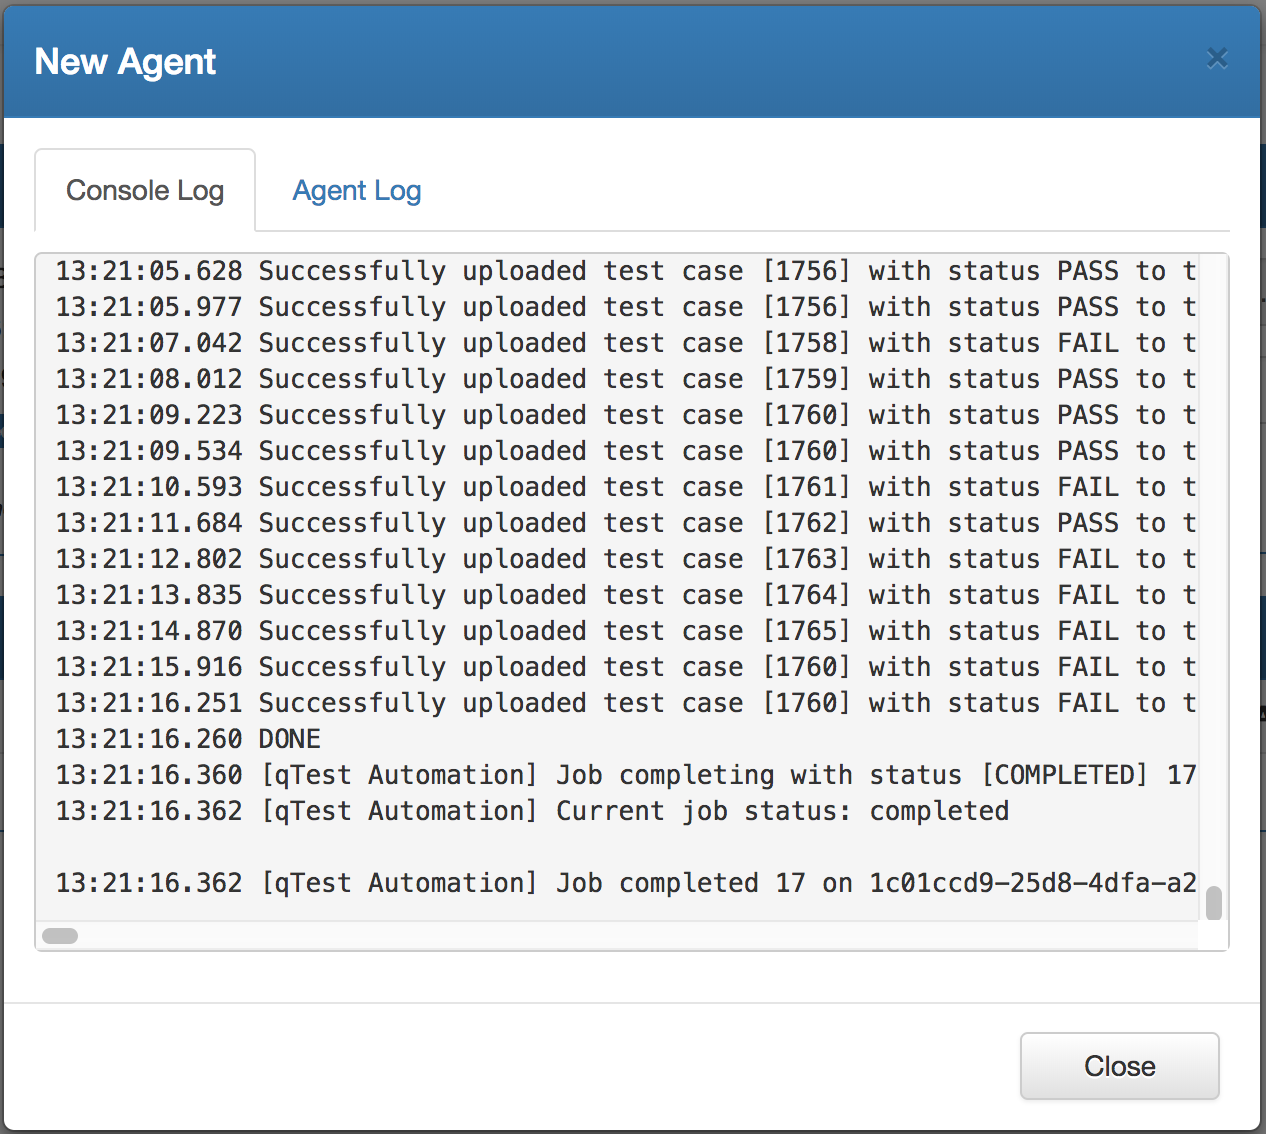
Next, get back to your Agent Host UI, locate the New Agent and click on Show log icon.

You will be presented with a dialog showing the execution logs.
Console Log
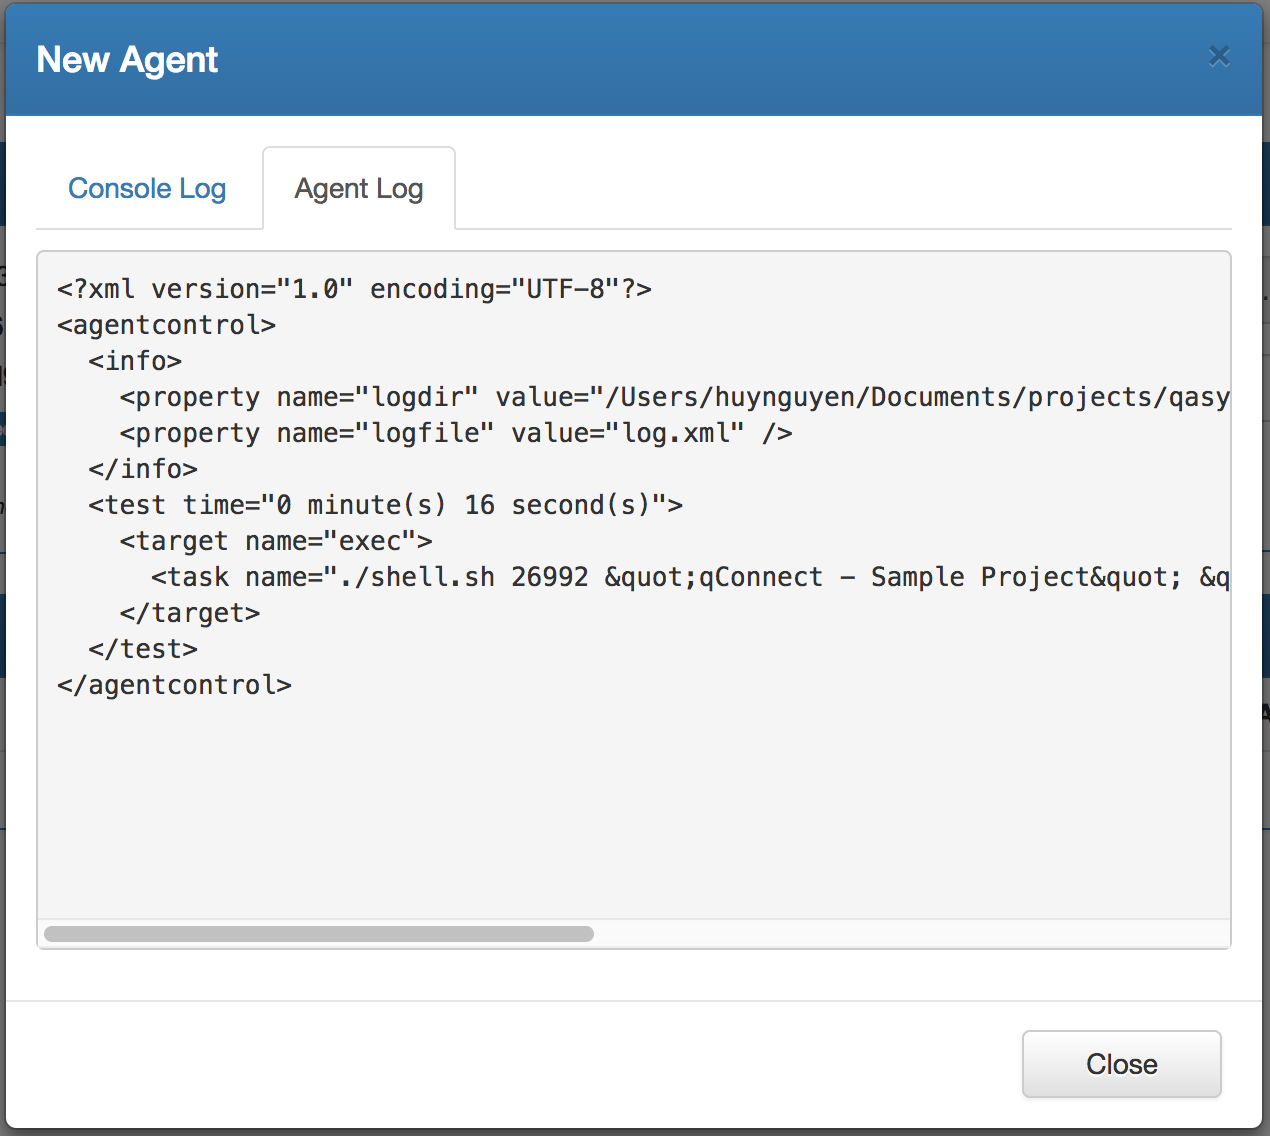
Agent logs
You have successfully created, configured, scheduled and executed the Shell Agent in Launch.