qTest Automation Host 2.x Installation Guide on Linux
In this article, we will walk you through how to install the qTest Automation Host version 2.x on a Linux machine.
Download qTest Automation Host 2.x
-
From the Download qTest Automation Host page, download the qTest Automation Host 2.x for Linux.
It is highly recommended that you download the latest 2.x version to benefit from bug fixes and enhancements. -
Open the Terminal.
-
Copy the downloaded file agentctl-[version]-linux-x64-full.tgz to a desired installation directory, e.g. /usr/local/agentctl-[version]-linux-x64-full.tgz
If you plan to install multiple Automation Host instances on Linux. it is important that you create a parent folder for each instance to easily identity the instance as well to avoid issues when upgrading each instance. The best practice is to suffix parent folder with a number.EXAMPLE:
Instance #1: /usr/local/qTest-automation-host-1/agentctl-[version]-linux-x64-full.tgz
Instance #2: /usr/local/qTest-automation-host-2/agentctl-[version]-linux-x64-full.tgz
...
Instance #N: /usr/local/qTest-automation-host-N/agentctl-[version]-linux-x64-full.tgz
Replace [version] in the command to the actual version that you have chosen to download, e.g. 2.1.1
-
Change the current directory to the installation directory.
EXAMPLE:
$ cd /usr/localor if you are going to install multiple Automation Host instances
$ cd /usr/local/qTest-automation-host-N -
Extract the bundle:
$ tar -zxf agentctl-[version]-linux-x64-full.tgz -
Change the current directory to the extracted agentctl:
$ cd agentctl-[version]
Acquire your qTest API Token
-
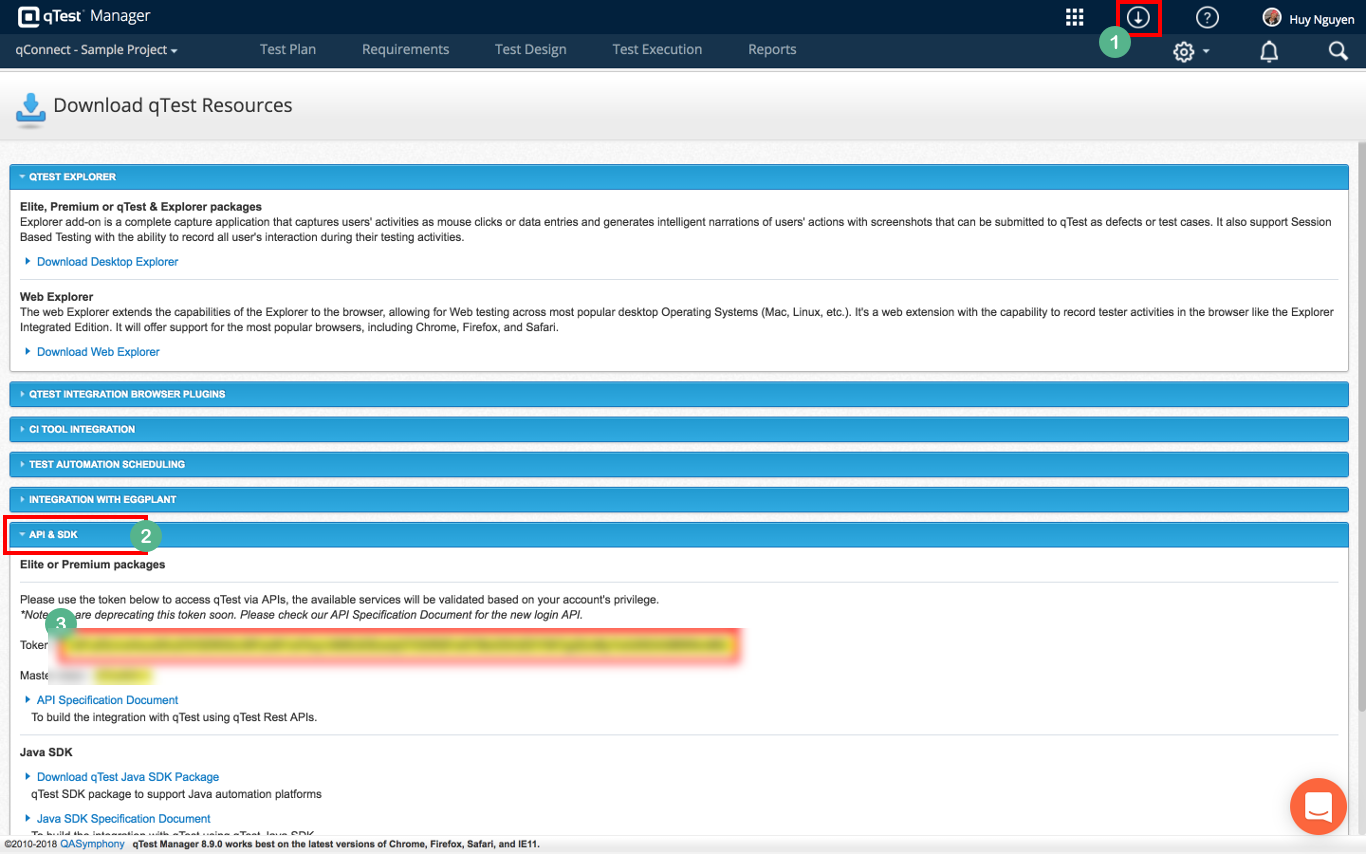
Login to qTest Manager as an Administrator and access the Resources page.
-
Expand the APIs and SDK section.
-
Copy the API Token, as shown below:
NOTES ABOUT qTest API TOKEN CHANGES:
-
Users change their password in qTest Manager OR
-
Users switch authentication type, e.g. from authenticating with qTest using Username and Password to SSO or LDAP. and vice versa
Install and Configure the Automation Host
There are two options to install and configure the Automation Host:
-
Via web interface
-
Via command line
Option 1: Install and configure Automation Host via web interface
-
From the Terminal, execute the following command:
/path/to/agentctl-[version]$ ./agentctl start -
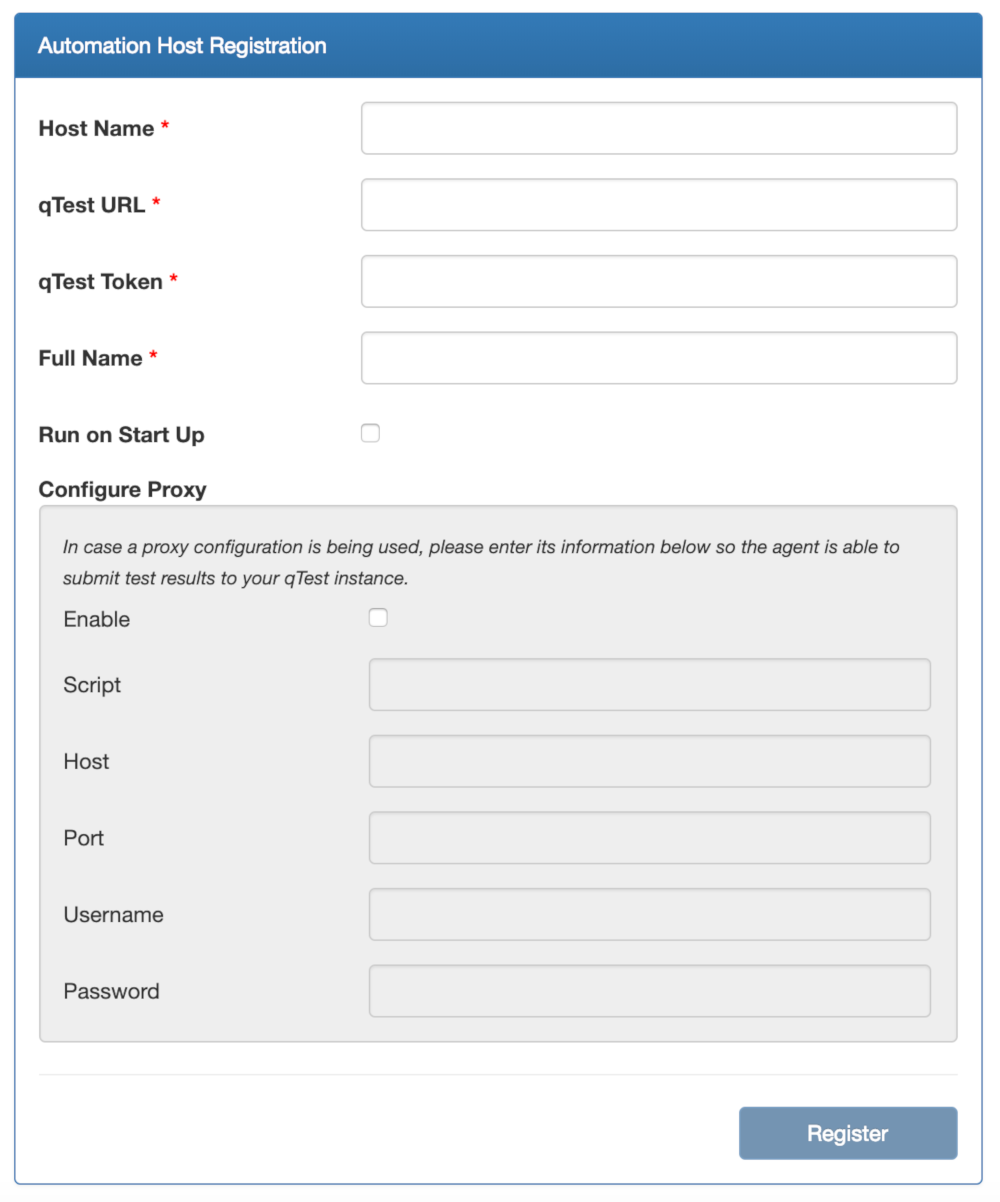
Wait a couple of minutes for the Automation Host to fully start. Open a web browser and navigate to http://localhost:6789. You'll see the registration UI being shown, as below.
-
Enter information to register the automation host:
Host Name: Enter a meaningful name for the host
qTest URL: Your qTest Site URL
qTest Token: Enter the token from the step Aquire your qTest API token
Full Name: Your full name
Configure Proxy: If you are connecting to the internet through your corporate proxy, select Enable checkbox to enable proxy configuration
Script: If your proxy server is configured with a script, enter the URL to access your PAC (Proxy Auto-Configuration) file
Host: Enter the proxy host address. This can be either the IP address, computer name, or dns name of this proxy server. Note: If you specify both Script and Host, the Automation Host will connect to the script-based proxy server first, then connect to the proxy host if the connection to the script-based one failed.
Port: Specify the port that the proxy server is running on. This parameter is required.
Username: If your proxy server requires basic authentication, enter a username to authenticate with the proxy. Otherwise, leave this field empty.
Password: If your proxy server requires basic authentication, enter a password to authenticate with the proxy. Otherwise, leave this field empty.
Run on Start Up: Available on Automation Host 2.2.2 and later. Select this option to automatically start the Automation Host when the machine starts.
EXAMPLE
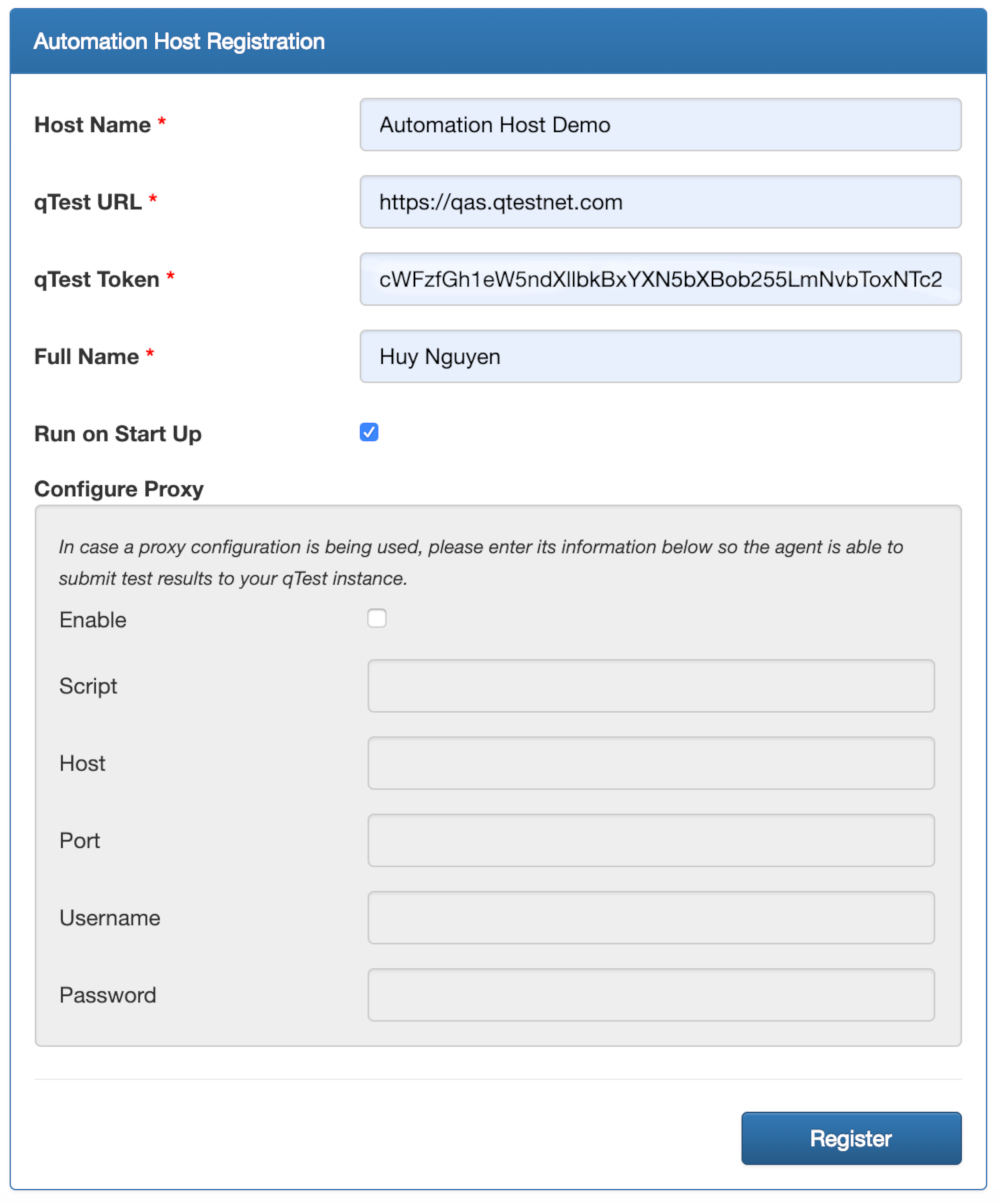
Select Register to start registering Automation Host with qTest Manager.
Install the Automation Host as Service on Linux
If you want the Automation Host to automatically start when system starts, there are two options:
-
Install Automation Host as a service OR
-
Configure it to run at system start up (highly recommended for Automation Host 2.2.2+).
Install qTestAutomation Host as a single Service on Linux
Access the agentctl directory and execute following commands:
1. If the Automation Host is running in the Terminal, press Ctrl + C to stop it.
2. Execute below command to install the Automation Host as a service:
/path/to/agentctl-[version]$ sudo ./install3. Check if the service is installed successfully with below command
/path/to/agentctl-[version]$ sudo systemctl status qTest-automation-agent Install Multiple qTestAutomation Host Instances as Services on Linux
Follow the steps below if you want to install multiple Automation Host instances as services on Linux.
-
Extract the downloaded Automation Host package to multiple directories. Make sure you create a parent directory for each Automation Host instance to easily identify it as well to avoid issues when upgrading that instance. EXAMPLE below shows how we extract each package inside a parent directory whose name is suffixed with a number
Instance #1: /usr/local/qTest-automation-host-1/agentctl-[version]
Instance #2: /usr/local/qTest-automation-host-2/agentctl-[version]
...
Instance #N: /usr/local/qTest-automation-host-N/agentctl-[version]
-
Access each directory, then perform steps 3-5 for each directory.
-
Install and Configure the Automation Host.
Make sure you give each instance a unique Port number via -Pport parameter. It is also highly recommended to give each instance a unique Automation Host name via -Phostname parameter in config or start command. -
If the Automation Host is running in Terminal, stop it with below command.
./agentctl stop
-
Execute the command below to install the host as a service: IMPORTANT: you must give the service a unique name via <service name> parameter:
/path/to/agenctl-[version]$ sudo ./install "<service name>"
Uninstall Service
If you want to uninstall the Automation Host 2.x service, open the Terminal and execute the following commands:
/path/to/agentctl-[version]$ sudo ./uninstall If you installed multiple instances of Automation Host as services on Linux. access to each Automation Host directory and execute the above ./uninstall command.