Manage Projects
qTest Manager allows you to manage your projects by creating new projects, cloning a project, editing a project, and deleting a project.
Create or Clone a New Project Video
Create a New Project
To get the most out of qTest Manager, we recommend that you create new projects. Each project can have its own set of users, fields, and integrations. By default, every qTest Manager account comes with a qConnect - Sample Project. The sample project contains requirements organized into folders, as well as Test Plans and Test Cases.
To Create a New Project, follow these steps:
-
Hover over your username located in the top right corner of the qTest Homepage.
If the Administration option does not display in the drop-down menu, you must request and be granted Site Administrator privileges to create a new project.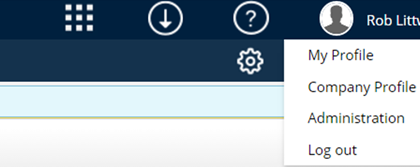
-
Select the Administration option in the drop-down menu.
-
Select the Projects tab.
-
The "Projects" page displays. Select +Add new project.
-
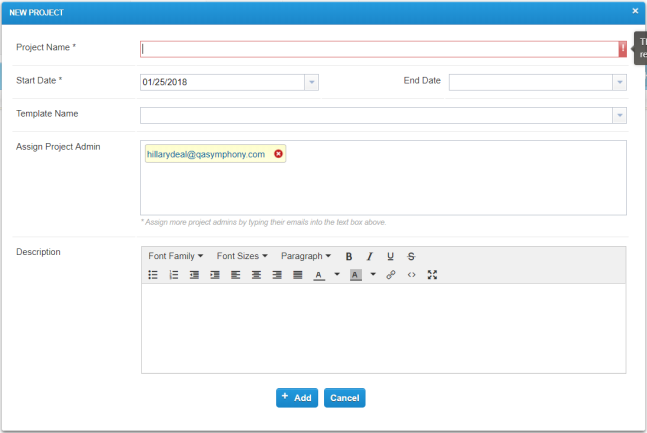
The "New Project" dialog displays. Enter the following information:
Project Name
Start Date (if different from today’s date)
End Date (Best Practice is to keep this field empty. Otherwise it will prevent you from making changes within the project after the date entered passes. ex: entering Test Cases, Requirements, etc.)
Template Name (Name of the Site Template if you wish to use the same fields from another project)
Project Admin(s) to add users and assign them Project Admin permissions to this project
Project Description
-
Select +Add.
-
A message is displayed indicating the project has been successfully created. Select OK.
-
Users that have been assigned as 'Project Admin(s)' will receive an email notification.
-
The new project is listed with a Status of ‘Active’ in the Project List area of the Site Administration - Projects page.

Clone Project
Cloning a project is used to quickly create a duplicate of an existing project.
When cloning a project, you can copy:
-
data in an existing project regarding its Test Plan, Requirements, and Test Cases
-
project settings (such as, field settings, user management)
For example, if any custom fields exist in the current project or certain email notifications based on specific trigger events, they can be copied to the cloned project.
To Clone a Project:
-
Hover over your username located in the top, right corner of the qTest Homepage.
-
Select the Administration option in the drop-down menu.
-
Select the Projects tab.
-
Select Clone From Existing Project.
-
In the New Project Details area of the Clone Project widget, enter the following:
Project Name
Start Date (if different from today’s date)
End Date (Best Practice is to keep this field empty. Otherwise it will prevent you from making changes within the project after the date entered passes. ex: entering Test Cases, Requirements, etc.)
Assign Project Admin(s)- will add users and assign them Project Admin permissions to this project
Project Description
-
In the Data Cloning Settings area of the Clone Project page, enter the following:
Select the name of the source Project you want to clone, from the list of all projects inside your account.
In the Select source project’s settings to clone area, you may select one or more radio icons.
If you check the Notification Settings radio icon, the Field Settings radio icon is automatically selected too.
If the User Management Settings radio icon is selected, the Project Admin list of source projects will be retained in the cloned project.
If the Defect Workflow Settings radio icon is selected, the Defect Workflow Settings of source projects will be retained in the cloned project.
In the Select object types and structures to clone area, you may select one or more radio icons. These options are used to clone the data and associated folder structure for the Test Plan, Test Design, and Requirements objects.
If you select Test Plan structure, all data will be cloned regarding the defined Releases and Builds scope.
If you select Test Design structure, all Test Case data and folder structure are cloned.
If you select Requirement structure, all Requirements data and folder structure are cloned.
If you select any of these object types and folder structures, Field Settings are also cloned.
The folders in Test Design will mirror the folders in Requirements.Therefore, if you select to clone only the Requirements folder structure or only the Test Design folder structure, all of the folders in both the Requirements and Test Design folder structure will be cloned. If you create a new folder in Requirements, it will automatically show up in Test Design as an empty folder and vice versa.
-
Select Clone.
-
A message displays, indicating 'The project is being processed.' Select OK.
-
An email notification is sent to the user who created the cloned project. The email indicates whether the clone was successful or not.
-
Users that have been assigned as 'Project Admin(s)' will receive an email notification.
Edit Project
Editing an existing project is available to rename a project, description or edit the Project Admin(s) assigned. Editing a project's timeline (start/end date) will affect the timelines of the corresponding objects such as Releases, Builds, Test Cycles, and Test Suites in the project.
To edit a Project, follow these steps:
-
Hover over your username located in the top right corner of the qTest Homepage.
-
Select the Administration option in the drop-down menu.
-
Select the Projects tab.
-
In the Project List, select the project name you want to edit.
-
Edit the project's information as needed.
-
Select Save.
The qConnect - Sample Project is designed for demo purposes and its original "dummy data" can be reset by any user in your account. For this reason, we highly recommend that you do NOT use this project for your testing.
Delete a Project
Deleting Projects is easy in qTest Manager. To do so, follow these steps:
-
In Administration, select the Projects tab.
-
Locate the Project that you want to delete, and select the Delete icon from the Action menu.
