qTest and Tosca Integration: Quick Start Guide
qTest's built-in integration with Tricentis Tosca allows you to combine qTest's Application Lifecycle Management (ALM) integration and release planning with Tricentis Tosca's automation capabilities.
This quick start guide describes the integration steps that you need to perform in qTest. Please note that some steps require prior action in Tricentis Tosca. For a complete overview of how to set up the qTest and Tosca integration, refer to the Tricentis Tosca manual.
Prerequisites
To integrate Tricentis Tosca and qTest, the following requirements must be met.
-
You are an Elite qTest user.
-
You need the following permissions in the qTest Project that is integrated with Tosca: Create Modules, Edit Modules, Edit Test Case Assignment, Create Test Cases, View Test Cases, Update Test Cases, Delete Test Cases, Create Test Cycles, Update Test Cycles, Delete Test Cycles, Create Test Runs, Delete Test Runs.
For information on setting permissions, refer to Edit User Permissions within a Project.
-
You use qTest version OnDemand or 10.3 OnPremise.
-
You have installed Tricentis Tosca and the Tricentis Tosca Server version 13.4 or Server version 14.1.
-
You have configured a multi-user environment in Tosca and are using Tosca Distributed Execution (DEX) without AOS.
Tosca DEX with AOS is currently not supported with the Native Integration: Tosca DEX without AOS. -
For integrations where qTest is hosted on the Tricentis Cloud, the corresponding Tosca server must be reachable on the internet and requires a public DNS.
qTest workflow
Following are the integration steps that are performed in qTest. For a full overview on integrating Tosca to qTest, refer to the Tricentis Tosca documentation.
For additional information on integrating Test Cases from qTest to Tosca, refer to Integrate from qTest to Tosca.
Configure Tosca integration settings in qTest
-
In qTest Manager, click the Gear icon
 . Then select Automation Settings.
The Automation Settings screen appears.
-
In the Automation Settings section, click the Activation status button to toggle the activation on.
-
In the mapping table, map the following Tosca statuses to qTest: Passed, Failed, Error, and Canceled. Mapping these statuses allows test results from Tosca to be successfully submitted to qTest.
-
In the Tosca Integration section, click the Activation status button to toggle the activation on.
-
In the Project URL field, enter the Tosca workspace URL.
The Tosca workspace URL can be found using the {Workspace} GET method, as indicated in the following image. The {WORKSPACE} value is the name of the qTest integration workspace that you set up in Tosca. For more information about the qTest integration workspace set up in Tosca, refer to the Tricentis Tosca documentation.

-
In the Username field, enter the username used for the workspace.
-
In the Password field, enter the password used for the workspace.
-
In the Tosca Workspace Timeout field, select the number of minutes after which qTest should fail pending integration tasks from qTest to your integrated Tosca workspace.
-
In the Monitoring Service URL field, enter the Monitor Service URL.
For information on locating the Monitor Service URL, refer to Locate the Monitor Service URL.
Verify that the Project URL and the Monitor Service URL are both accessible from qTest Manager and qTest Launch. The Monitor Service URL must also be accessible from your internet browser to access the URL from a job. -
Click Try Connection.
The connection may take a few seconds to one minute to establish, depending on your network. Please note that the Tosca workspace you are integrating with qTest and the REST API cannot be open at the same time when trying to establish a connection. If the connection attempt results in a 500 error, verify that the Tosca workspace is closed. -
Click Save.
A message confirming that Tosca integration has been turned on appears.
-
Click Refresh to refresh your browser and apply the changes.
Launch your tests in qTest
For information about launching tests in qTest, refer to Schedule Test Execution for Tosca TestEvent from qTest.
Known Limitation: The Tosca workspace must be closed before tests can be executed from qTest.
View the results
You can view test results in either qTest or in Tosca.
For information on viewing results in qTest, refer to View your Tosca Execution Results in qTest.
For information on viewing results in Tosca, refer to the Tricentis Tosca documentation.
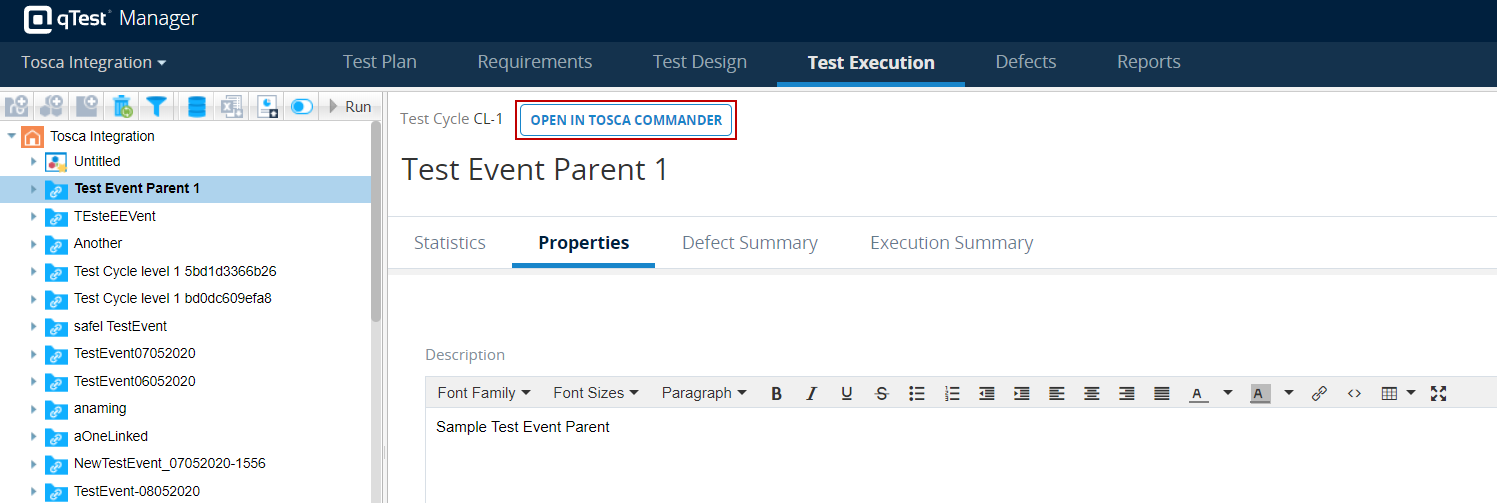
Access linked Tosca objects in Tosca
You can access linked Tosca objects directly from qTest. To view a linked object in Tosca, click Open in Tosca Commander on the object screen.