Install and Register the Automation Host
This article walks you through how to install Automation Host prior to 1.3.8. If you are installing Automation Host 1.3.8 or later, refer to qTest Automation Host Installation and Upgrade Guide Master List.
Download the Automation Host onto the location machine where the automation scripts are deployed. and run it on the machine so that it is registered in qTest Manager as an Automation Host.
-
Download Automation Host
Navigate to Download qTest Automation Host page and download the appropriate version that is compatible with your qTest Manager version then proceed to the next step.
-
Install the Automation Host
Install on Windows
PREREQUISITE: Java version 1.7+ should be installed on your machine and JAVA_HOME environment variable has been configured before proceeding.
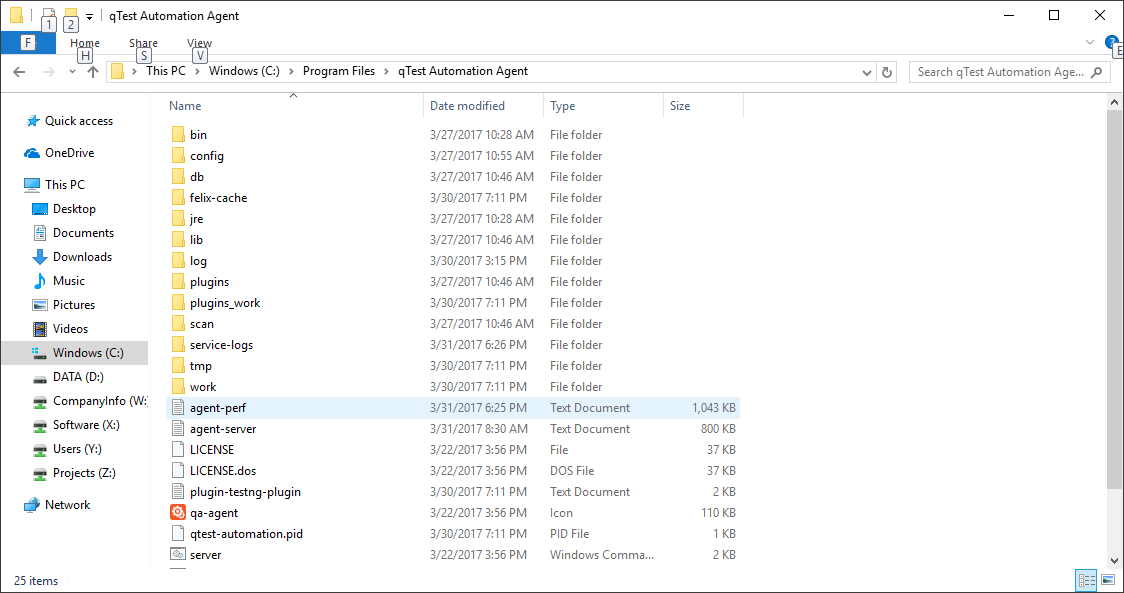
- After the zip file (qTest-automation-x.x.x.zip) has been downloaded, extract it.

By default, the tool will use domain localhost and port 6789 when it is running. However, you can change the default values:
Create an environment variable named AGENT_SERVER_HOST and specify your desired domain name or this machine's IP address. If you are using a domain name, you will need to map the machine's IP Address with the domain name. Eg: AGENT_SERVER_HOST: 192.168.76.1
Create an environment variable named AGENT_SERVER_PORT and specify your desired port number. Eg: AGENT_SERVER_PORT: 6789
-
If you want to use other Java version than the one specified in JAVA_HOME, you can create variable named QA_AGENT_JAVA_HOME and specify your desired Java home directory. Eg: C:\Program Files\Java\jdk1.7.0_25
-
Open a command console and change the current path to the extracted Automation Host tool directory.
- Execute the following command to install the tool.
service install
- After the service has been installed, run the below command to start it.
service start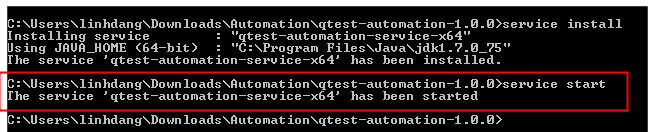
-
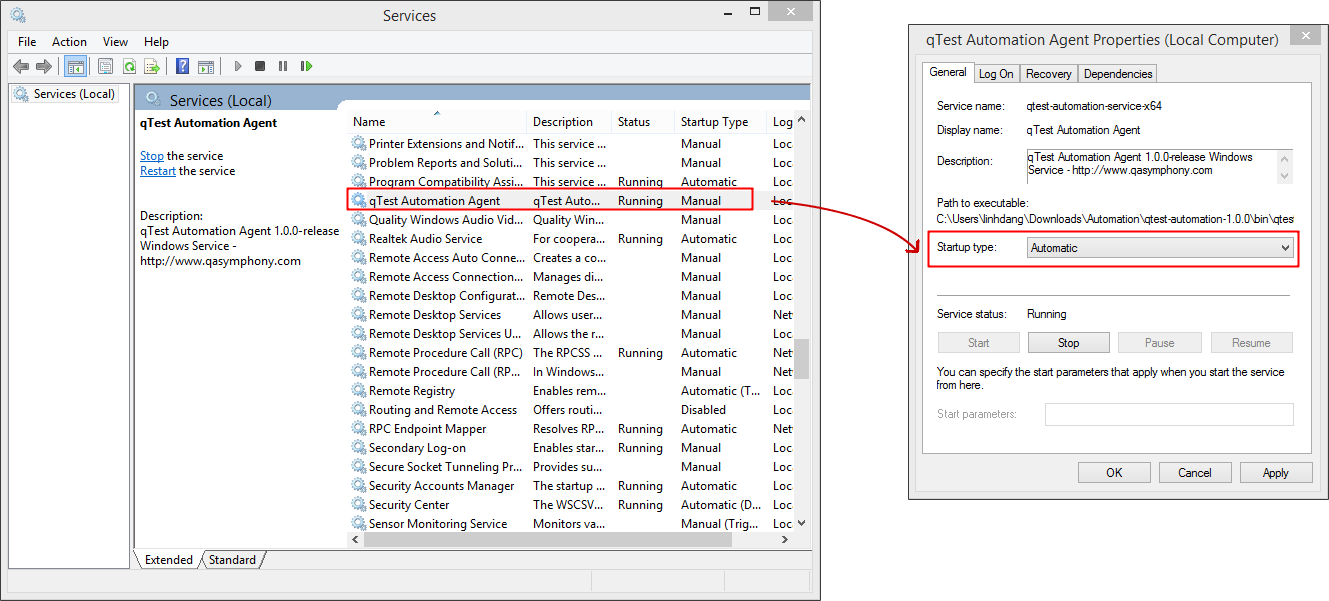
Check the services which were installed on your local server and search for qTest Automation Agent. Right click on the qTest Automation Agent service, select Properties and change its Startup Type to Automatic.
- Open your browser and access to the URL with the domain and port as you specified above (eg: localhost:6789).
- Proceed to Register the Automation Host
Install on Linux
PREREQUISITES:
-
Java version 1.7+ has been installed on your machine and JAVA_HOME environment variable has been configured before you run the tool.
-
You will need to switch to root user before executing the below steps.
INSTALLATION:
-
After the zip file (qTest-automation-x.x.x.zip) has been downloaded, extract it
# unzip qTest-automation-x.x.x.zip -
Access to the extracted directory
# cd qTest-automation-x.x.x -
By default, after you install the service, it will use domain localhost and port 6789 when it is running. However, you can change the default values. Open file default.agent-server under the extracted directory and modify the following keys:
AGENT_SERVER_HOST: modify the hostname
AGENT_SERVER_PORT: modify the port number
-
Run the following command to install and start the service:
# ./start-server.sh -
New group qas and new user qas have been created during the installation. You will need to associate group qas with your automation script directories using chgrp so test results can be reported to qTest Manager, for example:
# chgrp -R qas [automation_directory] -
Open your browser and access to the URL with the domain and port as you specified above (eg: localhost:6789)
-
Known limitation: you will need to keep the shell running in the console or the service will be shut down
-
Proceed to Register the Automation Host
Install on MacOS
PREREQUISITES:
-
Java version 1.7+ has been installed on your machine and JAVA_HOME environment variable has been configured before proceeding
INSTALLATION:
-
Open the Terminal
-
After the zip file (qTest-automation-x.x.x.zip) has been downloaded, extract it
$ unzip qTest-automation-x.x.x.zip -
Access to the extracted directory
$ cd qTest-automation-x.x.x -
By default, after you install the service, it will use domain localhost and port 6789 when it is running. However, you can change the default values. Open file default.agent-server under the extracted directory and modify the following keys:
AGENT_SERVER_HOST: modify the hostname
AGENT_SERVER_PORT: modify the port number
-
Run the following command to install and start the service:
# ./start-server.sh -
Open your browser and access to the URL with the domain and port as you specified above (eg: localhost:6789)
-
Known limitation: you will need to keep the shell running in the terminal or the service will be shut down
-
Proceed to Register the Automation Host
Register the Automation Host
-
When you open the Automation Host for the very first time, you will need to register it with your qTest account. Input the following information into the Automation Host Registration window:

Host Name: the displayed name of this host in your qTest application. For now, you will not be able to modify this field after registering.
qTest URL: the URL to access to your qTest application.
Full Name: the displayed name of your qTest account.
qTest username and Password: the credentials to login to your qTest application. Make sure that this user has the permissions within the project to Create Test Cases and Execute Test Runs permissions
If a proxy server is being used, click on Configure Proxy and then enter its info so the agent is able to submit test results to your qTest instance
Enable: select it in case a proxy is used
Host (required): host name or IP address of the proxy server
Port (required): port number of the proxy server
Username and Password: you can specify the domain before your username
-
Click on Register button to register the host with your qTest account.
-
On the next screen, you can see the status indicates that the Automation Host has been registered successfully.
-
From this screen, you can also modify the Polling frequency to select how often your automation agents will poll qTest for new automation schedules. Click on Save button to save the host's configurations.
Once the Automation Host is registered, make sure to install framework plugins. Check out this article for next steps: Install Automation Agent 1.x