Automation Host Docker Setup Instructions
In this article, we will walk you through how to set up the Automation Host in a Docker environment on an Ubuntu machine.
Setup the Automation Host
1. Create a Dockerfile at /path/to/agentctl/Dockerfile, enter content as below:
FROM ubuntu:16.04 RUN apt-get update &&apt-get install -y git curl wget && rm -rf /var/lib/apt/lists/*
ENV AGENT_VERSION $TheAgentHostVersion
ENV PACKAGE_NAME agentctl-${AGENT_VERSION}-linux-x64-full.tgz
#ENV PACKAGE_URL https://s3.amazonaws.com/qTest-storage/qTest-automation/${AGENT_VERSION}/$PACKAGE_NAME
ENV PACKAGE_URL https://qasymphony.jfrog.io/qasymphony/Launch-release-local/automation-hosts/agentctl/${AGENT_VERSION}/agentctl-${AGENT_VERSION}-linux-x64-full.tgz ENV AGENT_HOME /usr/local ENV FOLDER_NAME agentctl-${AGENT_VERSION}
ENV PORT 6789

WORKDIR $AGENT_HOME

RUN set -x \
  && wget --no-check-certificate "$PACKAGE_URL" \
  && tar xvzf $PACKAGE_NAME -C $AGENT_HOME \
  && rm $PACKAGE_NAME \
  && mv agentctl-${AGENT_VERSION} agentctl

# install a junit sample
COPY ./junit-sample ${AGENT_HOME}/junit-sample/

# configure host
RUN ./agentctl/agentctl config -Phost=0.0.0.0 -Pport=${PORT}

EXPOSE $PORT

COPY ./entrypoint.sh /entrypoint.sh
RUN chmod u+wrx /entrypoint.sh
ENTRYPOINT ["/entrypoint.sh"]
Note:
-
$TheAgentHostVersion: replace this value with the Automation Host version you want to install, e.g. 2.0.5
-
This example install junit sample code to demo junit for java plugin, you can download junit-sample to working folder (~/agent) and follow guide to Build the sample in this repository: https://github.com/QASymphony/junit-sample
# install a junit sample
COPY ./junit-sample ${AGENT_HOME}/junit-sample
2. Create a file called entrypoint.sh and make it executable
Open entrypoint.sh in your chosen text editor and enter content as below:
#!/usr/bin/env bash
./agentctl/agentctl start
3. Build the image:
Docker Build -t agent:new .

Once the Docker Build command is successful, you'll see the output as below:
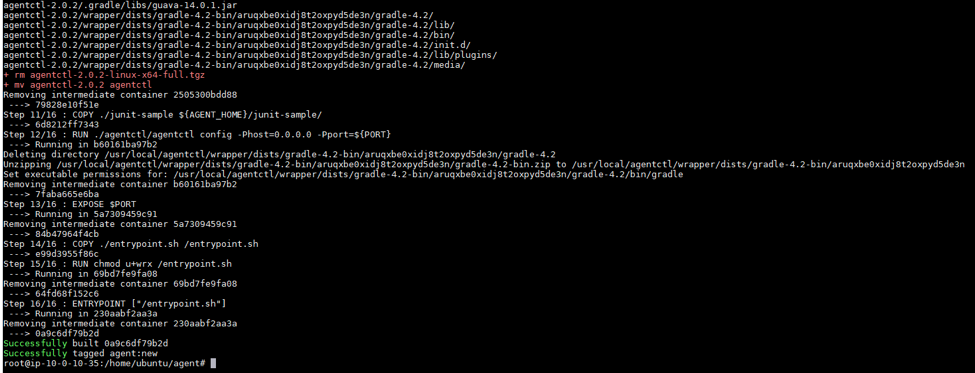
4. Run the container with the desired port:
$ Docker run -d -p 8080:6789 agent:new

When this command finished, wait for a couple of minutes for the Automation Host to be fully started.
Register the Automation Host with qTest Manager
-
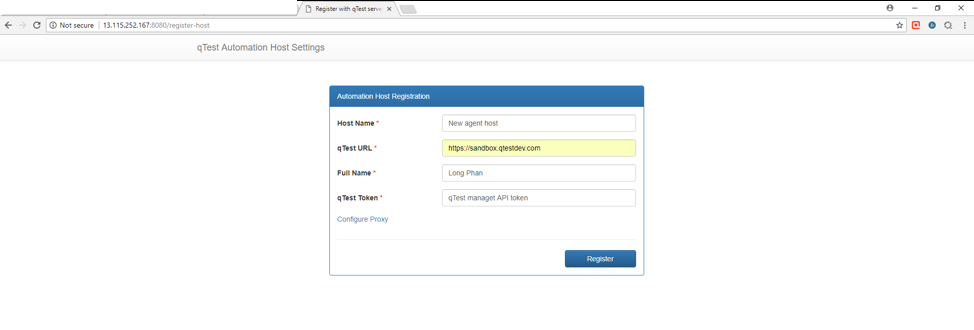
Open web browser and access to the host via this url: http://[host-ip-address]:8080. You will be presented with a UI like below.
-
On the host UI, enter the following to register the Automation Host with qTest Manager:Host
Name: name of the automation host
qTest URL: URL of you qTest Manager instance
Full Name: your full name
qTest Token: the API token for the host to access to qTest Manager. Refer to Acquire your qTest API Token to get the API token. Note: If your environment is behind a proxy, select the Configure Proxy link and provide proxy configuration.
-
Select Register.
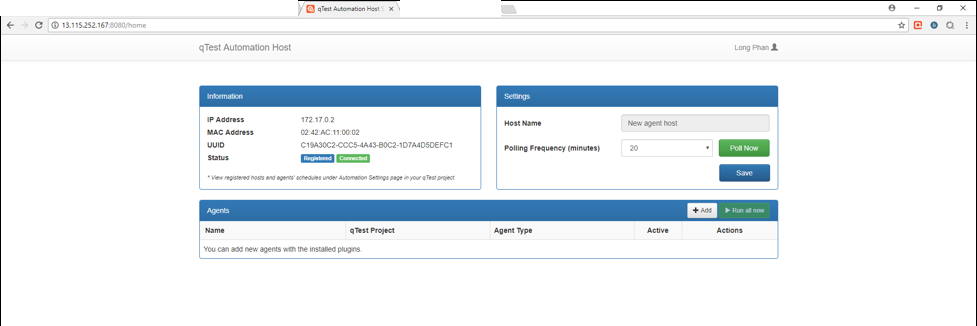
When the registration is successful, you'll be presented with the Automation Host home page.
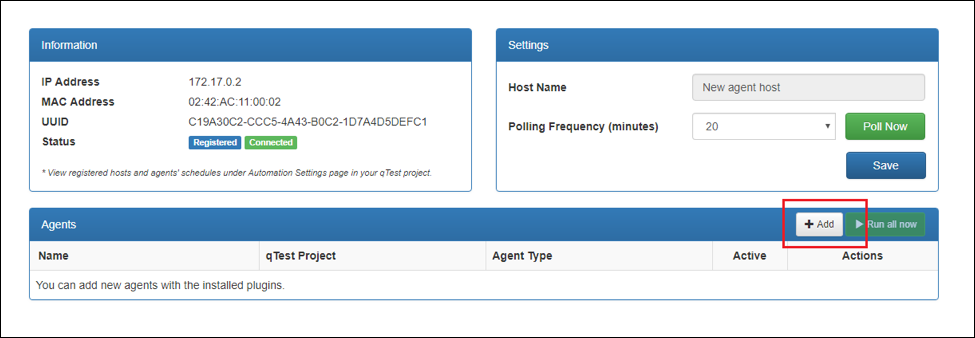
Create JUnit sample agent
-
Select Add.
-
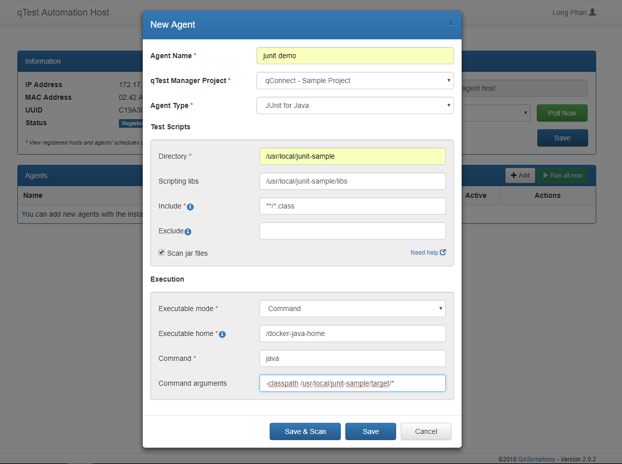
On the New Agent dialog, enter the information for the new agent:
General Information
Agent Name: Name of the new egent, e.g. junit demo
qTest Manager Project: select a project that this Agent is associated with, e.g. qConnect Sample Project
Agent Type: JUnit for Java
Test Scripts
Directory: specify the path to your JUnit source code that you have downloaded. In this example, it's /usr/local/junit-sample
Scripting libs (optional): /usr/local/junit-sample/libs
Include (required): **/*.class
Exclude: leave this field empty
Execution
Execution Mode: Command
Executable home: /docker-java-home
Command: java
Command arguments: -cp “/usr/local/junit-sample/target/*”
-
Refer to the Legacy Automation Agent User Guides for more detail on how to create various type of agents to your automation host.
-
Select Save & Scan. The Automation Host will create your agent and scan for test cases. When the scanning complete, you'll be presented with the Automation Test Case Mapping Wizard dialog as below screenshot.
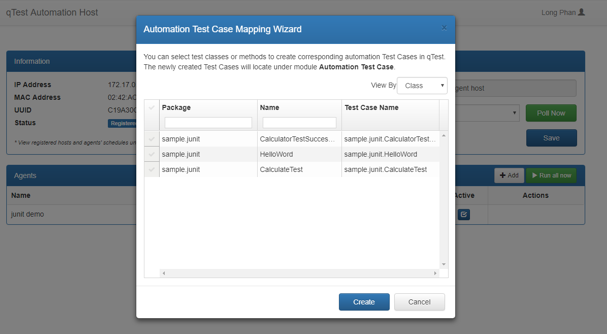
-
Select test cases then click Create to create test cases in qTest Manager.