Single Sign-On (SSO) Integration with Ping Federate
qTest Manager offers an integration with Ping Federate SSO. In this article, we are going to walk through how to set up this integration.
Important Announcement for new SSO Integrations
qTest Manager SSO Service Provider (SP) uses an x509 certificate to sign authentication requests and decrypt SAML assertions. As part of qTest Manager's security process, we update our SP certificate every 3 years in August. The current certificate expires September 9, 2019.
If you are using:
-
any version of qTest OnPremise that is 9.7.1 or earlier
-
and setting up an SSO integration for the very first time
You must update the SSL certificate in each Manager server before configuring your IdP.
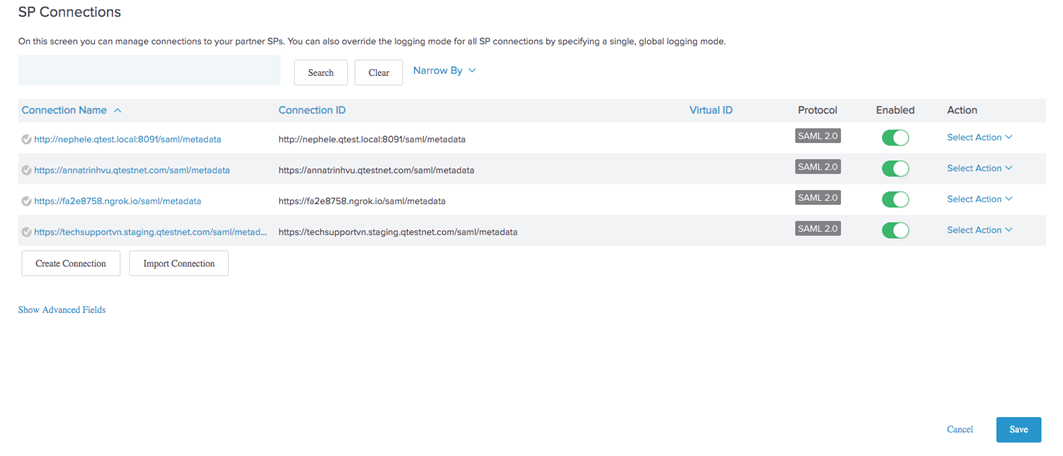
Create a New Connection
Before configuring your integration, you will need to create a brand new connection from within Ping Federate. To do so, follow these steps:
-
Access your Ping Federate instance.
-
Choose the Identity Provider tab from the left-hand menu.
-
On the "Identity Provider" page, select the Create New icon.
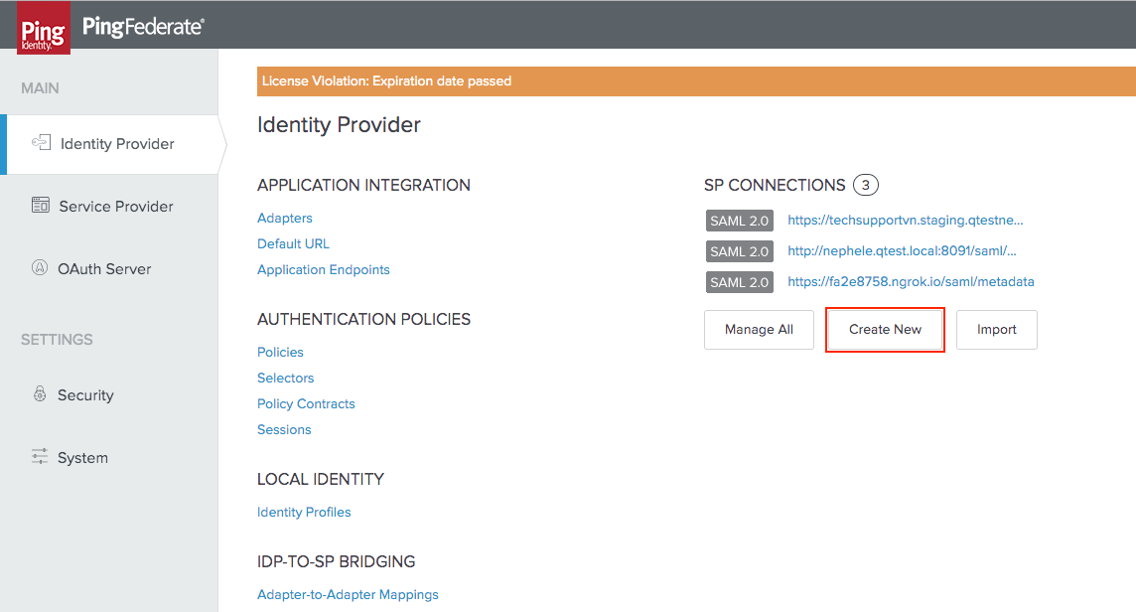
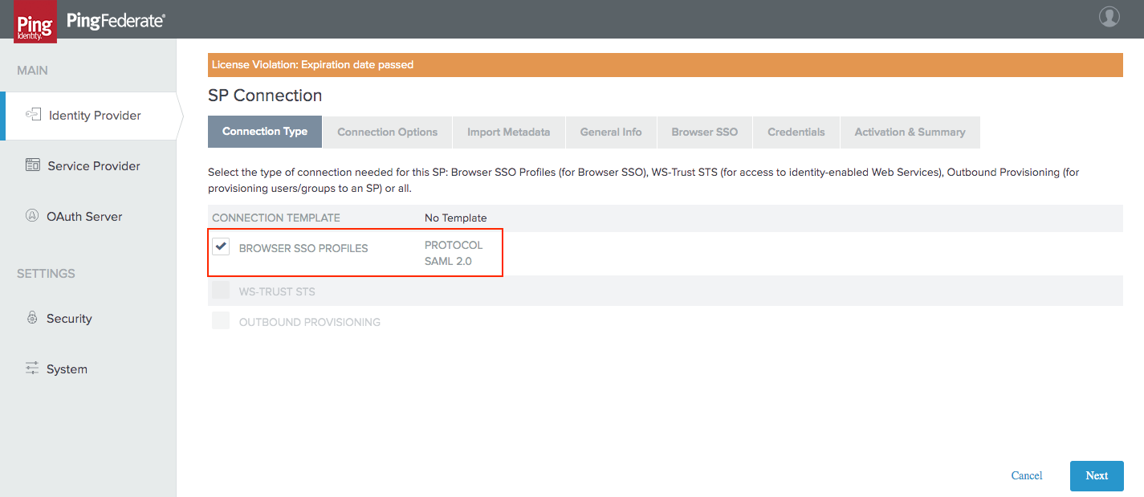
You are then brought to the Connection Configuration UI. Follow these steps to properly configure and create your new connection:
-
For Connection Type and Connection Options, retain the default settings.
-
Within the Import Metadata tab, select URL for the "METADATA" option.
-
Select Manage Partner Data URLs.
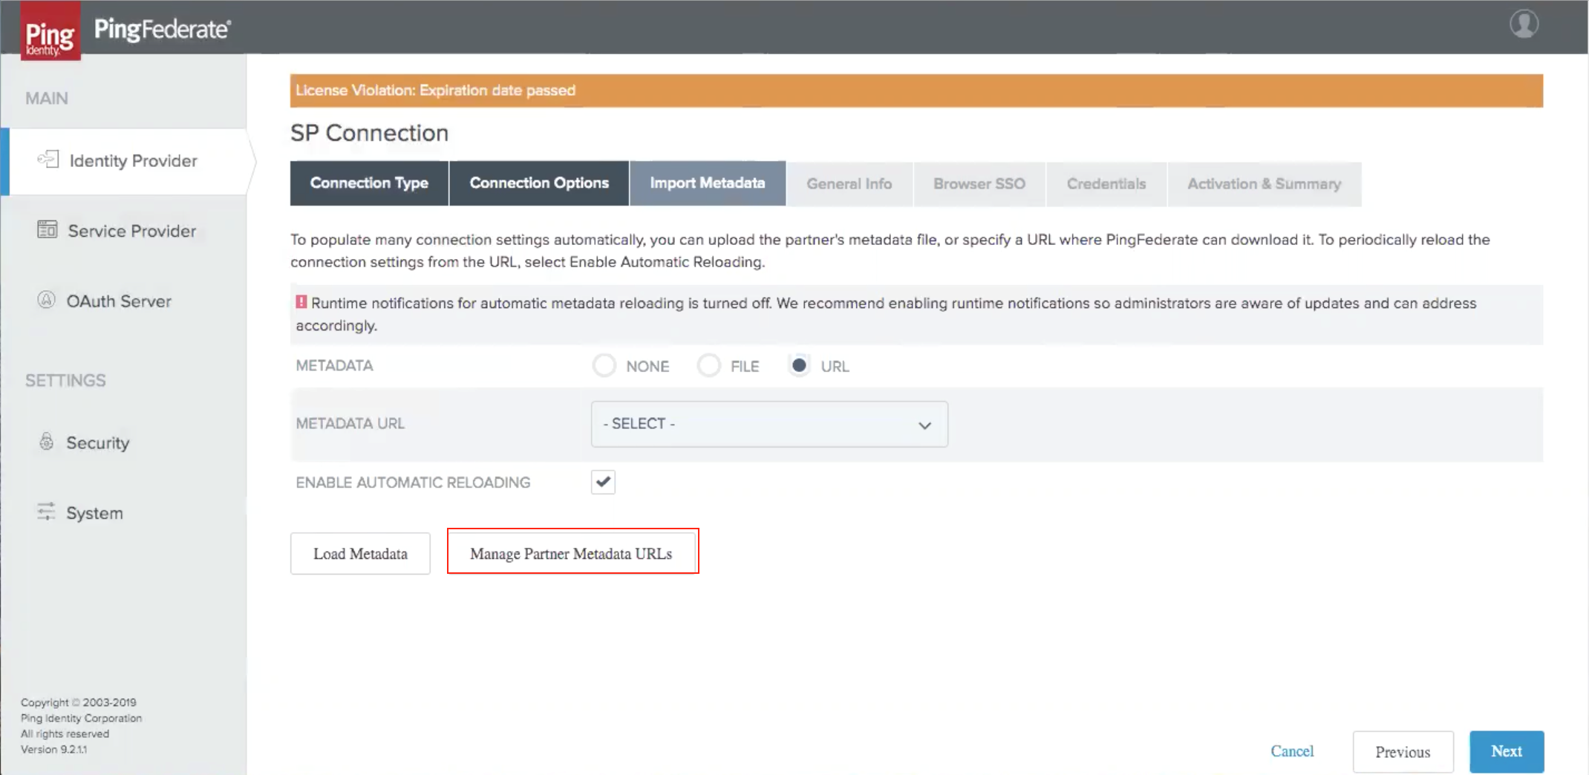
You will then be brought to the "SP Connection / Partner Metadata" page to manage your Partner Data URLs.
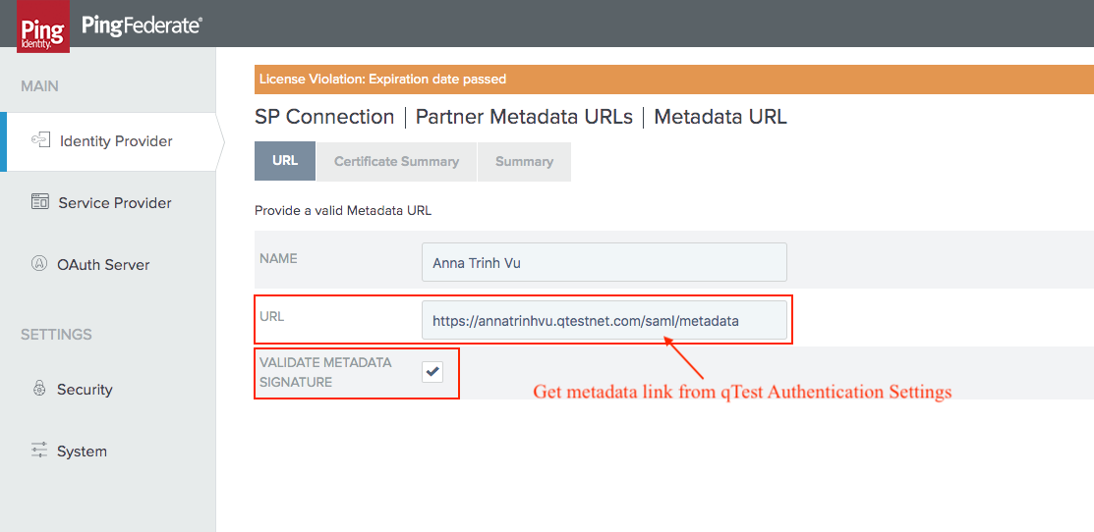
Manage your Partner Data URLs
-
Select the Add New URL icon.

-
Within the URL tab, do the following:
-
enter your qTest Metadata link in the URL field.
-
select the Validate Metadata Signature.
-
-
Keep the "Certificate Summary" section as is. Select Next.
-
Verify your Summary and select Done.
-
You are brought back to the SP Connection page. Here, in the Import Metadata tab, select the metadata file name that you have already defined.
-
Select the Load Metadata icon.
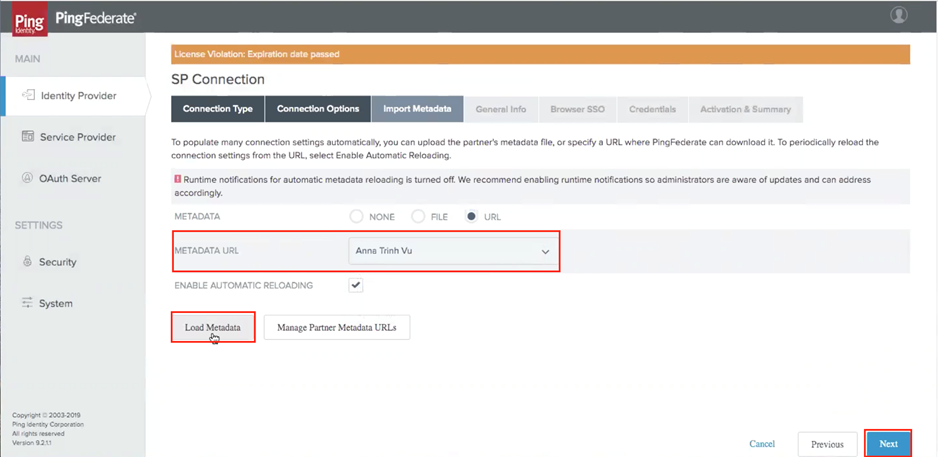
-
Review your Metadata information, and select FULL as your Logging Mode.
-
Select Next.
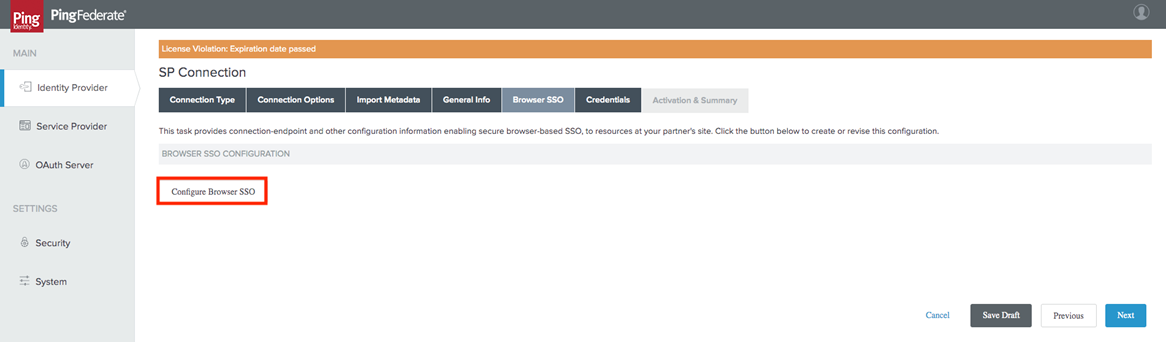
Configure Your Browser SSO
You are then brought to the Browser SSO tab. Follow the steps below to configure your Browser SSO:
-
Select the Configure Browser SSO icon.
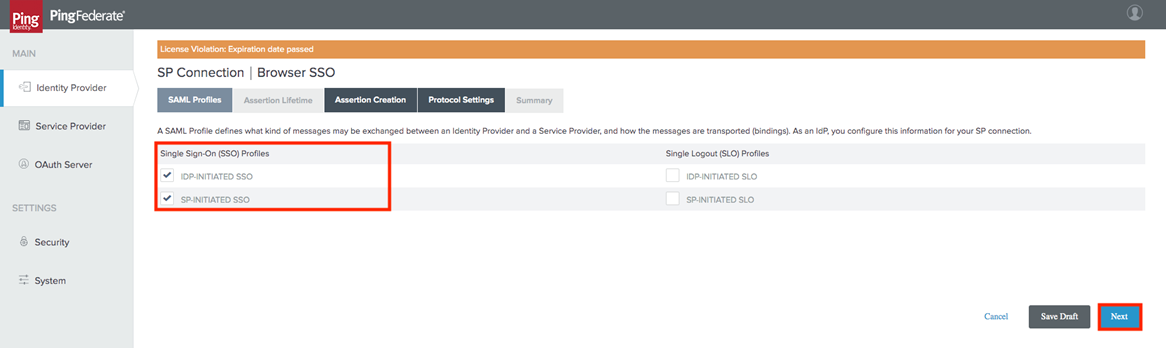
-
In the Assertion Lifetime tab, select the check-boxes associated with both IDP- and SP-Initiated SSO. Select Next.
-
Define your assertion lifetime as according to your internal policies. Select Next.
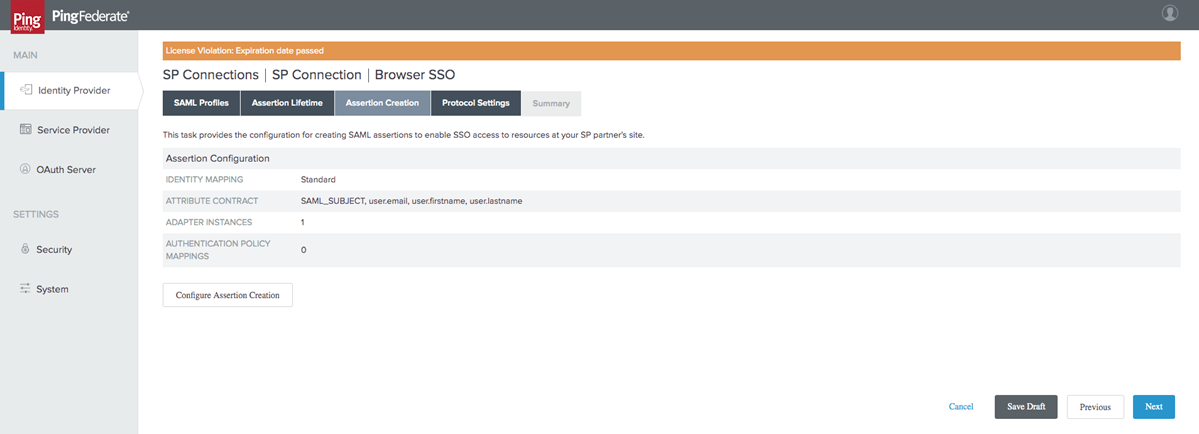
-
In the Assertion Creation tab, select the Configure Assertion Creation icon.
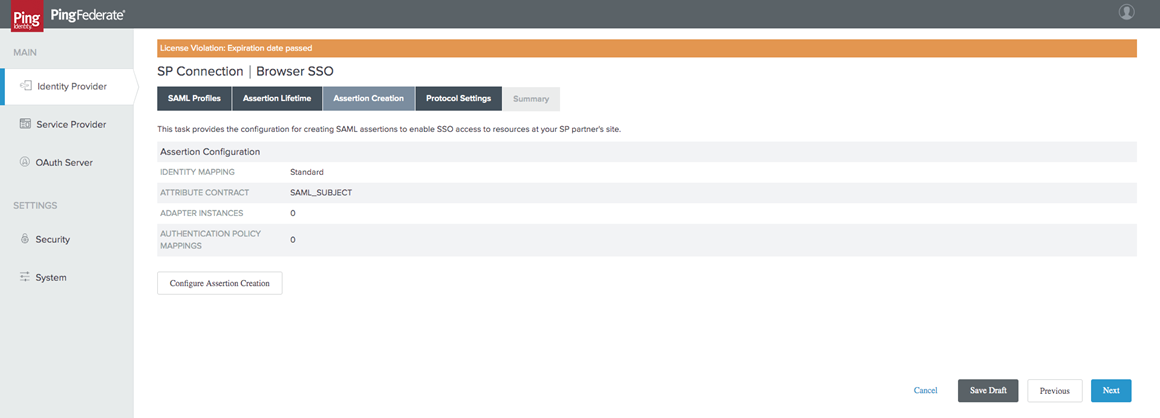
-
On the "Assertion Creation" page, select the Standard Option.
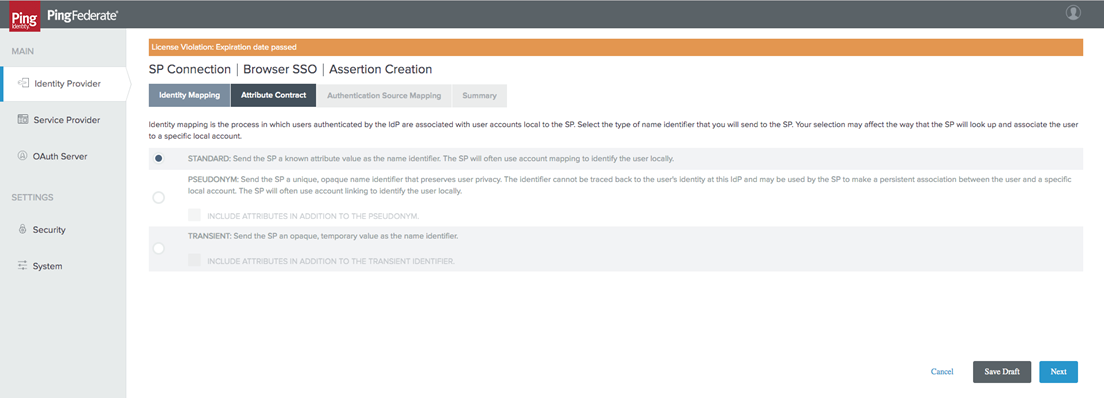
-
Add attributes as defined below:
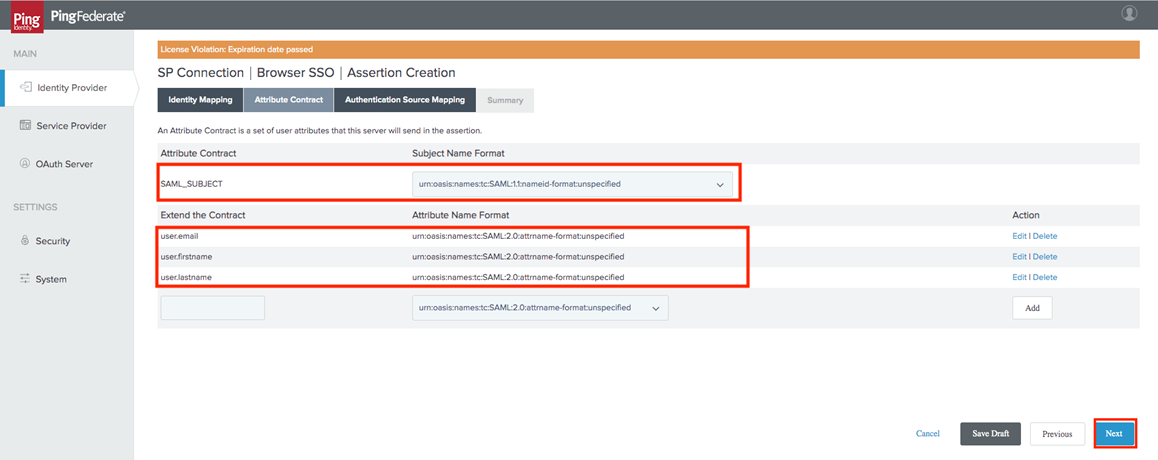
-
Select Next.
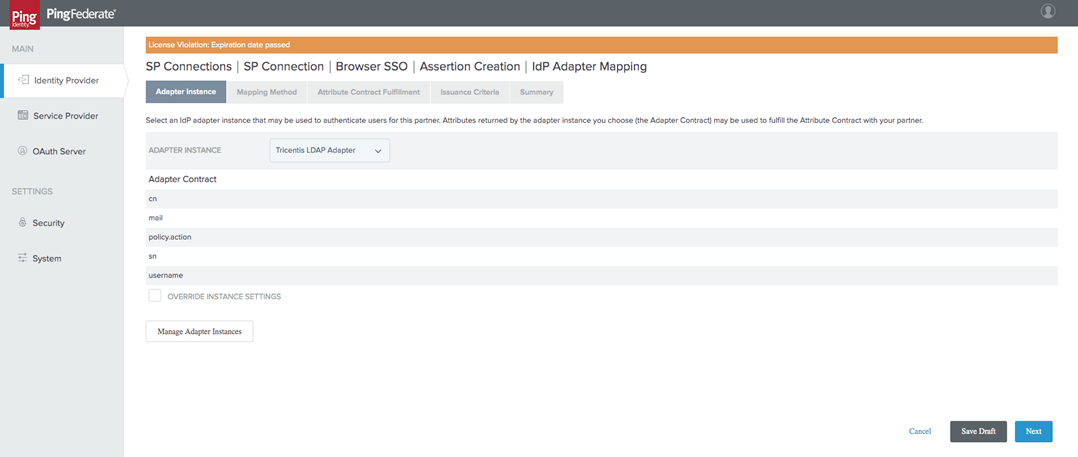
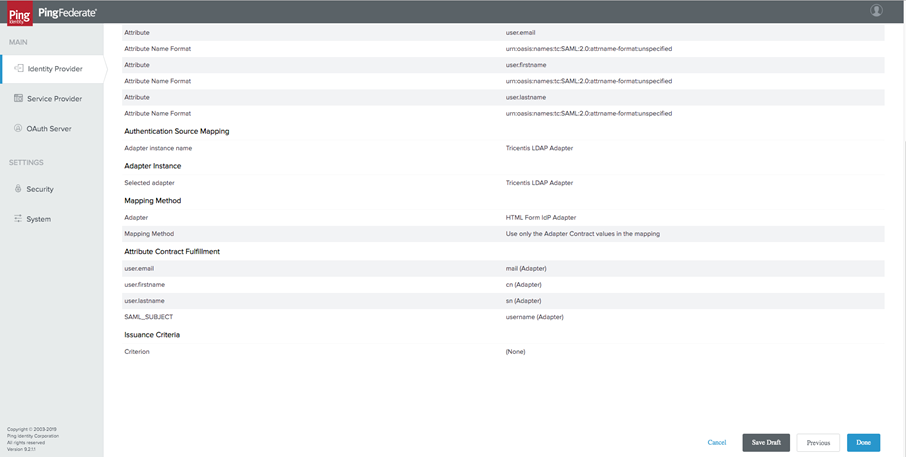
You will then need to Map your Adapter instance. To do so, follow the steps below:
-
In the Authentication Source Mapping tab, select the Map New Adapter Instance icon.
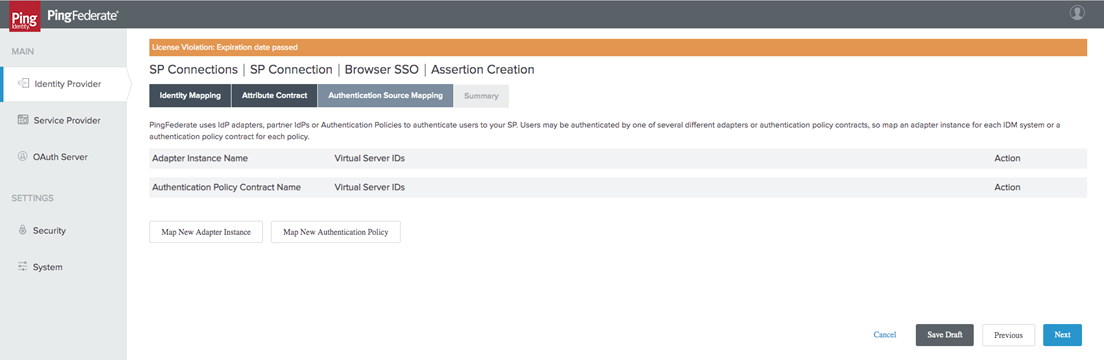
-
Choose a defined Adapter instance with your LDAP. Select Next.
-
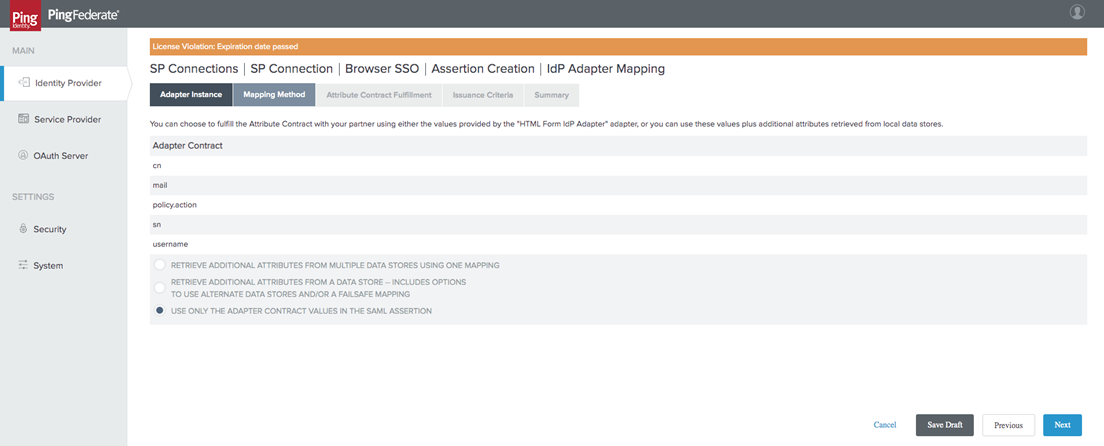
In the Mapping Method tab, choose the Use Only the Adapter Contract values in the SAML Assertion option.
-
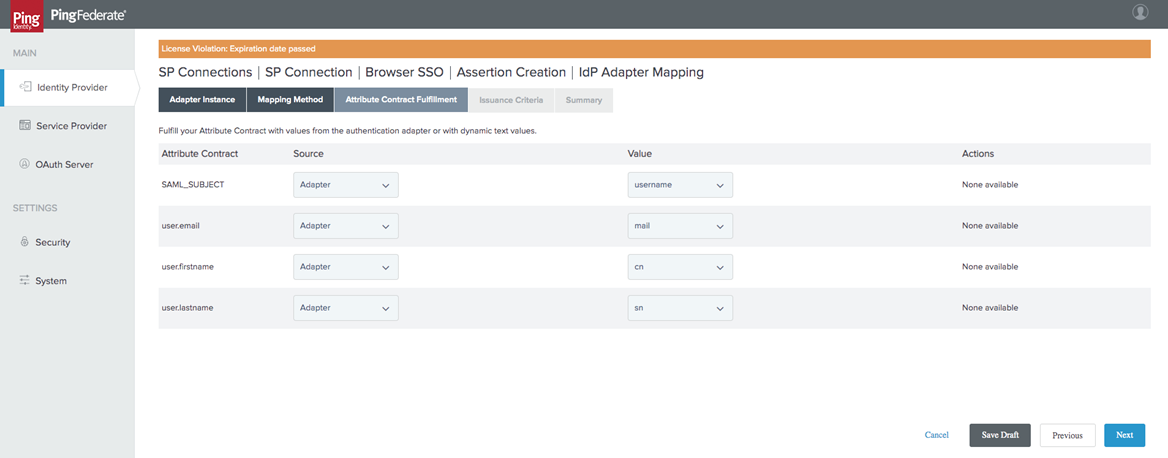
Within the Attribute Contract Fulfillment tab, define your attributes as follows:
-
Skip the Issuance Criteria by selecting Next.
-
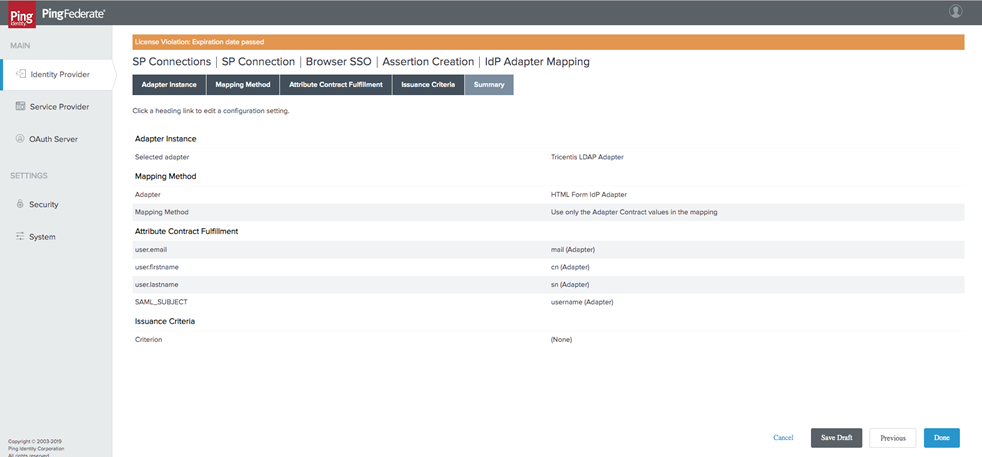
Review your IdP Adapter Mapping. Select Done.
-
You are brought back to the Activation Source Mapping tab. Here, select Next to review your summary.
-
After reviewing your summary, select Done.
-
Review your Assertion Creation and select Next.
Configure Protocol Settings
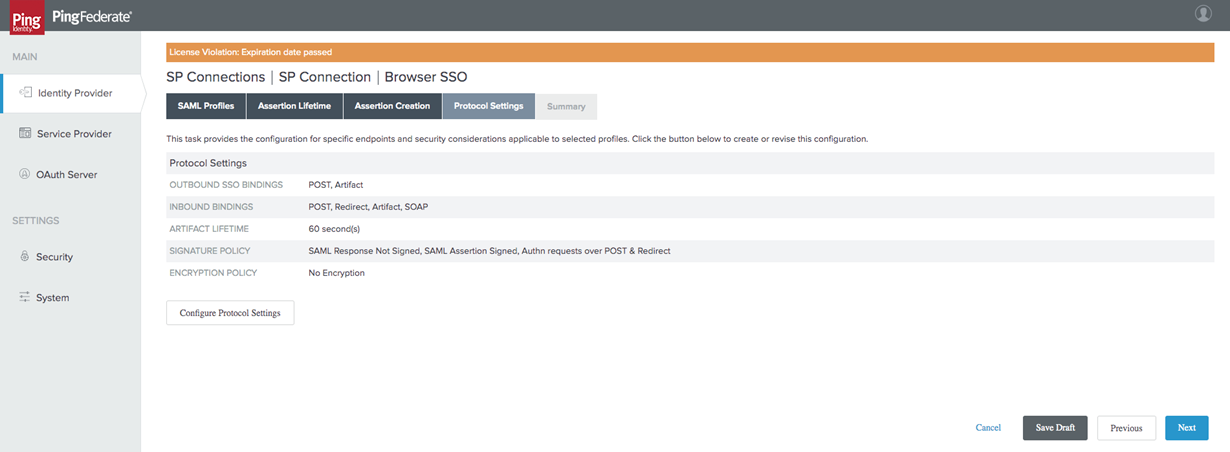
You will then have to configure your Protocol Settings. Follow these steps:
-
Review your Protocol Settings. Select Next.
-
Select Next again.
-
Define your Remote Party URL as the following:
/SAML2/ARL/Artifact

-
In the Signature Policy tab, choose Sign Response as Required. Select Next.

-
For the Encryption Policy, select None.

-
Review your Protocol Settings Summary and select Done when finished.
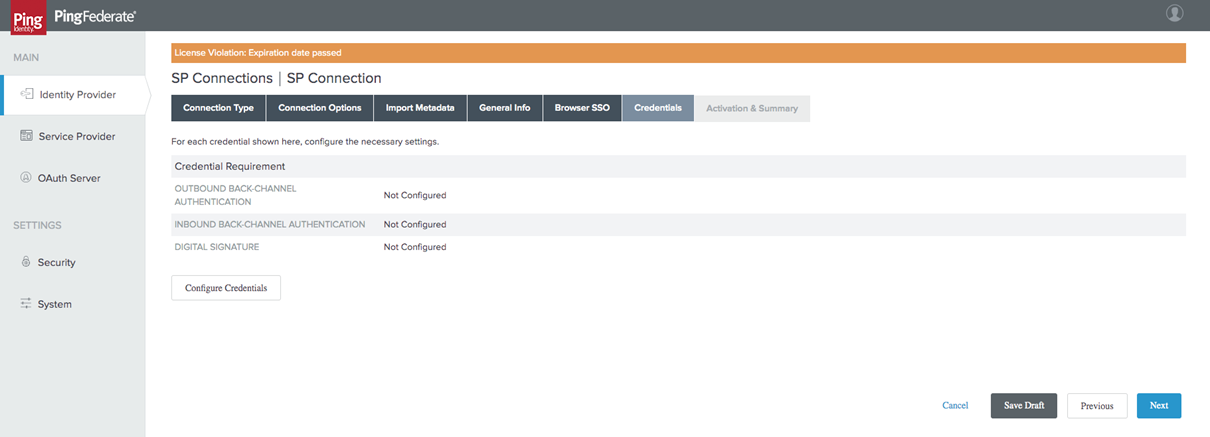
Define your Credentials
Next, you will need to define your Credentials. Follow the steps as outlined below:
-
In the Credentials tab, choose the Configure Credentials icon.
-
Configure both options for Back-Channel Authentication.
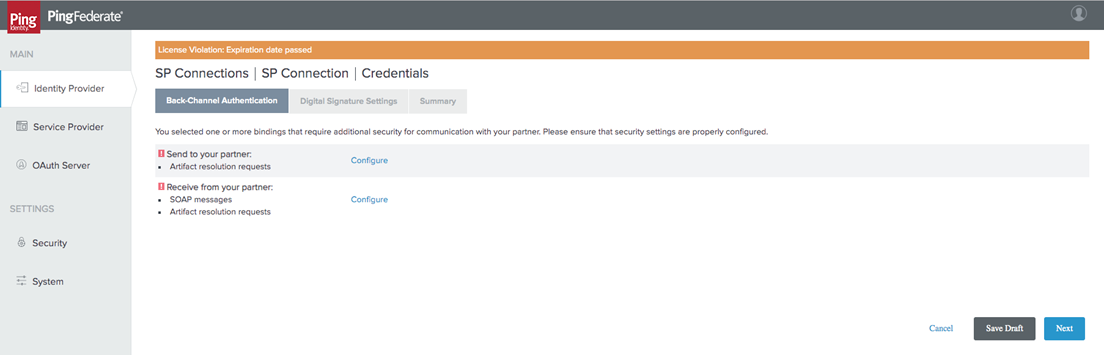
-
Select Digital Signature for both Outbound and Inbound SOAP.
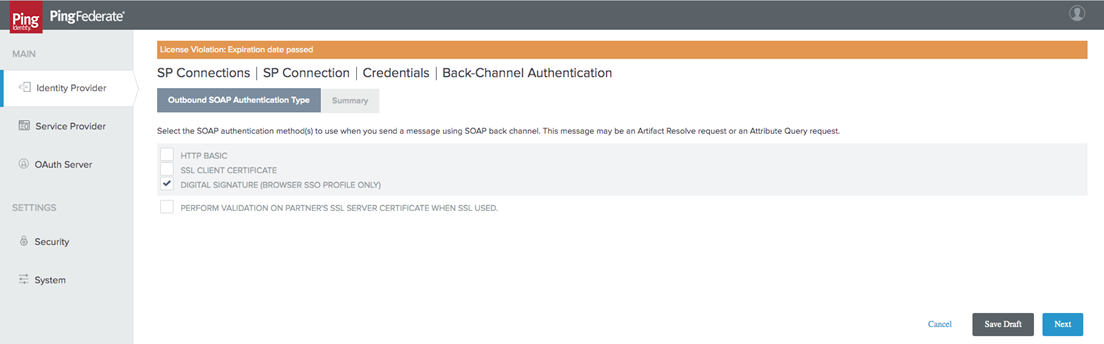
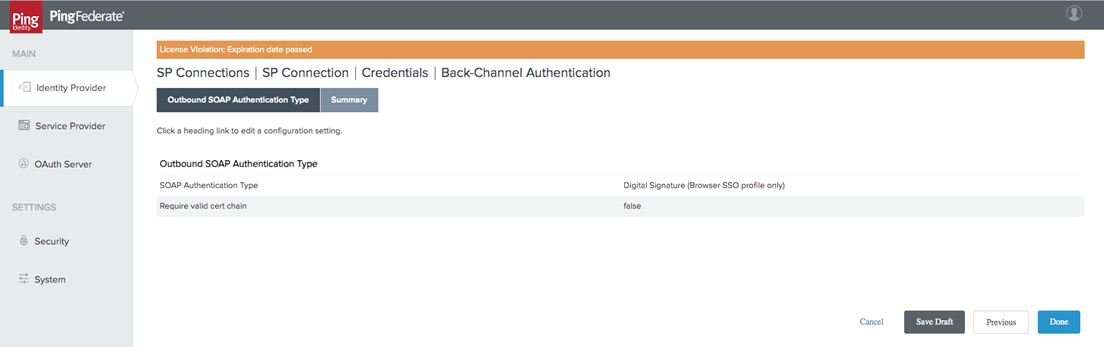
-
Select Next.
-
In the Digital Signature Settings tab, choose the following for your Signing Certificate and Signing Algorithm:

-
In the Signature Verification Settings tab, select Manage Signature Verification Settings.
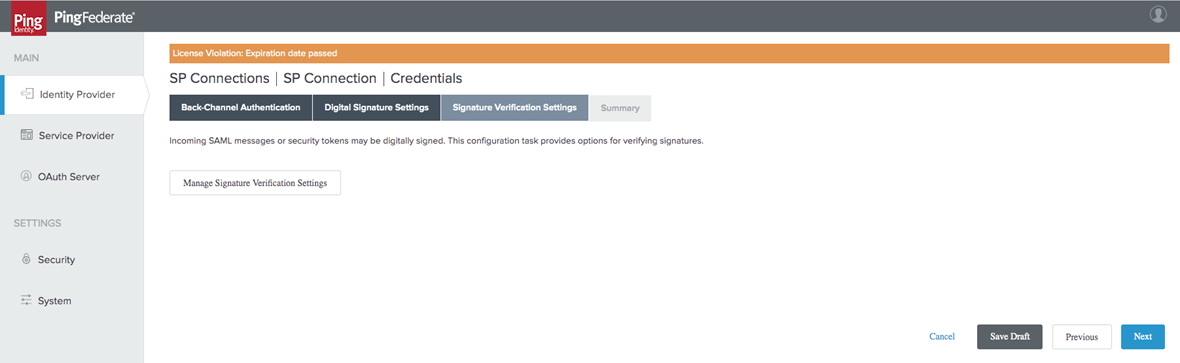
-
Select the Unanchored option for your Certificate.
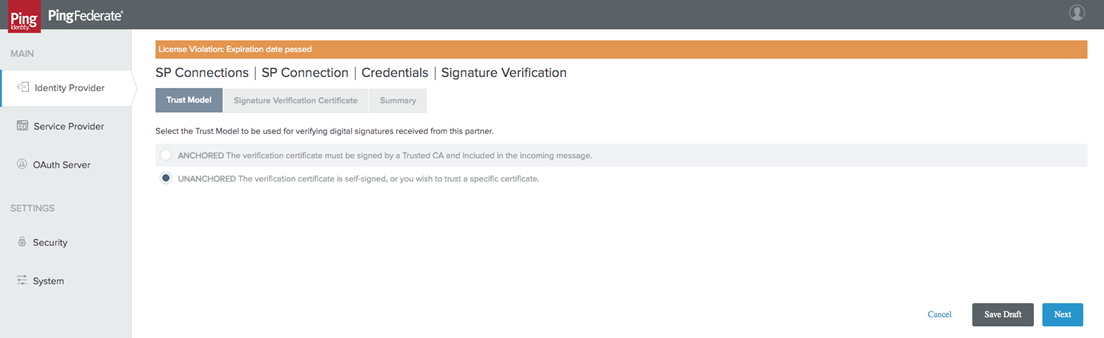
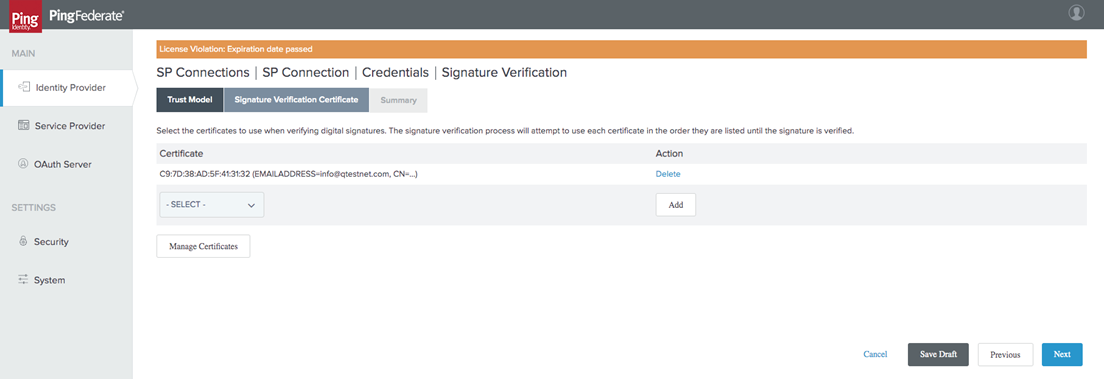
-
Review your Signature Verification and select Done.
-
Then, enable and save the newly created SP Connection.
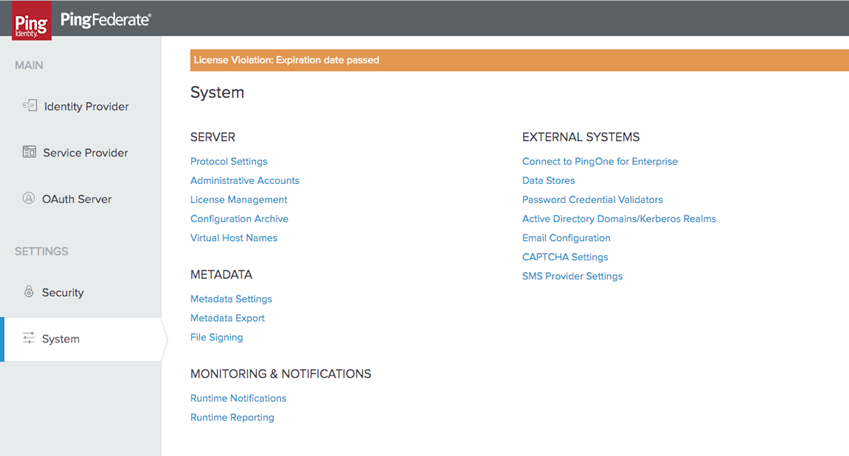
Metadata Export
Now that you have configured your integration, you can export your Metadata to qTest. To do so, follow the steps as outlined below:
-
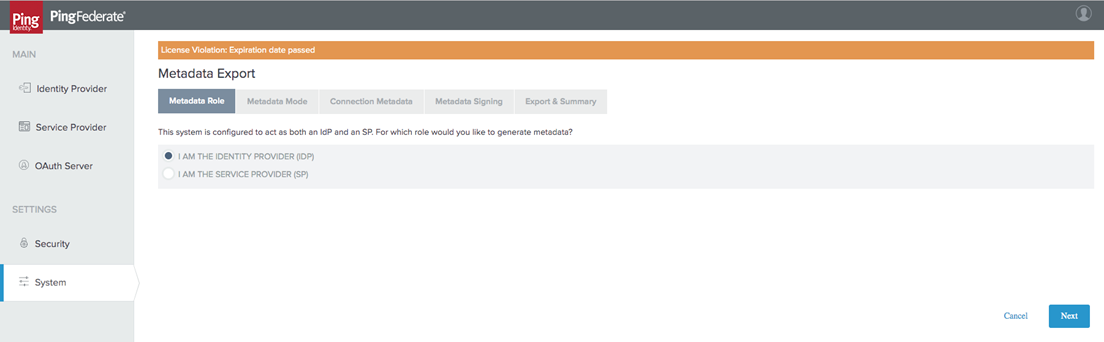
Access your System Settings and choose Metadata Export.
-
Within the Metadata Role tab, select I am the IDP. Select Next.
-
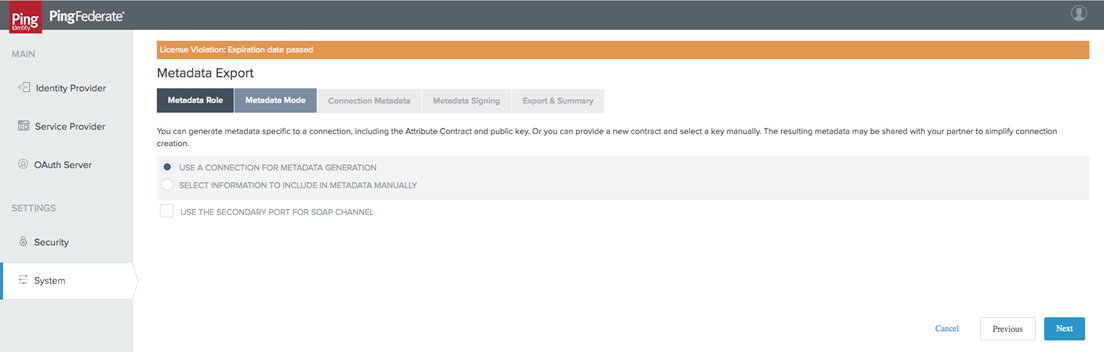
Select Use a connection for Metadata Generation. Select Next.
-
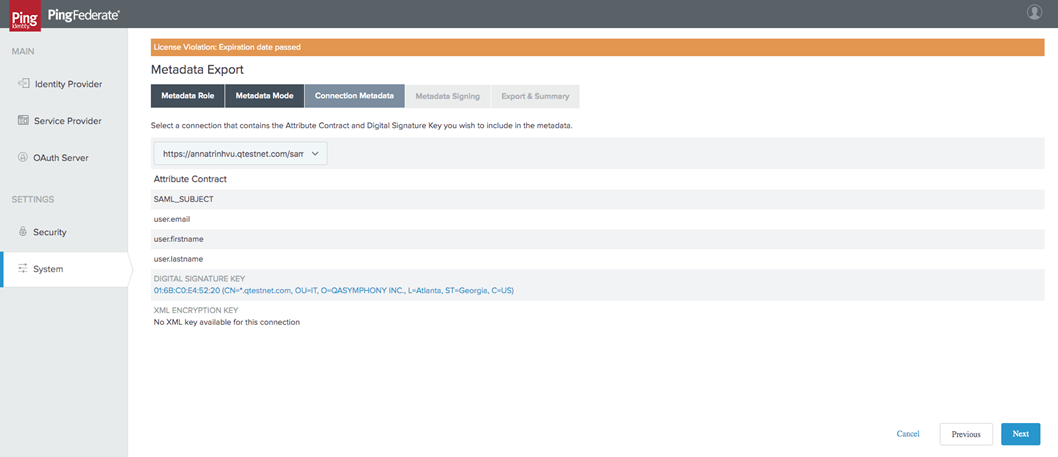
In the Connection Metadata tab, Select the SP connection you create with qTest. Select Next.
-
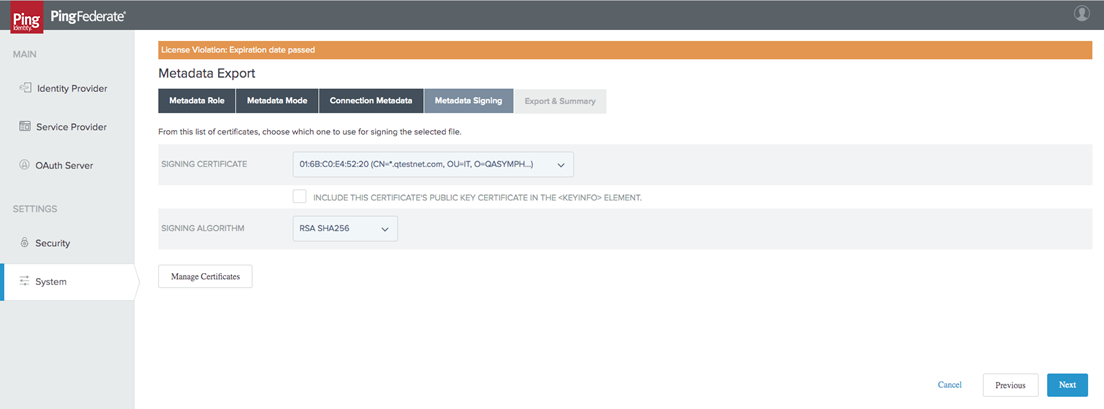
Select Signing Certificate. Select Next.
-
Review and Export Metadata file from Ping.

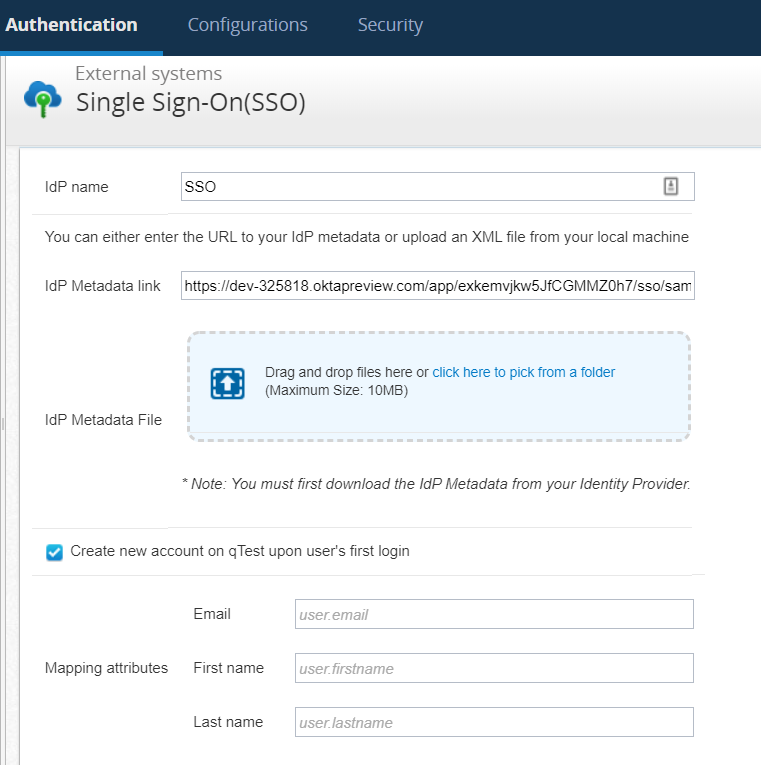
Add Metadata to qTest
Once you have downloaded your Ping Metadata, you will need to upload that file to qTest. To do so, follow these steps:
-
in qTest Manager, select Administration from your username drop-down menu.
-
Select the Authentication tab.
-
In the left-hand nav menu, SSO.
-
In the Configuration section, upload your Ping Metadata file.
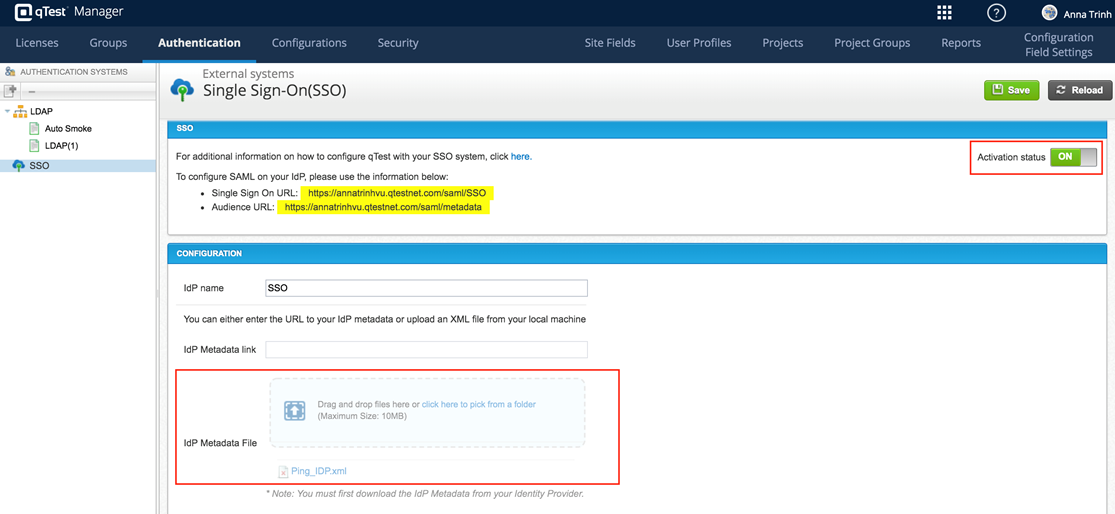
-
Toggle the Activation Status to ON.
-
Save and Refresh your page.
You have now successfully configured your integration between qTest and Ping Federate.
Optional Configuration Option
Define Custom Mapping Attributes for SSO Integration
Site Admins have the ability to define custom mapping attributes for your SSO Integration. The attribute values are prepopulated by default, with the values below:
-
user.email
-
user.firstname
-
user.lastname
If you choose to change a default attribute value, to a custom mapping, qTest will use the new values to retrieve data from SAML responses.