Import and Use Requirements from JIRA
qTest Manager allows you to manage both standalone Requirements as well as Requirements from JIRA. Importing Requirements from JIRA allows testers to use up-to-date information from JIRA issues, such as stories and epics (or even custom issue types), to create Test Cases for coverage.
The Requirement Integration feature allows you to import Requirements from JIRA and map them to the Requirement artifact in qTest Manager.
Prerequisites
Before importing Requirements from JIRA, make sure to complete the setup instructions provided in the following articles:
Required Permissions
-
qTest Manager Project Administrator permissions to access the project’s Integration Settings.
-
The JIRA username in the connection must have the ‘Create Issue’ permission in the JIRA project. For more information, refer to the JIRA article Manage Project Permissions.
How to Get Here
-
Within the qTest Project that you are configuring your JIRA integration, select the Gear icon.
-
Select Integration Settings from the drop-down and the Configure Integrations page loads.
-
In the External Systems panel on the left, select JIRA.
-
Locate your JIRA connection in the Connections List section and in the Action column, select the wrench icon to configure.
Activate the JIRA Requirement Integration
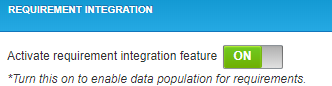
On the 'Configure Connection' page, locate the Requirement Integration section, and set the toggle button to ON to activate the Requirement Integration feature. By default, the toggle button is OFF.
Configure the JIRA Requirement Integration
-
Once the Requirement Integration feature is activated, you must select the Add Requirement Type icon.

-
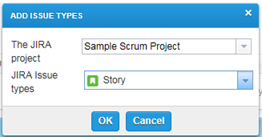
The Add Issue Types modal displays.
Select the down-arrow to the right of The JIRA project field to expand the drop-down list. Select the applicable JIRA project from which you will import Requirements to qTest Manager.
Select the down-arrow to the right of the JIRA Issues types field to expand the drop-down list. Select the issue type you use to represent Requirements in the JIRA project selected above (e.g., story, feature, epic, task, work item). This procedure will retrieve that object type, so it is imported into qTest Manager as Requirements.
 The purpose of this step is to identify the issue type from the JIRA project and import that object type into qTest Manager as Requirements.
-
Select OK to save, and a line item is now visible in the Requirement Integration area of the Configure Connection page. Details include:
the name of the JIRA Project you selected
the associated JIRA issue type (object) you selected
Edit Data Retrieval
Now, you need to edit how qTest is going to retrieve your JIRA data.
-
Position the cursor into the ACTION column of the new line that indicates the JIRA Project and JIRA Issue Types for which you want to edit the data retrieval. Three icons are displayed but select the middle icon, the wrench.

-
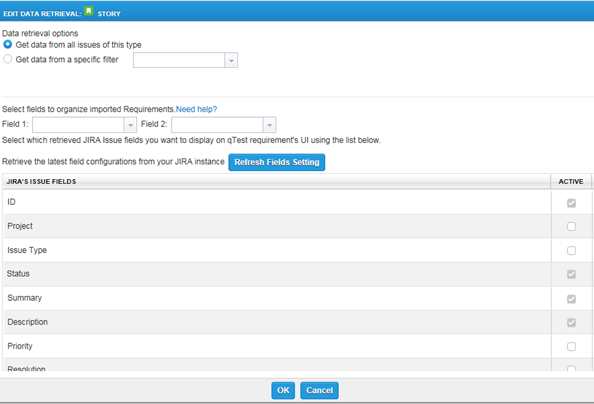
The Edit Data Retrieval screen loads and you can configure three things, (more information is provided in the sections below.)
Import all issues of that issue type, or based on a JIRA filter.
Establish how Requirements from JIRA will be organized, based on one or two JIRA fields.
Select the JIRA fields you wish to display in qTest Manager.
Data Retrieval Options
-
Choose the Get data from all issues of this type option to import all data for the Issue Type selected above.
OR
-
Choose the Get data from a specific filter option to import a subset of data, for the Issue Type selected above, by using a filter you previously created in the JIRA project.
The filter must be a favorite of the username entered above on the Add JIRA Connection page. qTest Manager will not allow you to import Requirements using a favorite filter created by another user. To use this option, select the arrow to the right of this option icon and select the desired filter from the drop-down list. If the JIRA username does not "favorite" a filter, it will not show up in this drop-down list. See Add a filter as a favorite in JIRA.
Organize into Folder Structure
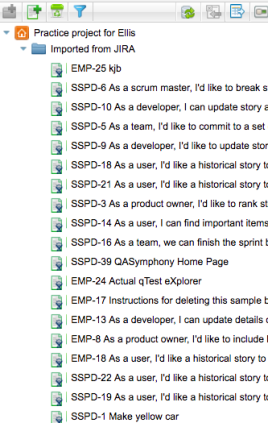
By default, the Requirements from JIRA are imported into one 'Imported from JIRA' folder in qTest Manager, resulting in a flat structure, as seen in the screenshot below.
We do not recommend using this default structure for Requirements:
Therefore, you can organize your imported Requirements, using up to two JIRA Issue fields, which results in a nested folder structure below the standard 'Imported from JIRA' folder.
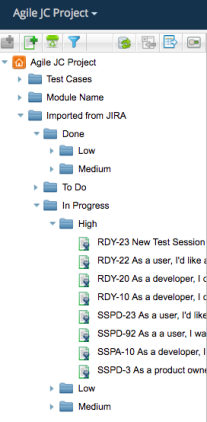
The screenshot below shows a two-level structure of JIRA Requirements, meaning that your JIRA Issue fields have been selected for organizing your Requirements. We strongly recommend using this structure for Requirements.
To organize your Requirement folders, do the following:
-
In the Select fields to organize imported Requirements section, select the arrow to the right of Field 1 and choose the desired JIRA Issue field in the drop-down list, such as Product.
-
Select the arrow to the right of Field 2 and choose the desired JIRA Issue field in the drop-down list, such as Status.
The steps above enable you to create a 2-level folder structure to help organize your imported Requirements according to the two JIRA Issue fields selected here.
Take Note
-
If you select only one JIRA Issue field to organize your Requirements folders, then you will have a one-level folder structure under the default Imported from JIRA folder.
-
If you select a JIRA Issue field for folder organization, that can have more than one assigned value in JIRA (multi-selection), then the folder name that is created will include:
all values assigned to the Requirement of the selected JIRA Issue field
and the values will be separated by a dash ' - '
Example:
selected JIRA Issue field = 'Component'
'Component' values assigned to this JIRA Requirement= Database and API
Folder name= Database-API
In the following example, the ‘Status’ option has been selected in Field 1, and the ‘Priority’ option selected in Field 2.

Select JIRA Fields to Display on Requirements
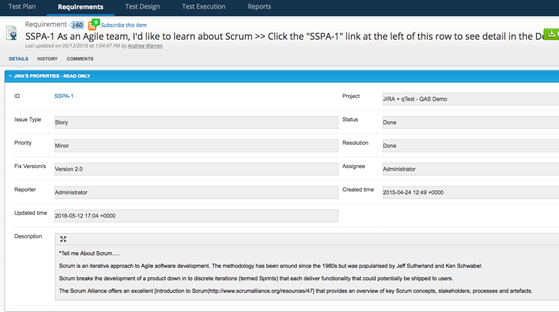
The JIRA fields you select here will be accessible to testers for informational purposes. They display in the JIRA Properties-Read Only section of the Requirement page in qTest.
The following image shows multiple JIRA fields displayed. We highly recommend using this approach:
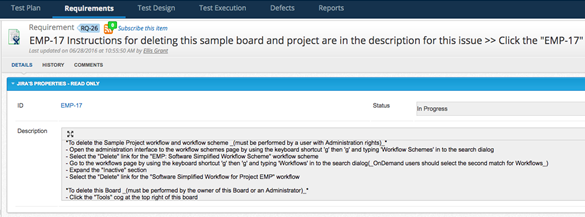
This image shows the bare minimum of JIRA fields displayed. We do not recommend using this approach:
To select the JIRA fields to display on your Requirements, do the following:
-
In the JIRA ISSUE FIELDS section, select any additional data from JIRA you want to import to qTest Manager, such as the Fix Version and Priority.
-
To select a field, including custom fields created in JIRA, select the ACTIVE check-box for the item. While not required, we recommend checking all the checkboxes to import all of this data into qTest Manager.
For each qTest Manager Project, you can customize the JIRA fields to show in the Requirements page of qTest Manager. The fields you use in one project may differ from the fields used in another project.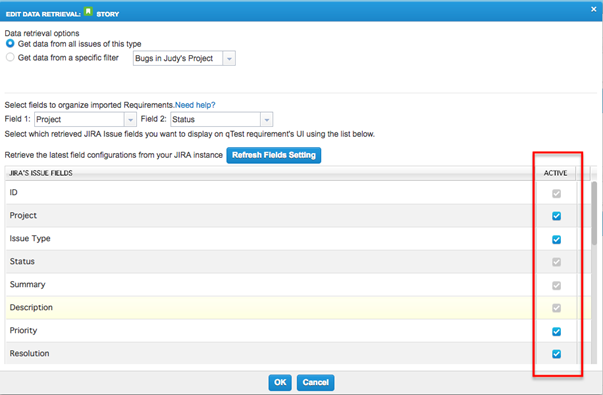
-
Select OK and the Edit Data Retrieval modal closes.
Save and Activate the JIRA Requirement Integration
-
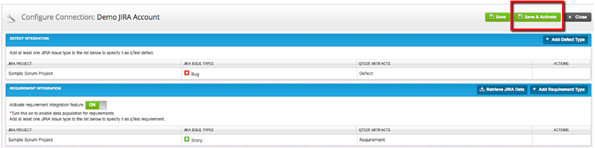
Once the Edit Data Retrieval modal closes, you MUST select the Save & Activate icon (which is located at the top right) on the Configure Connection: Demo JIRA Account page.
-
The CONFIRMATION pop-up window displays.

-
Select Refresh and the Configure Integration: JIRA page displays. The Configure Connection page is redisplayed.
-
Select Retrieve JIRA Data. This is a manual process to kick off the integration connection to initially pull your data.

-
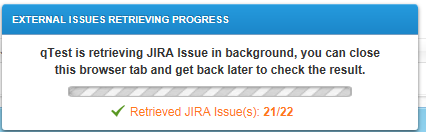
The EXTERNAL ISSUES RETRIEVING PROGRESS pop-up window displays. A progress bar is visible in the window.
-
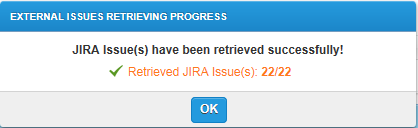
When qTest Manager has imported all JIRA Requirements, the following message is displayed.
-
Select OK. The Requirements which were created in JIRA will be accessible to testers in read-only form in qTest Manager.
Review JIRA Requirements After Import
-
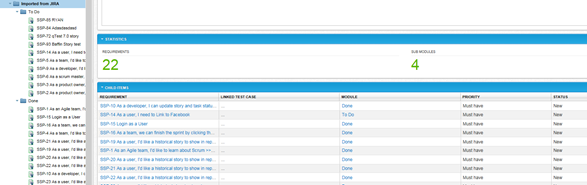
Select the Requirements module from the header and select the Imported from JIRA folder located in the left panel. The Requirements imported from JIRA are listed within this default folder. Each of these objects represents an object in JIRA. Imported JIRA issues are represented by with the Atlassian symbol
 to differ from internal qTest Requirements.
-
If you selected two JIRA fields to organize the Requirements (in Integration Settings), you should see two levels of subfolders underneath the default Imported from JIRA folder. For example, if the two fields are Project and Status, the first level of subfolders is by JIRA Project, and the next level of folders underneath those is by Status. If a Requirement changes from the "In Progress" Status to the "Done" status, the requirement will automatically reorganize itself from the In Progress folder to the Done folder. These changes will reflect in qTest Manager in real time.
-
Imported JIRA issues are updated in real-time, however, if you have the Requirement page open when a change is made on the issue in JIRA, you may need to reload the Requirement page to view the update. An imported JIRA issue has two Properties sections - JIRA's Properties and qTest's Properties.
JIRA Properties contain Active JIRA issue fields configured on the Edit Data Retrieval screen. These Properties are Read-only. Currently, JIRA Properties' fields cannot be used for searching or querying in qTest Manager.
qTest Properties contain all qTest Requirement's fields, excluding Description.
-
To view the actual JIRA issue for a particular Requirement, select the ID hyperlink to be redirected into JIRA.
Make sure to download the qTest Integration Browser Plug-in for your browser so that your JIRA username and password are saved (which will allow you to quickly jump from qTest to JIRA without having to log in each time). This is recommended to be installed on each user's browser.
-
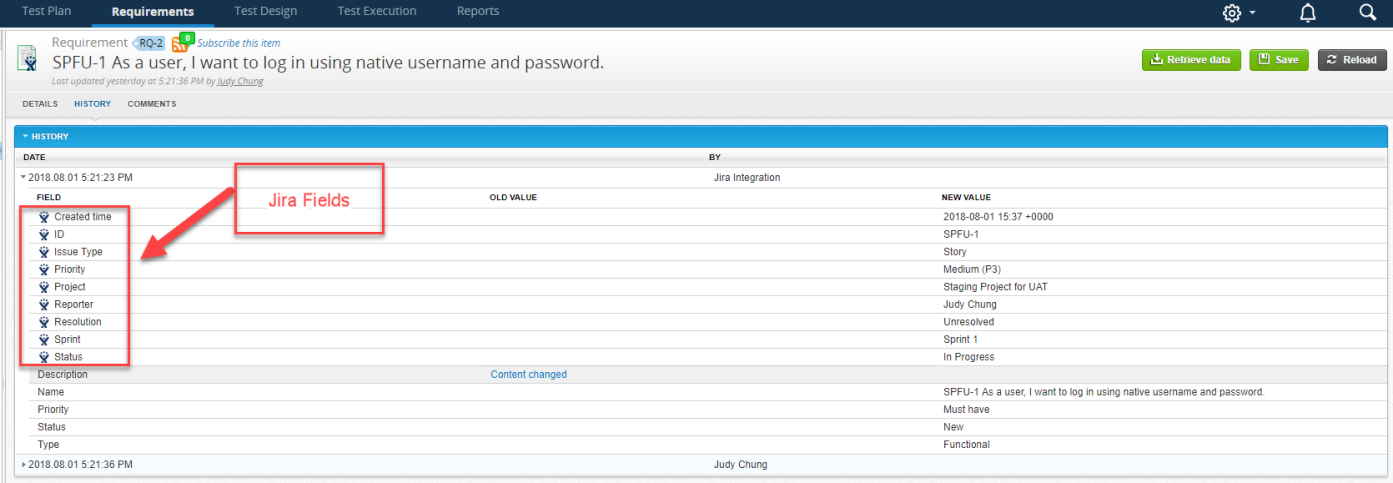
When a linked JIRARequirement is changed in JIRA, qTest will update the content on the linked Requirement, including logging an entry in the Requirement History. Entries in the History will show the qTest username to indicate who it was “Changed By.”
-
If a JIRA Requirement is automatically synced, it is recorded as having been updated by “JIRA Integration.”
-
If a user manually selects the Retrieve option to update a JIRA Requirement, he/she is recorded as the user who made the change in the Requirement.
In addition to the qTest fields, changes to all JIRA fields are recorded in the History tab with the JIRA logo next to the JIRA Field Name.
-
Known Limitation
Given you created a new custom field in JIRA, but have not selected the Refresh Field Settings icon to sync the new field to qTest, and there is a Requirement change in qTest with the new field, a record will display in the History tab as "No change."
Once you select the Refresh Field Settings icon, qTest will begin storing the field value in our database, and the History tab will show the value change accordingly.
Copy JIRA Requirements
Copied issues will become a qTestRequirement (and no longer remain integrated with JIRA). It will only retain the Description field from the JIRA issue. We recommend against copying Requirements from JIRA.
Instead, consider "Clone Connection" from one qTest Manager project to another qTest Manager project. This allows you to reuse the integration configurations and import the same Requirements into another qTest Manager project.
Manually Manipulate JIRA Requirements Folders
Move a JIRA Requirement
You can manually move JIRA Requirements to reorganize them into a different folder than the folder it was originally imported into (based on the integration field settings you selected earlier.)
When you move the Requirement, it will continue to be integrated with JIRA, so that any updates to those issues will be reflected in qTest Manager. The Requirement will remain in the new folder unless you move it again.
Try This: Moving an Integrated JIRA Requirement
Move a JIRA Requirement Folder
Additionally, you can manually move JIRA Requirement(s) folders, through drag/drop, to reorganize them into a different folder than the folder it was originally imported into (based on the integration field settings you selected earlier.)
When you move the Requirement folder, the Requirements within that folder will continue to be integrated with JIRA, so that existing Requirements and any new Requirements will be reflected in qTest Manager (as they are synced to the new location.) The Requirement folder will remain in the new location unless you move it again.
Rename JIRA Requirement Folders
Along with the ability to move Requirement folders, you can also rename a Requirement folder.
When you rename a Requirement folder, the Requirements within that folder will continue to be integrated with JIRA, so that any updates to those issues will be reflected in qTest Manager.
Link Requirements to Test Cases
Imported JIRA issues can be linked to qTest Manager Test Cases, either from the Requirement or Test Case. A JIRA Requirement can be linked to multiple qTest Manager Test Cases; multiple JIRA Requirements can be linked to a single Test Case. For more information, see Linking Test Cases and Requirements.
When you link Test Cases to a JIRA Requirement, you will be able to see the linkage in multiple places.
-
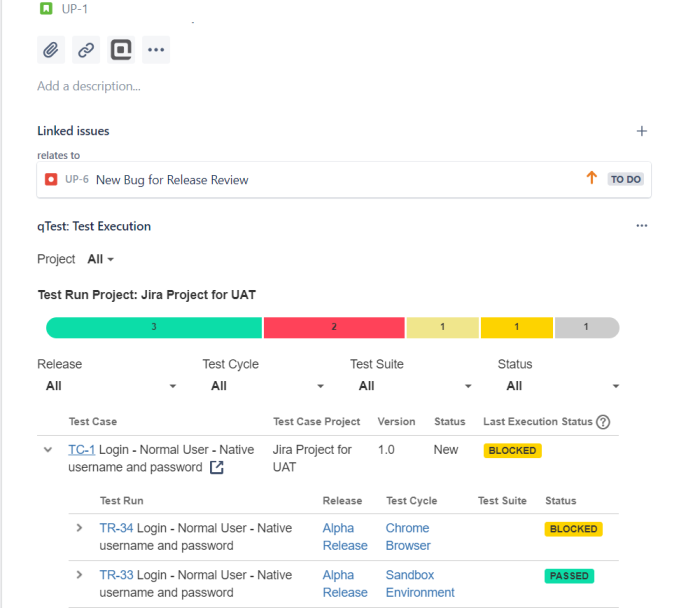
qTest Test Execution add-on in the JIRA Requirement Issue shows the linked Test Case(s) and associated Test Runs.
-
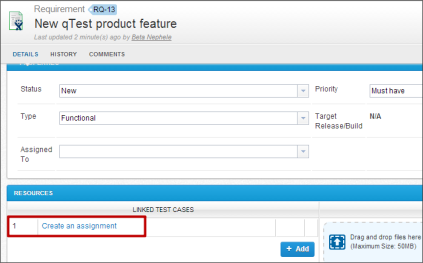
qTest Requirement shows the linked Test Case(s) in the Resources section.
-
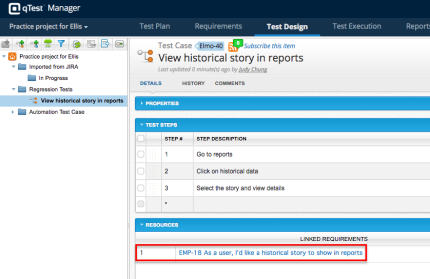
qTestTest Case shows the linked Requirements in the Resources section.
When you remove the link between a Test Case and a Requirement - this is performed in the Resources section of the Test Case or Requirement in qTest - the corresponding issue links in JIRA are also removed.