Adding Test Runs in Test Execution
A Test Run is an executable version of a certain Test Case. The idea is that a Test Case can be executed (as a Test Run) in multiple areas, such as different Releases, Sprints, and more. For more on Test Runs, refer to Introduction to qTest Objects
Creating Test Runs Video
Add Test Runs
To create Test Runs within a particular Test Suite, perform the following steps:
-
Select Test Execution.
-
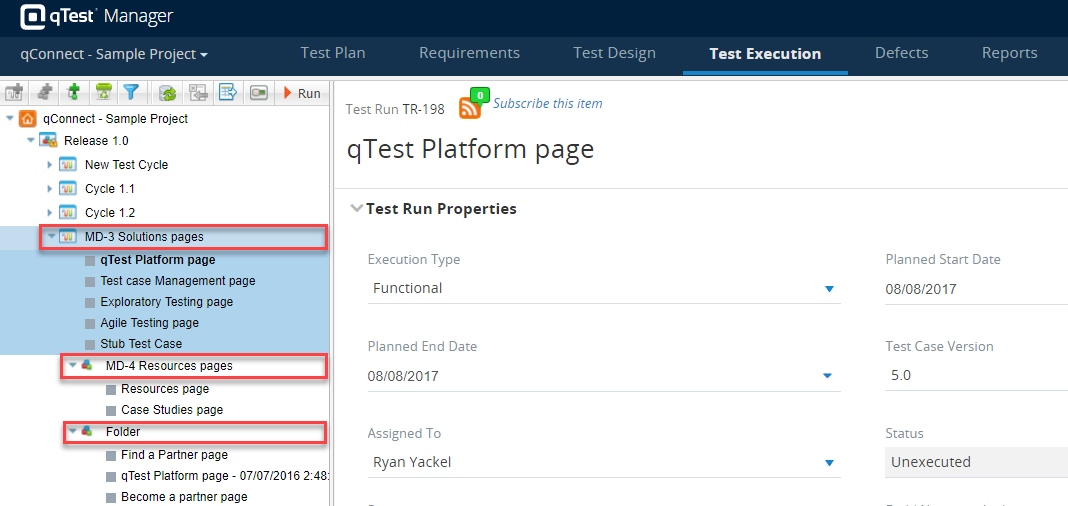
Select your Test Suite in the Navigation Panel, and select the Add Test Runs icon.

-
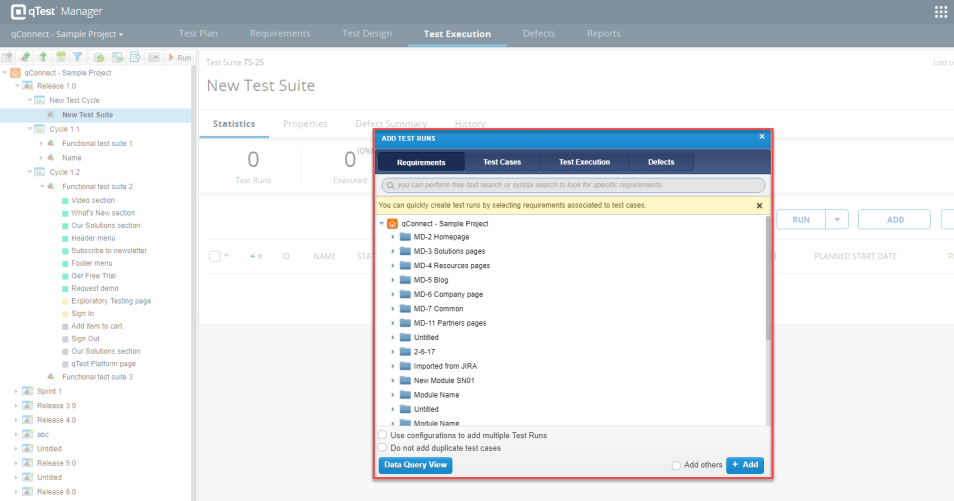
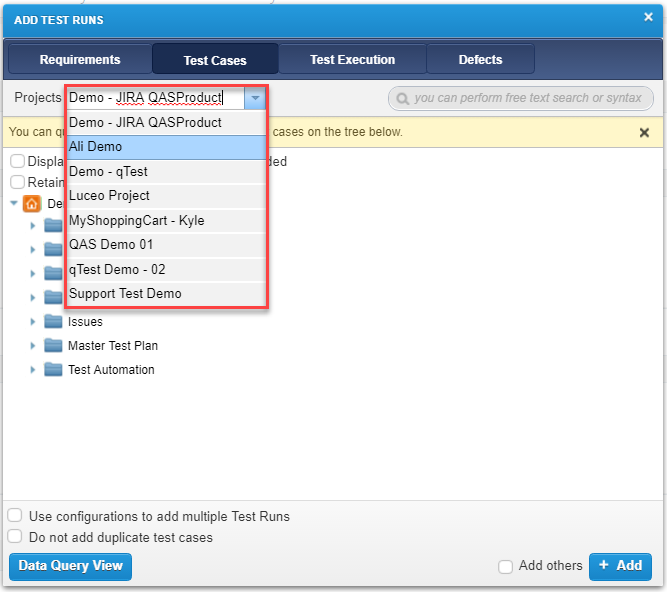
The "Add Test Runs" dialog displays. Select the Test Cases tab.
-
Select the particular Test Case you wish you add as a Test Run. Select Add.
Instead of selecting specific Test Cases one-by-one, qTest Manager allows you to add Test Runs from a folder of test cases. To do so, follow the steps below:
-
In the Add Test Runs dialog, select the Test Cases tab. Select a Test Case folder from the list.
-
Select Add.
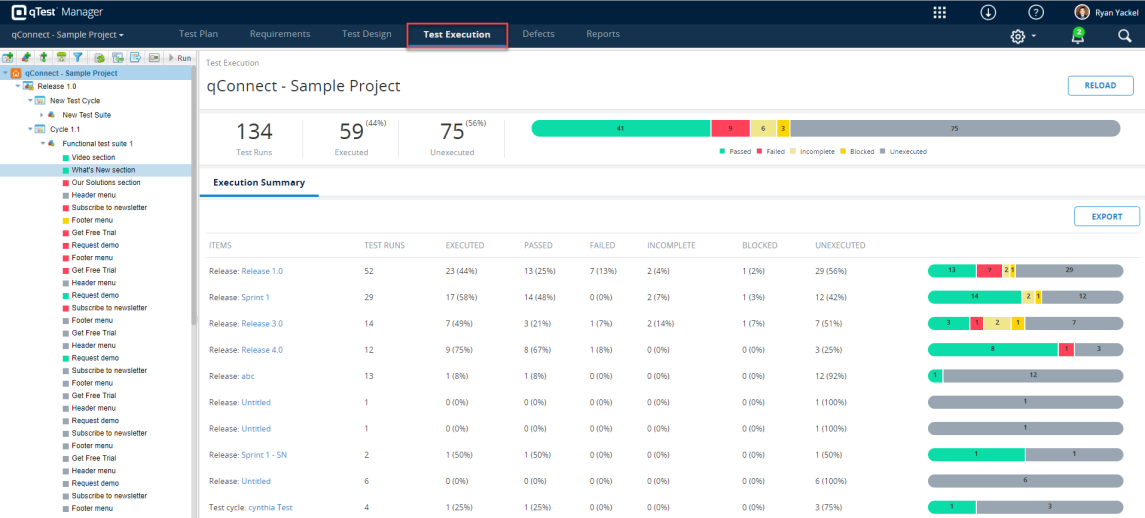
The Test Suite page displays. The Test Runs that have been added are displayed in the Test Run grid of the Test Suite page, as shown here:
 For information on creating Test Runs from the Test Design module, see the article Create Test Runs with Parameters.
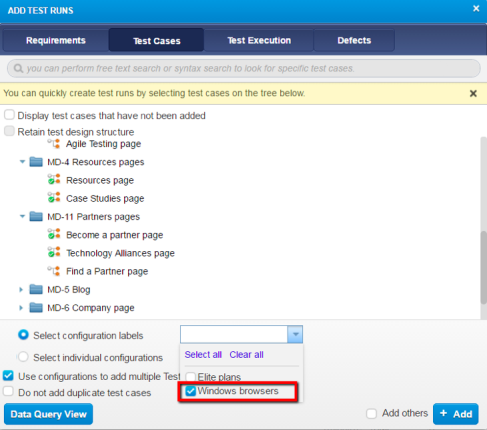
Add Test Runs and Retain Test Design Structure
When managing Test Runs in Test Execution, it can be beneficial to create a nested hierarchy to help better structure execution activities and reporting. This can be accomplished by using Test Cycles and Test Suites. A great way to save time when creating this type of structure is to mirror the Test Design hierarchy.
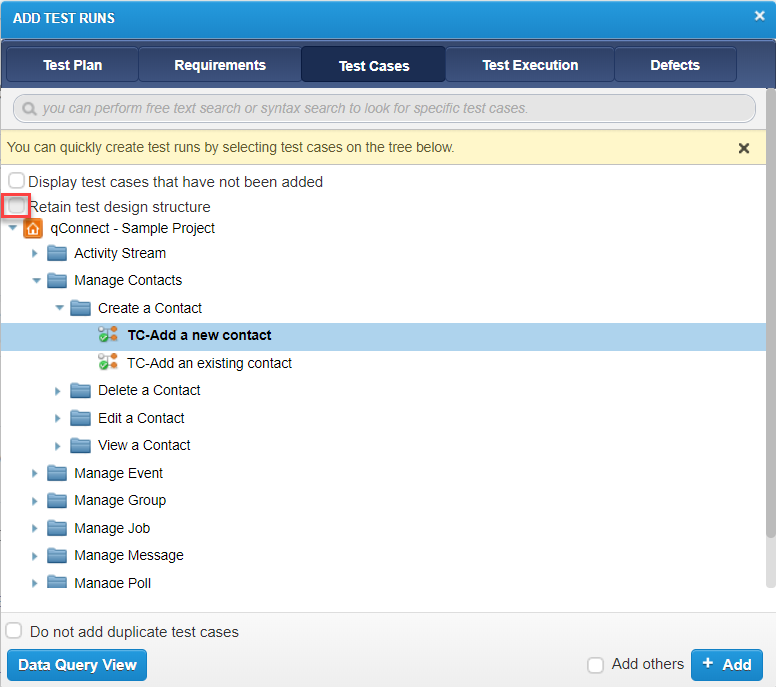
In the Test Cases' section of the Add Test Runs dialog, you can check 'Retain test design structure' to mirror the folder structure from Test Design. This will enable you to create Test Cycle(s), Test Suite(s), and Test Run(s) in the same hierarchical structure used within Test Design.
-
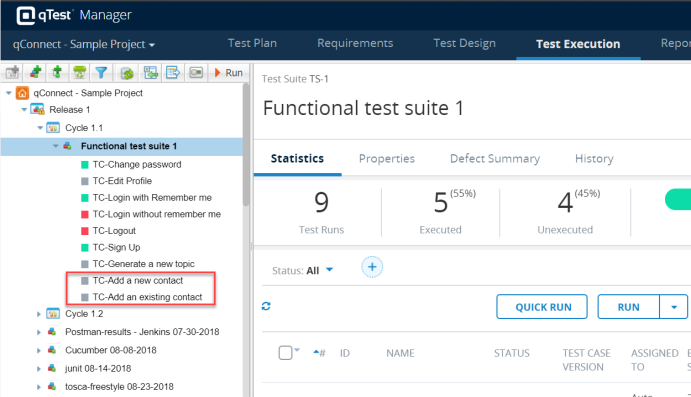
Test Design folders that contain subfolders will be created as Test Cycles in the Test Execution tree. Otherwise, the folders are created as Test Suites.
-
If 'retain test design structure' cannot be selected, the Test Suite was selected before selecting "Add Test Runs."
-
To use this feature, make sure to select either the Root, Release, or Test Cycle before selecting "Add Test Runs."
Add Test Runs Using Test Case From Another Project
If you have many test cases that need to be executed in different projects, you can add Test Runs using a Test Case is from another project. Before you can do this, however, you will need to share Test Cases from one project to another. For details, see the article Reusing Test Cases .
To add a Test Run using a Test Case from another project, perform the following steps:
-
From the Add Test Runs window, select the Test Cases option. In the Projects drop-down list, select the project from which you will borrow a Test Case. When you select the project from the list, the folder structure for Test Cases comes from the project where the Test Case is stored.
-
From the tree view, select the Test Case you want to add as a Test Run. Then, select the +Add icon.
-
The Test Suite page is redisplayed, which shows the Test Runs that were added from Test Cases in another project.
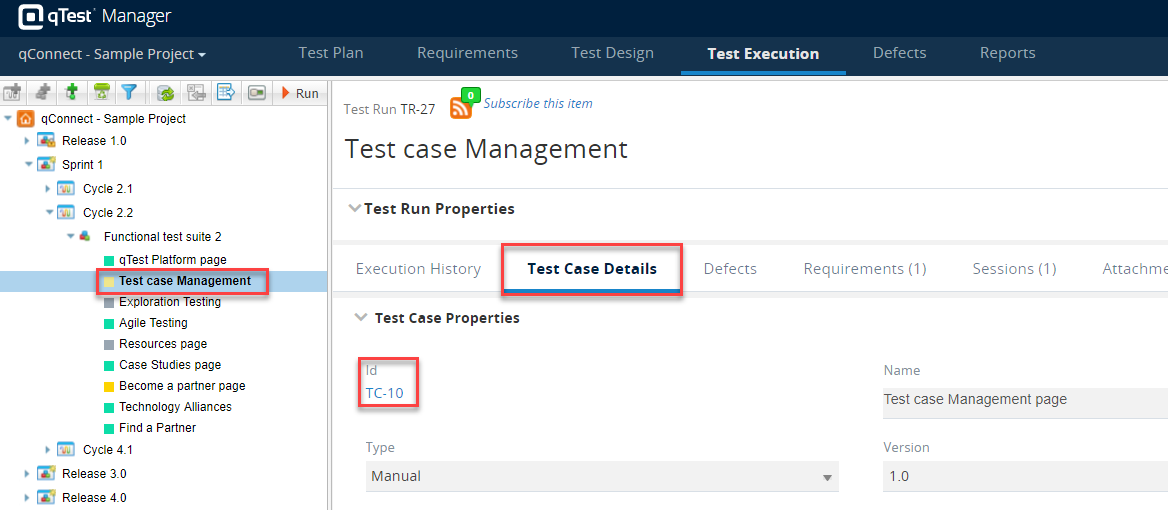
You can view the Test Case properties by clicking directly on a Test Run. The Test Run level with also contains your run properties and Test Execution history. To access the view below, make sure you are on the Test Run level.
Add Test Runs via Linked Requirements
Another way to add Tests Runs is based on Requirements. If you select a Requirement, any Test Case linked to the Requirement will be added as a Test Run. This is useful if testers are responsible for new feature testing. Perhaps you are held accountable to test two new stories being developed, you can easily add all the Test Cases linked to those specific stories to a respective Test Suite.
-
From the Add Test Runs window, select the Requirements tab at the top of the pop-up window and select the Requirements folder.
-
Select Add.
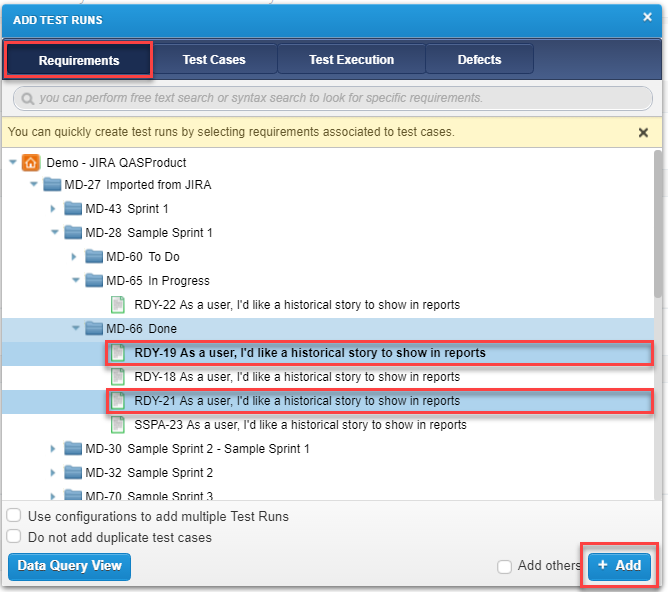 Example: You have two Requirements in a folder labeled “Medium." Each Requirement is linked to two Test Cases. By selecting the “Medium” folder and Add, four Test Cases will be added as Test Runs.
Add Test Runs Using Configurations
Test Run Configurations can be a powerful way to dictate how a test must be performed based on one or more variables, such as Browser + OS. Adding Test Runs with Configurations allows you to manage a single Test Case in the Test Design module and create multiple Test Runs in the Test Execution module with each Test Run representing a different configuration. For example, you may want to test a Test Case in Chrome, Firefox, Safari, and Internet Explorer.
Before using this feature, perform the necessary setup in the article entitled Configuration Field Settings. Then, perform the following steps.
-
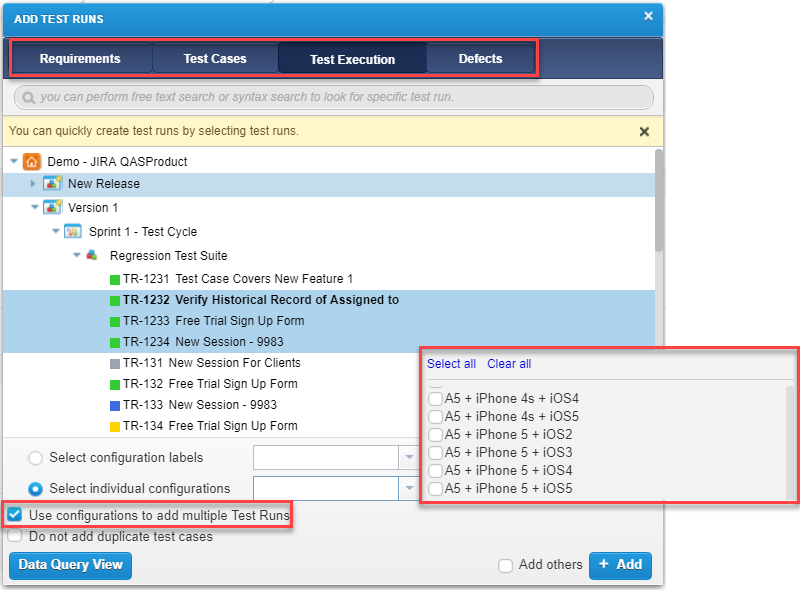
From the Add Test Runs window, select the Test Cases option. Then, find the Test Case for which you want to create Test Runs. In the following example, we will select the ‘Become a partner page’ Test Case and create multiple Test Runs from the Test Case using configuration labels.
-
Select the ‘Use configurations to add multiple Test Runs’ checkbox. This option is used to pick which individual configuration for which to create Test Runs.
You must have previously selected the Configuration field checkbox from within Field Settings for this project to make this field active. If you did not do so, the ‘Use configurations to add multiple Test Runs’ checkbox is not displayed. -
Do one of the following:
- Select the Select configuration labels radio button. You must have previously created labels for this project from the Field Settings option. If you have not created labels for this project, this radio button is not displayed. b.)
- Select the ‘Select individual configurations' radio button.
-
Select the arrow to the right of the Select configuration labels radio button. Select the desired label from the drop-down list. In this example, we will select the ‘Windows browsers’ label. If there were five configurations for the selected label, five Test Runs will get added (one for each 'Windows browser').
-
Select Add. For the selected Test Suite, a Test Run for every configuration within the selected label is created. Each Test Run is a different executable instance of the same Test Case.
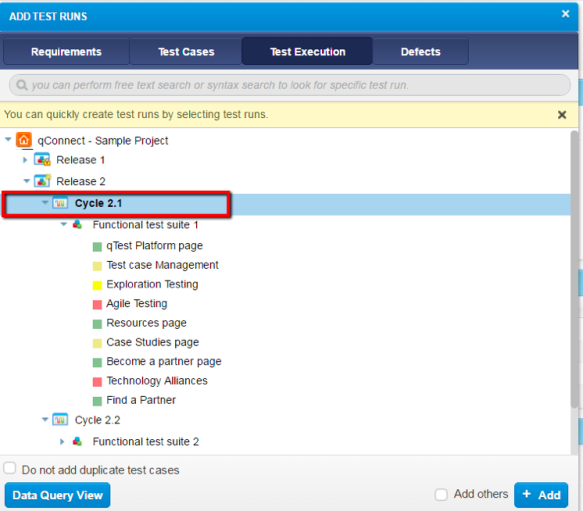
Add Previously Executed Test Runs
qTest Manager can be used to add previously executed Test Runs to the current Release. To add a previously executed Test Run, perform the following steps:
-
From the Add Test Runs window, select the Test Execution tab at the top of the pop-up window.
-
Select one previously executed Test Runs you want to add to the current suite. Alternatively, select an entire Test Suite, Test Cycle, or Release to add Test Runs in bulk. In the example shown below, all of the previously executed Test Runs in Test Cycle 2.1 are selected.
-
Select Add.
Another way to copy previously-executed Test Runs in bulk to the current Release is described in the article Copy or Move Objects in Test Execution.
-
Right-click the desired Test Run, Test Suite, Test Cycle, or Release in the left panel of Test Execution. Then, select the Copy option from the right-click drop-down menu.
-
Right-click the current Release in the left panel and select the Paste option from the drop-down menu. The previously-executed Test Runs are pasted into the current Release.
-
The copied runs will be completely new and unexecuted. The status and history will not be carried over.
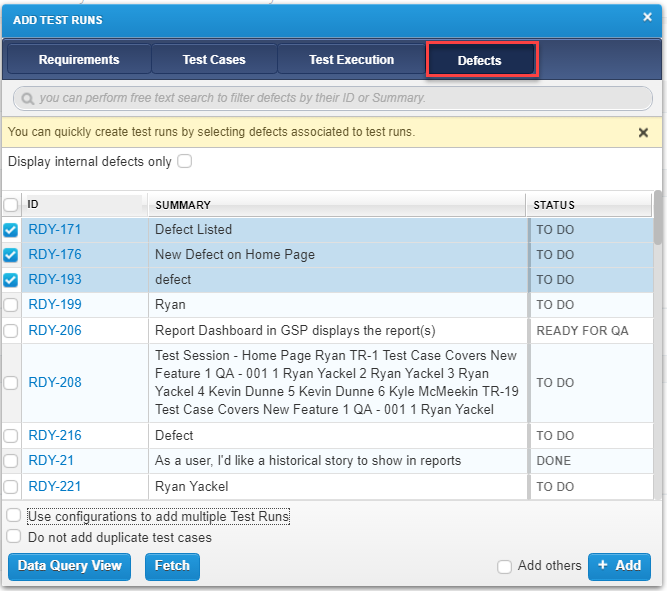
Add Test Runs Based on Linked Defects
Test Runs can also be added by selecting Defects associated with previously-executed Test Runs. This is particularly useful when re-testing bugs after they have been fixed by Development. To add Test Runs in this manner, perform the following steps.
-
From the Add Test Runs window, select the Defects tab at the top of the pop-up window. A list of Defects found in previous Test Executions is displayed.
-
Refer to the Status column and select the Defects that are ready to be retested. To select a Defect, select the checkbox to the left of the Defect or click anywhere on the line for the Defect. In the example shown here, DF-3, which has a status of “Closed” has been selected, since "Closed" signifies the defect is ready to be retested. The Defect status may be different based on your testing process.
-
Select Add. Any Test Run associated with the selected Defect is added to the Test Runs for the current Release.
By adding Test Runs based on linked Defects, you will create a separate Test Run with a fresh execution history. Otherwise, if you wish to add to the execution history of the existing Test Run, you can drag/drop that Test Run into the new Test Suite. See the article Copy or Move Objects in Test Execution.
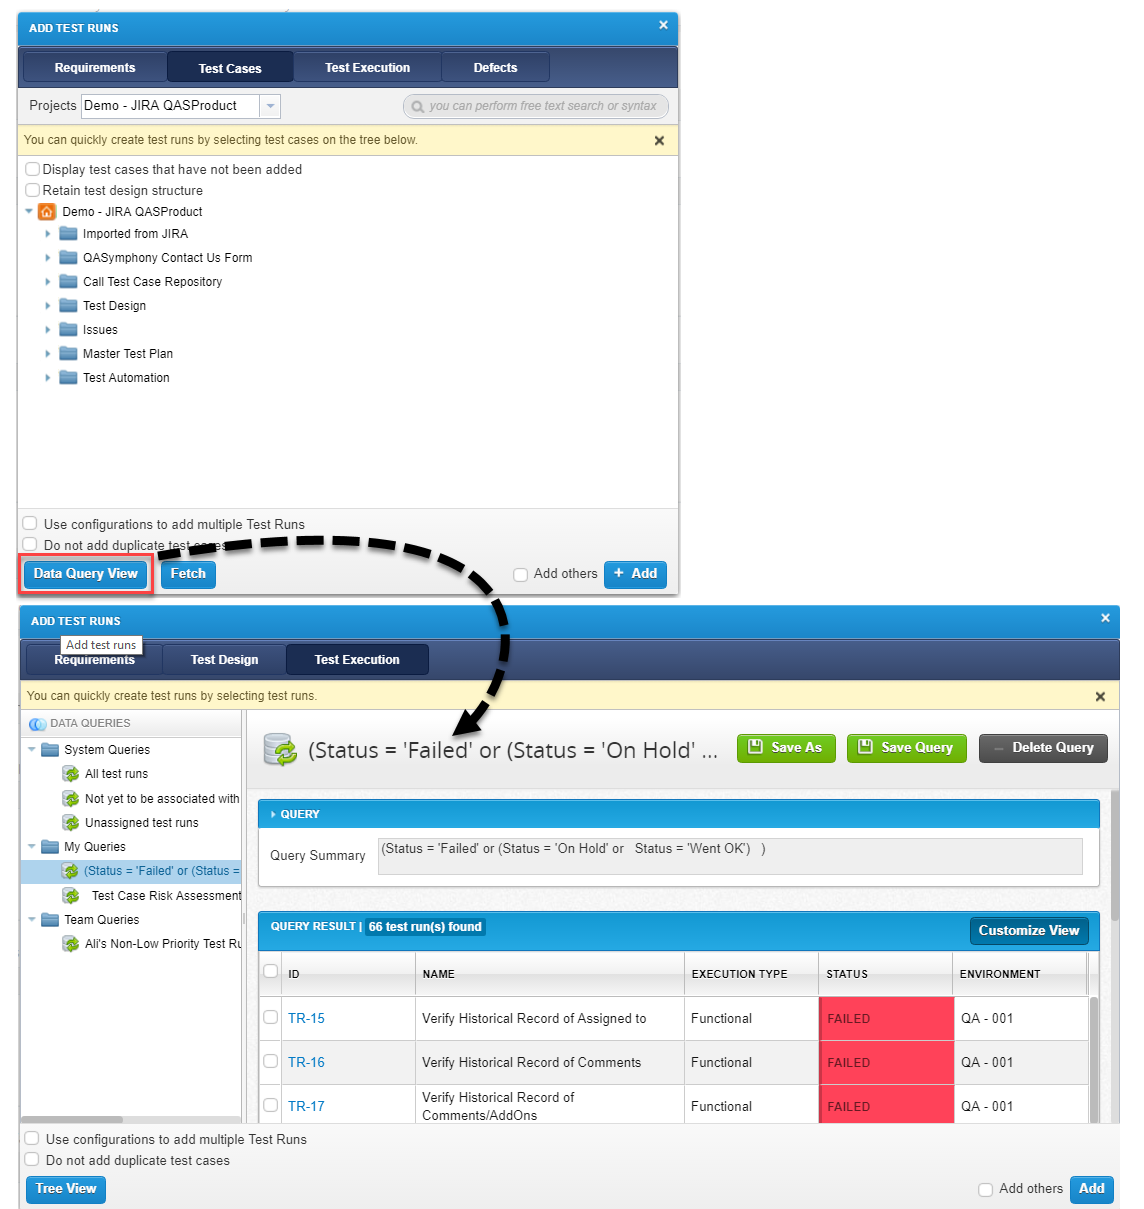
Add Test Runs with Data Query
In the "Add Test Runs" window, you can switch between the tree view to the data query View. The data query view allows you to build complex queries to isolate objects based on certain criteria. You are able to query Requirements, Test Cases, and previous Test Runs within the respective tabs. An example would be querying for Test Cases with a certain tag, such as "Sanity", that you can then add to a Test Suite.
NOTE:
-
The following clauses are added by default to your new queries to make sure the found objects are valid objects for Test Run creation.
-
Requirements: Has Association with Test Cases = YES
-
Defects: Has Association with Test Runs = YES
-
-
The data query view cannot be used to search for external Defects (e.g., JIRA Defects). Instead, you can use the tree view in the "Add Test Runs" window and select the Defects tab. From there you can search for Defects by their ID, Summary or Status.
-
Custom queries from the data query view of the "Add Test Runs " window cannot be seen in the normal data query and vice versa, and they cannot be shared across the team.
IMPORTANT:
-
If a run has been created off of a shared Test Case, it cannot be edited via TestPad. We do not allow to edit shared Test Cases. Test Cases are shared for execution only. The limitation is that system cannot check user permission across projects while editing Test Cases in TestPad.
NEXT STEPS:
See the following articles.