How to use Interactive API Documentation
qTest offers an interactive Swagger API documentation that enables you to make API calls from the Swagger UI. qTest users can use this interactive documentation to:
-
Explore and learn about supported APIs
-
Copy examples of API requests to use similar syntax in their code
-
Export sample code in multiple languages: Java. C#, Python, and Ruby
Authenticate to Sample Account
Follow the steps below to use the interactive Swagger API documentation:
-
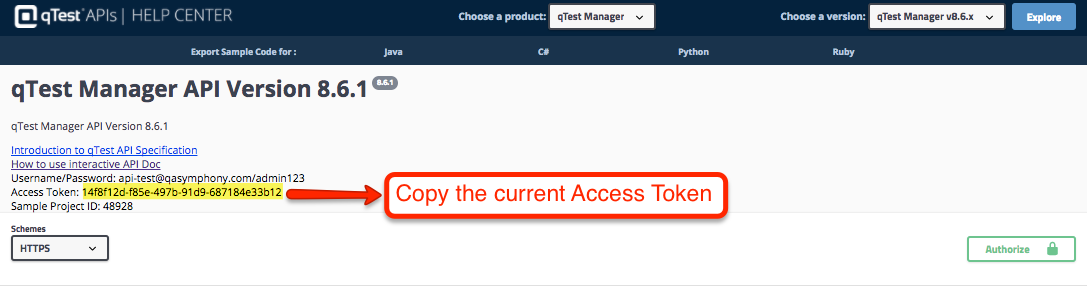
Click the link to qtest.dev.tricentis.com.
-
Copy the Access Token, which is a long alphanumeric code displayed under the Username/Password line.
-
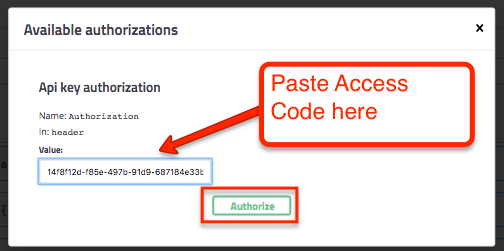
Click the Authorize button.
-
In the Available Authorizations dialog, paste the following syntax: bearer <Access Token>, where <Access Token> is your copied Access Token.
For example: bearer 14f8f12d-f85e-497b-91d9-687184e33b12
-
Click Authorize.
-
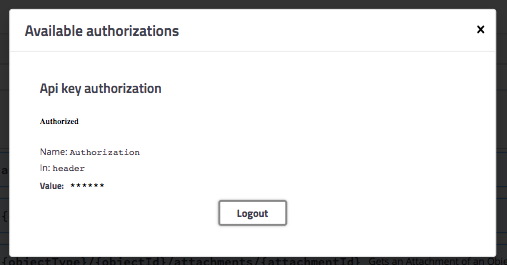
Once the authorization is successful, the dialog will show "Authorized."
Click the "X" to close out the window so that you can now begin using the interactive "Try it Out" feature.
Experiment with the API
-
Collapse or expand an entity resource to show or hide its operations (DELETE, GET, POST, PUT).
-
Select an entity and an operation, and enter parameter values. The interactive Swagger API interface guides you by verifying your requests, such as if you are missing a required field.
-
Click Execute to perform the operation using the inputs you have provided.
-
Copy the examples or syntax into your code.
Example:
To try out the Creates a Requirement API, follow these steps:
-
Look for the project ID from the top of the document. Alternatively, you can try the Gets multiple Projects API and then look for the ID of qConnect - Sample Project from the response.

-
Click on the arrow to the right of the Modules link to expand the Modules API section.
-
Click on the blue GET button to expand the API for Gets multiple Modules.
-
Input the projectID using the ID you found in step 1.
-
Click the Execute button to perform the call using the input provided.
-
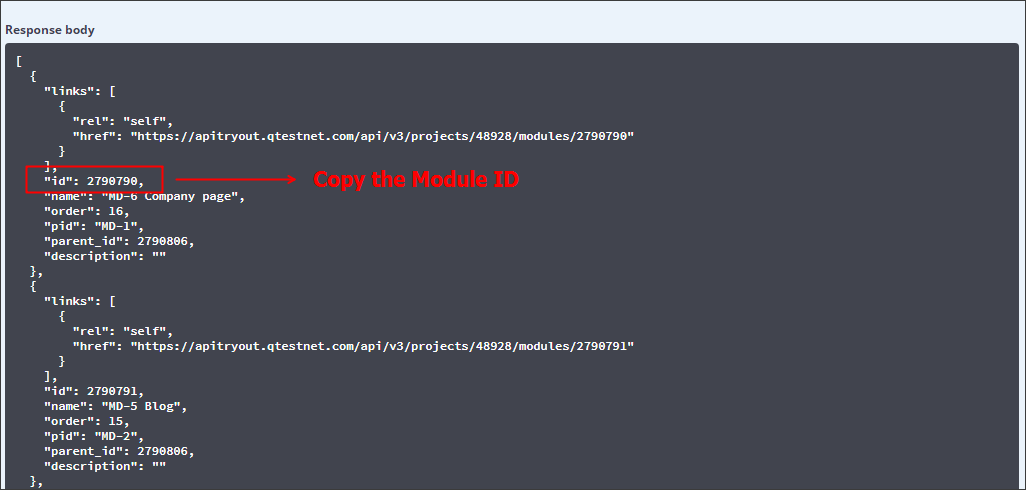
From the response body, select one ID of any Modules. You will use create a Requirement under this Module.
-
Click on the arrow to the right of the Requirements link to expand the Requirements API section.
-
Click on the green POST button to expand the API for Create a Requirement.
-
Click the Try it Out button.
-
Input the projectID as you found in step 1. On the request body, remove the properties array, input a name for the Requirement and the parent_id using the Module ID you found in step 6.
-
Click the Execute button to perform the call using the inputs provided.
-
Check out the results in the response body.
-
Copy the examples in the request body to use similar syntax into your code.
Export Sample Libraries
Currently, sample code can be generated into Java, C#, Python, and Ruby.
-
Click the desired language from the top of the toolbar, such as Java.
-
A .tgz file will be downloaded. Extract the downloaded file.
The extracted file will contain the following items:
-
README.md: This should be your starting point. It will instruct you to install the API client library and also provide an example for you to easily get started on writing your code using the library.
-
java\src\main\java\io\swagger\client\model: It contains the definition of all modeling objects.
-
java\src\main\java\io\swagger\client\api: It contains the source code of our API services' wrappers.
-
Example:
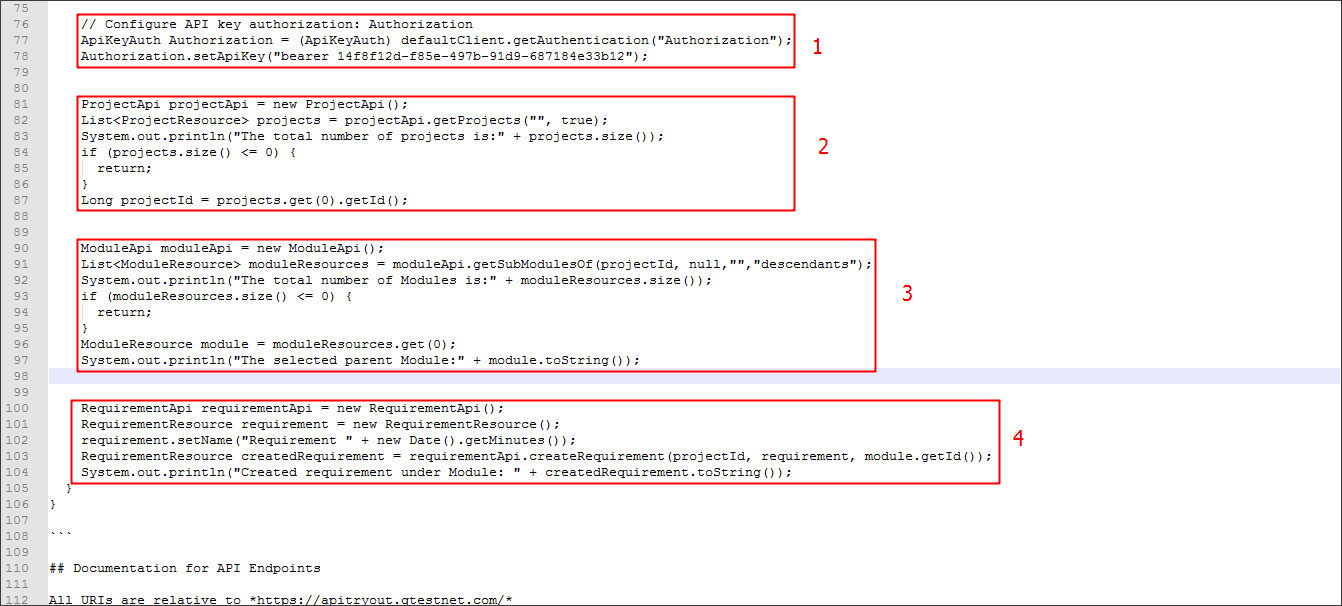
The following code snippet is an example of how to create a Requirement. It includes the following steps:
-
Authenticate. In order to acquire an authorized token, you can use method postAccessToken of class LoginApi.
-
Retrieve all available projects from your qTest Manager instance and then select the first one.
-
Retrieve all Modules from the selected project and then select the first one.
-
Create a new Requirement under the selected Module.