qTest and Tosca Integration: Quick Start Guide
You can use qTest's built-in integration with Tricentis Tosca to combine qTest's Application Lifecycle Management (ALM) and release planning with Tricentis Tosca's automation capabilities.
This quick start guide describes the integration steps you need to perform in qTest. Some steps require prior action in Tricentis Tosca. For a complete overview of how to set up the qTest and Tosca integration, refer to the Tricentis Tosca manual.
Prerequisites
We offer two different authentication methods for qTest and Tosca integration: client ID-secret or username-password. These options share most prerequisites, though there are some key differences in version compatibility and workspace requirements.
As of Tosca 15.2, you can determine which authentication method you need to use based on the following requirements.
Note that we recommend that you use an HTTPS connection to connect to Tosca to ensure you are as secure as possible.
When to use client ID-secret authentication:
-
If you use a server repository workspace
-
If you have an HTTPS connection
When to use username-password authentication:
-
If you use any other workspace type that is not a server repository workspace
-
If you have an HTTP connection
qTest does not automatically determine which authentication method to use. After you determine your needs, use the configuration option that works best for your setup.
Universal prerequisites
You must meet the following prerequisites for any type of setup:
-
You are an Elite qTest user.
-
You have the following permissions in the qTest Project that is integrated with Tosca: Create Modules, Edit Modules, Edit Test Case Assignment, Create Test Cases, View Test Cases, Update Test Cases, Delete Test Cases, Create Test Cycles, Update Test Cycles, Delete Test Cycles, Create Test Runs, and Delete Test Runs.
-
You have configured a multi-user environment in Tosca and use Tosca Distributed Execution (DEX).
-
To integrate qTest SaaS, the corresponding Tosca server must be reachable on the internet and requires a public DNS.
SaaS customers can add a custom header for outbound requests between qTest and Tosca, allowing them to place a proxy in front of their Tosca server. For more information about adding a custom header, refer to qTest and Tosca Integration: Quick Start Guide.
Additional prerequisites for username-password authentication
You can use the username and password method authenticate HTTP connections in all versions, as HTTP connections do not require authorization in Tosca. This authentication method also works for HTTPS connections in Tosca 15.1 or lower.
You must meet the following requirements to integrate Tricentis Tosca and qTest for HTTP or HTTPS connections that use a username and password authentication method:
-
You use qTest version SaaS or 2023.6 OnPremises.
-
For HTTP connections, you have installed Tricentis Tosca and a Tricentis Tosca Server version 14.2 or higher.
-
For HTTPS connections, you have installed Tricentis Tosca and a Tricentis Tosa Server version from 14.2 to Tosca 15.1 .
Additional prerequisites for client ID-secret authentication
System administrators can use the client ID and secret method for both HTTP and HTTPS connections to control which users and applications have permission to connect to the DEX server. This authorization ensures the DEX environment is secure. To upgrade to Tosca 15.2 or later, you are required to use the client ID and secret method to authenticate HTTPS connections.
You must meet the following requirements to integrate Tricentis Tosca and qTest for HTTP or HTTPS connections that use clientID and secret authentication method:
-
You use SaaS or qTest 11.3 On Premise or later.
-
You have installed Tricentis Tosca and a Tricentis Tosca Server version 15.2 or higher.
-
You have generated client ID and secret keys.
-
You have set up a Tricentis Server Repository workspace.
qTest workflow
Use the instructions below to complete the integration steps you need to perform in qTest. To see a full overview on how to integrate Tosca to qTest, refer to the Tricentis Tosca documentation.
If you need additional information on how to integrate Test Cases from qTest to Tosca, refer to Integrate from qTest to Tosca.
Configure Tosca integration settings
The configuration of your Tosca integration settings depends on your current authentication setup:
Configure username and password authentication
Follow the instructions below to set up username and password authentication:
-
In qTest Manager, click the Gear icon
 . Then select Automation Settings.
The Automation Settings screen appears.
-
In the Automation Integration section, click the Activation status button to toggle the activation on.
-
In the mapping table, map the following Tosca statuses to qTest: Passed, Failed, Error, and Canceled. Map these statuses to successfully submit test results from Tosca to qTest.
-
In the Tosca Integration section, click the Activation status button to toggle the activation on.
-
In the Project URL field, enter the Tosca workspace URL.
You can use the {Workspace} GET method to find the Tosca workspace URL, as indicated in the following image. The {WORKSPACE} value is the name of the qTest integration workspace you set up in Tosca. For more information about the qTest integration workspace set up in Tosca, refer to the Tricentis Tosca documentation.
-
Select the Username-Password authentication method.
-
In the Username field, enter the username used for the workspace.
-
In the Password field, enter the password used for the workspace.
-
In the Update Workspace Timeout field, specify the number of minutes qTest should wait after it requests a workspace update from Tosca before it returns a timeout. If the timeout threshold is reached, qTest fails pending integration tasks from qTest to your integrated Tosca workspace.
-
Enter the Monitoring Service URL. This field is only required if you are using a Tosca version older than 15.0.
For information on locating the Monitor Service URL, refer to Locate the Monitor Service URL
Verify that the Project URL and the Monitor Service URL are both accessible from qTest Manager and qTest Launch. The Monitor Service URL must also be accessible from your internet browser to access the URL from a job. -
Click Try Connection.
The connection may take anywhere from a few seconds to one minute to establish, depending on your network. The Tosca workspace you want to integrate with qTest and the REST API cannot be open at the same time when trying to establish a connection. If the connection attempt results in a 500 error, verify that you've closed the Tosca workspace.
-
Click Save.
A message confirms Tosca integration is enabled.
-
Click Refresh to refresh your browser and apply the changes.

Configure client ID and secret authentication
Follow the instructions below to set up client ID and secret authentication:
-
In qTest Manager, click the Gear icon
. Then select Automation Settings.The Automation Settings screen appears.
-
In the Automation Integration section, click the Activation status button to toggle the activation on.
-
In the mapping table, map the following Tosca statuses to qTest: Passed, Failed, Error, and Canceled. In the mapping table, map the following Tosca statuses to qTest: Passed, Failed, Error, and Canceled. Map these statuses to successfully submit test results from Tosca to qTest.
-
In the Tosca Integration section, click the Activation status button to toggle the activation on.
-
In the Project URL field, enter the Tricentis Server repository workspace URL.
You can use the {Workspace} GET method to find the Tosca workspace URL, as indicated in the previous image. The {WORKSPACE} value is the name of the qTest integration workspace you set up in Tosca. For more information about the qTest integration workspace set up in Tosca, refer to the Tricentis Tosca documentation.
For connections configured with client ID and secret authentication, you are required to use a Tricentis Server repository workspace.
-
Select the ClientID-Secret authentication method.
-
In the Client ID field, enter the client ID you generated.
-
In the Secret field, enter the secret key you generated.
-
In the Update Workspace Timeout field, select the number of minutes qTest should wait after it requests a workspace update from Tosca before it returns a timeout. If the timeout threshold is reached, qTest fails pending integration tasks from qTest to your integrated Tosca workspace.
-
Optionally, enter the Monitoring Service URL.
For information on locating the Monitor Service URL, refer to Locate the Monitor Service URL.
Verify that the Project URL and the Monitor Service URL are both accessible from qTest Manager and qTest Launch. The Monitor Service URL must also be accessible from your internet browser to access the URL from a job. -
Click Try Connection.
The connection may take anywhere from a few seconds to one minute to establish, depending on your network. The Tosca workspace you want to integrate with qTest and the REST API cannot be open at the same time when trying to establish a connection. If the connection attempt results in a 500 error, verify that you've closed the Tosca workspace.
-
Click Save.
A message confirms Tosca integration is enabled.
-
Click Refresh to refresh your browser and apply the changes.
Launch your tests in qTest
For information about launching tests in qTest, refer to Schedule Test Execution for Tosca TestEvent from qTest.
Known Limitation: The Tosca workspace must be closed before tests can be executed from qTest.
View the results
You can view test results in either qTest or in Tosca.
To learn how to view results in qTest, refer to View your Tosca Execution Results in qTest.
To learn how to view results in Tosca, refer to the Tricentis Tosca documentation.
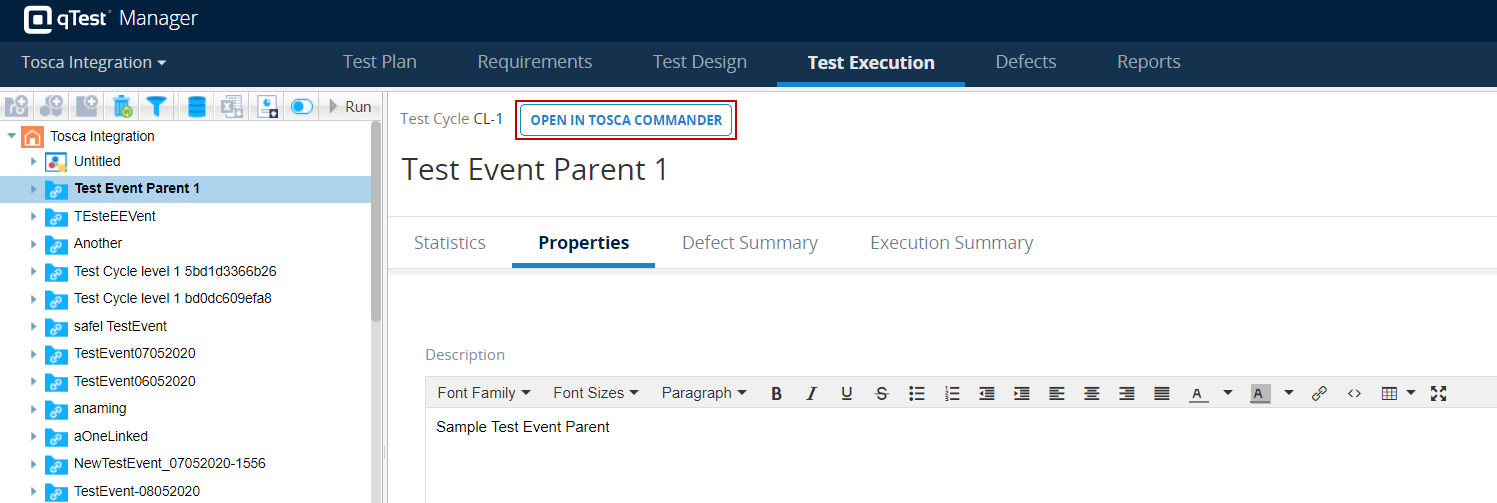
Access linked Tosca objects in Tosca
You can access linked Tosca objects directly from qTest. To view a linked object in Tosca, click Open in Tosca Commander on the object screen.