Schedule and Distribute Test Automation in qTest Launch
Elite users are able to schedule and distribute test execution jobs for Test Runs, Requirements, and Test Cases across multiple automation host machines in qTest Launch.
-
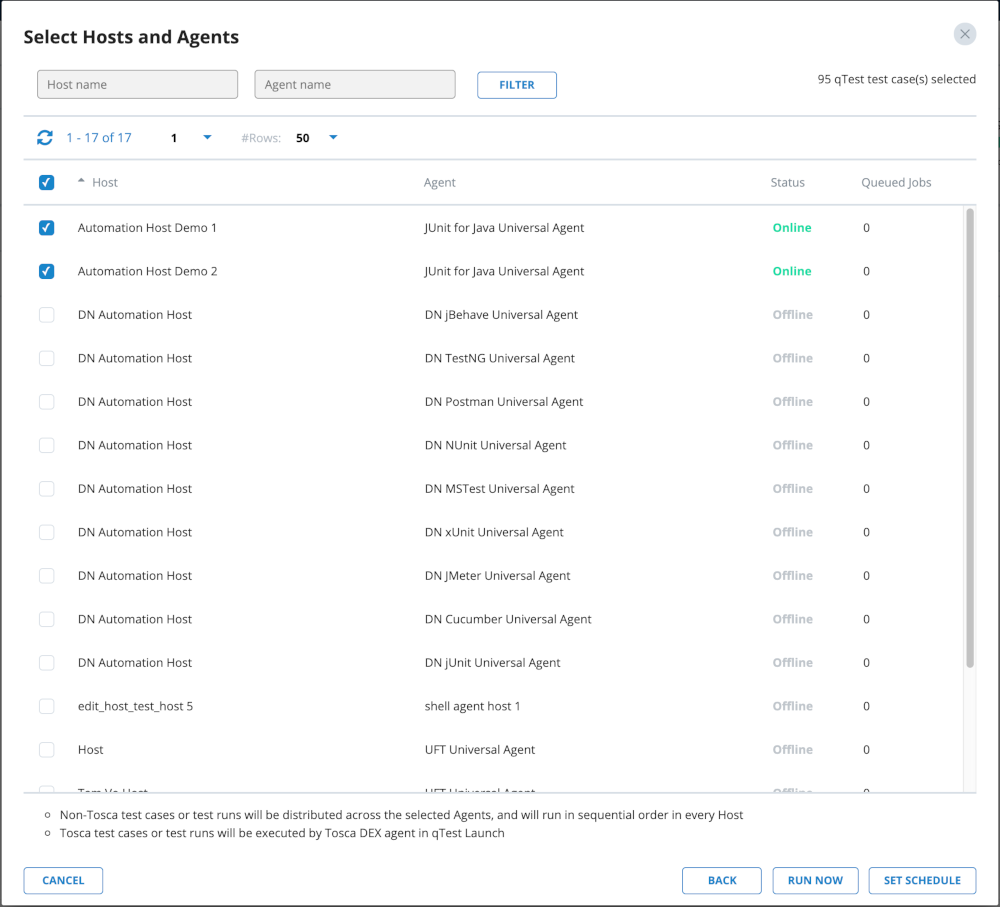
Non-Tosca test cases or test runs will be distributed across the selected Agents, and will run in sequential order in every Host.
-
Tosca test cases or test runs will be executed by Tosca DEX agent in qTest Launch (native integration).
The non-Tosca and Tosca Test Cases and Test Runs can be selected to run within the same schedule.
Schedule Test Execution in Launch
To schedule your test execution in Launch, follow the steps below:
-
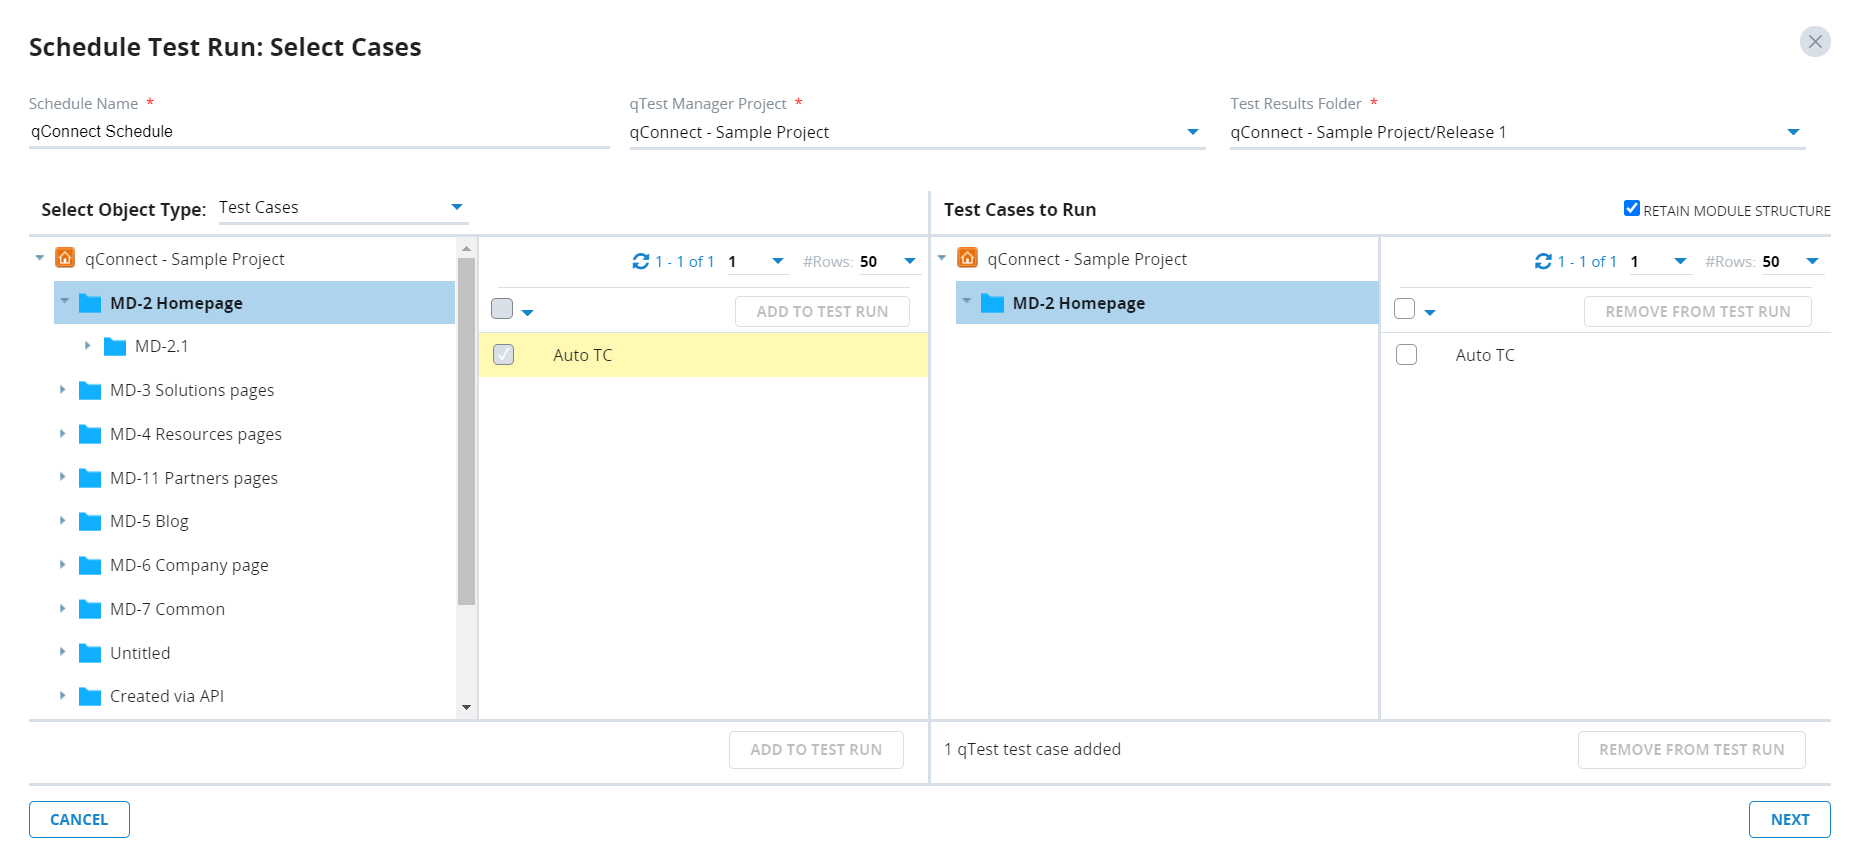
In Launch, select Schedule Tests. The Schedule Test Runs: Select Cases dialog displays.
-
Enter the name of the newly scheduled job in the Schedule Name field.
-
Select your qTest Manager Project.
-
Select folder location for the Test Results.
-
Select the down arrow icon in Test Result Folder to display Releases and Test Cycles in a tree structure for the currently selected project.
-
Select a Release or Test Cycle and confirm the location to save.
You can only select a destination for test results if the selected object type is either Requirements or Test Cases. In other words, if you selected Test Runs as the object type, the results are submitted to the selected Test Runs, so no location needs to be set up for the test results.
-
-
Filter objects to schedule tests by project and project type:
-
Requirements
-
Test Cases
-
Test Runs
-
-
Once the object filter is chosen, you can search for objects by name. Objects that match the filter or the search criteria are shown in the left panel under the tree structure.
-
Move the object to the right panel which displays the objects that are being scheduled to run.
-
To move individual items, select the blue plus sign icon.
-
To move multiple objects, press Ctrl and click to select the name of the objects. Then click the Add to Test Run icon.
-
Retain Module Structure: When this option is selected, the result will be submitted to the Test Results Folder under the same structure as the selected modules
-
-
Select Next. The Select Hosts and Agents screen displays.
-
Select hosts and agents that will execute your test.
Notes
-
Only Online hosts are available for test scheduling.
-
The test cases or test runs you selected in previous Select Cases screen will be distributed across the selected hosts using the ratio: number of selected test cases (or test runs) / number of selected hosts.
-
-
Choose the appropriate execution schedule type:
-
Run Now: For immediate execution. Proceed to step 11.
-
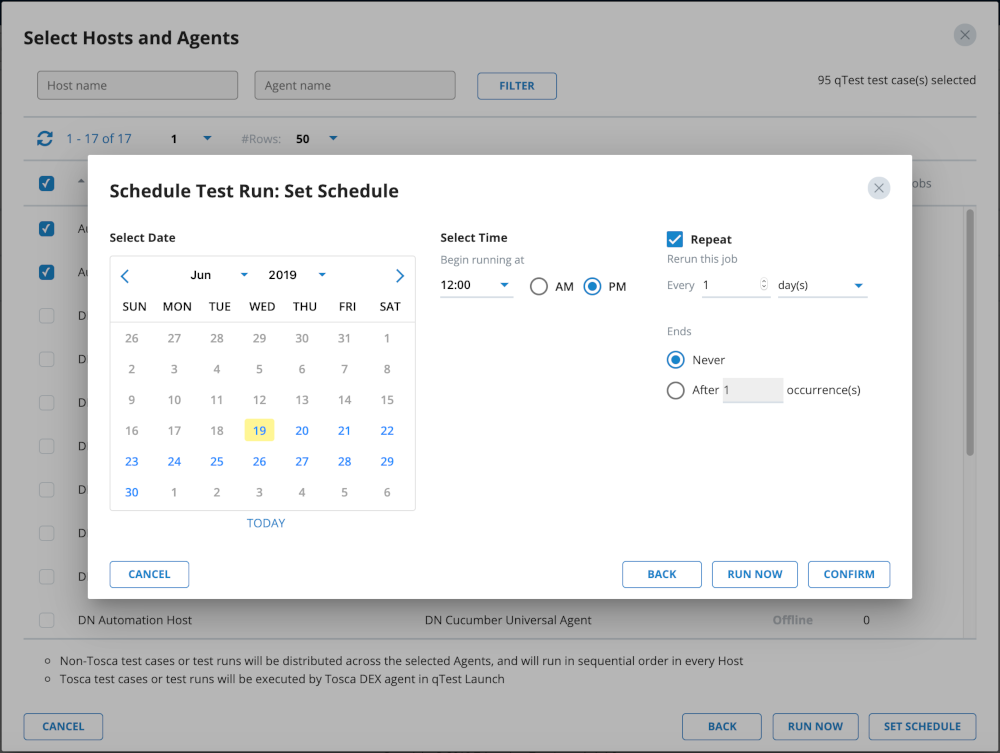
Set Schedule: To schedule for the future
-
In the Schedule Test Run: Set Schedule modal, choose the Select Date on the calendar to schedule the start date. Today's date will be the default.
-
Select Time to begin running the schedule.
-
If you want the schedule to repeat, select the Repeat check box, and choose the repeat cadence from the drop-downs.
-
Select the appropriate End time radio buttons.
-
The number of test cases scheduled to run will display, along with the Host and Agent information.
-
Select Run Now for immediate execution of your schedule, or confirm to begin your schedule on the selected date and time you chose earlier.
-
-
-
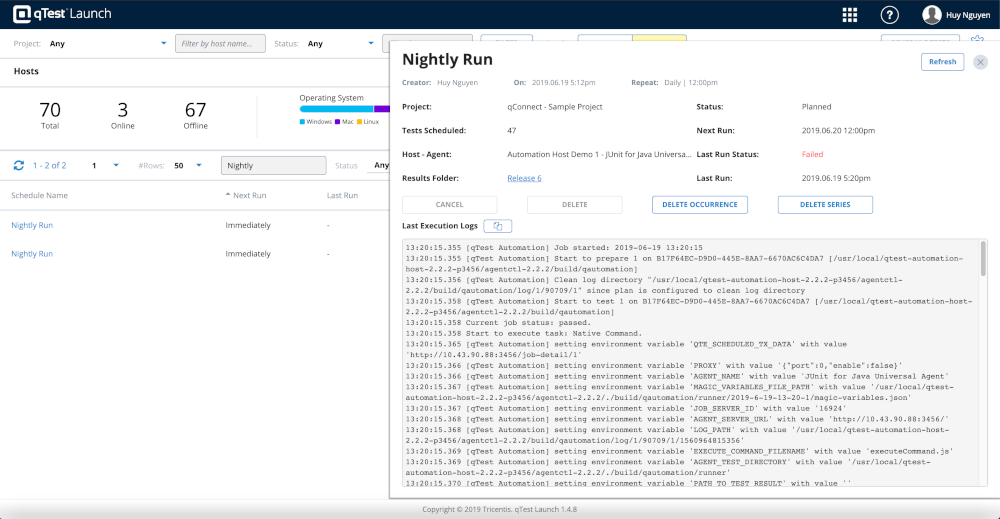
By selecting Run Now on either Select Hosts and Agents or Schedule Test Run screen, or by selecting Confirm on Schedule Test Run screen, you will be presented with the Test Runs Summary screen. This screen shows the detail information of the schedule job. This screen also indicates that the job has been successfully created. Select Done to finish your job scheduling.
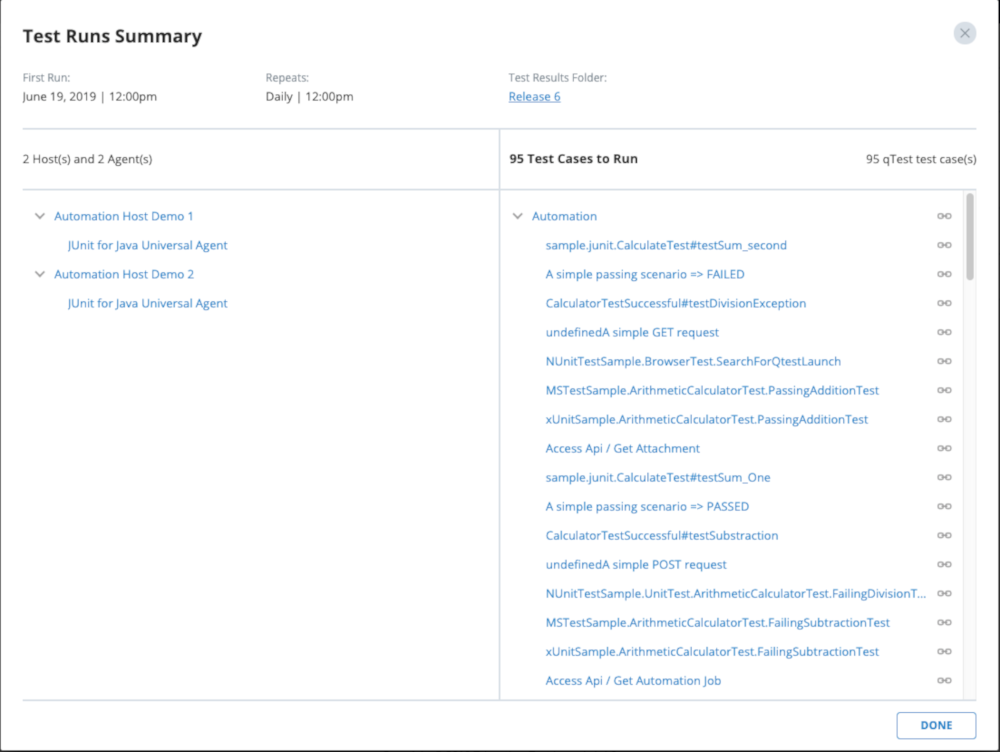
You will be back to the Home page. From there, select the Jobs view option to view the newly created scheduled job. If you follow this example, you'll see the new schedule has created two jobs that are distributed between two hosts.
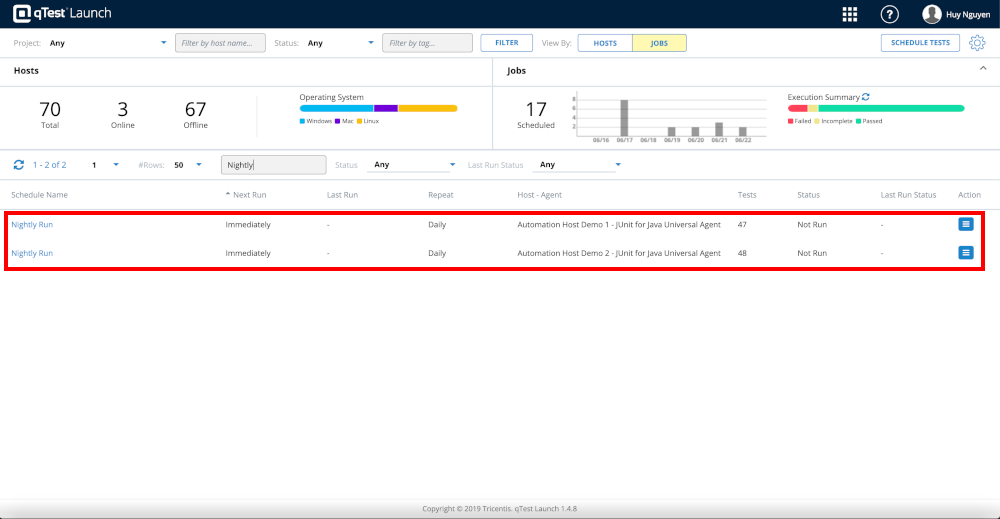
At any point in time, you can select the Job schedule to view its details.
Maintenance Hints
-
You cannot edit a scheduled job. You would need to cancel the currently scheduled job and create a new one.
-
If you do not want a scheduled job to run anymore, simply cancel it.