Using the Defects Module
The Defects module is where users can create, view, and edit Defects that have been created within the internal defect tracker. qTest Manager's internal Defect tracker is simple, yet powerful, allowing you to manage Defects in real-time as they are raised.
External Defects
If your qTest Manager project is integrated with an external tool like Jira, Rally, or VersionOne, the Defects module will disappear within your project. This is because the external Defects reside in the external tool. To easily view any external Defects that are linked to scripted tests in your project, please see these areas in Test Execution.
-
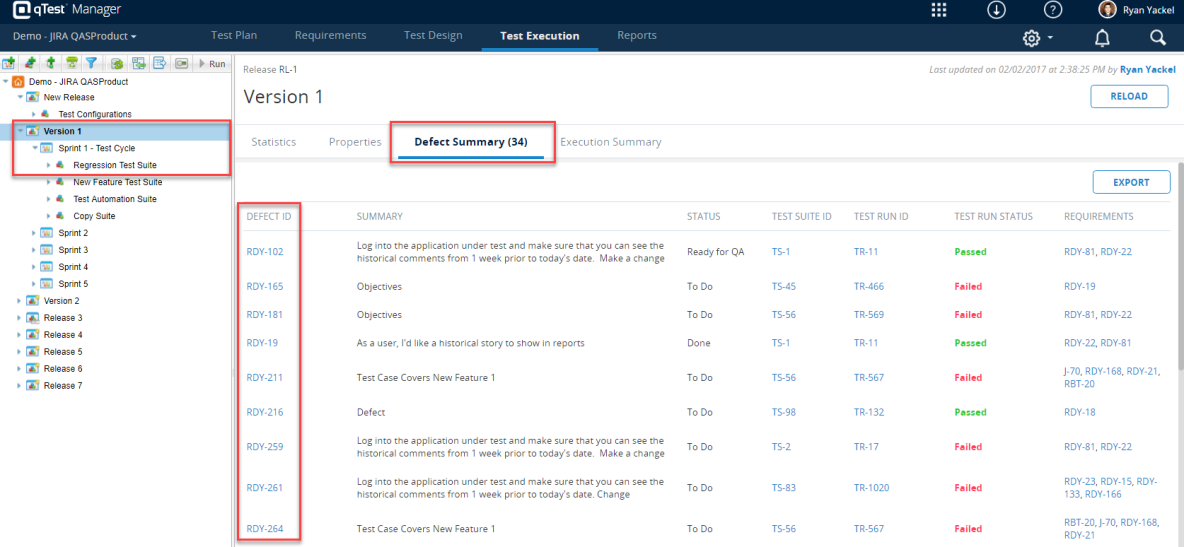
Defects Summary of Release, Test Cycle, and Test Suite
-
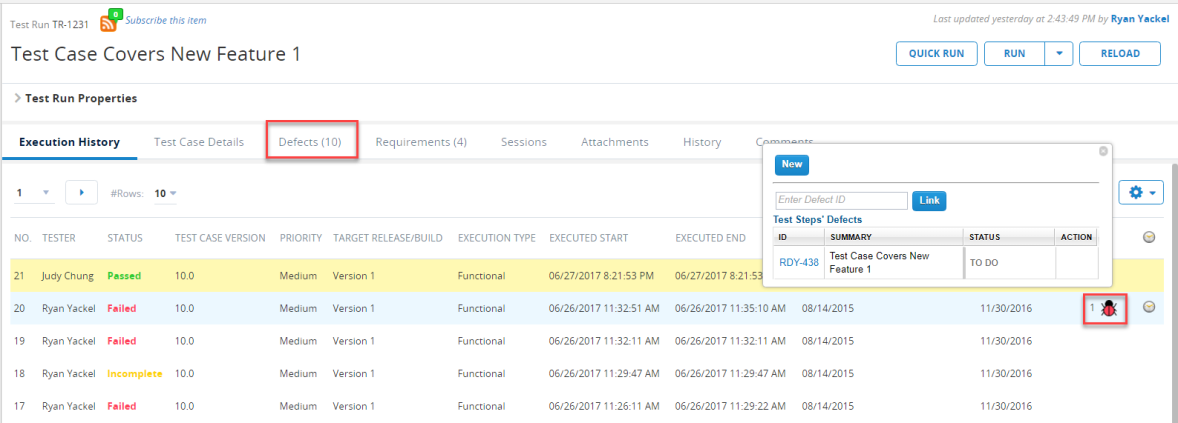
Defects tab of Test Run
Create an Ad-hoc Defect
If you find a Defect outside your scripted testing activities, you can create a new Defect that is not linked to any Test Runs. A Defect created in this manner is considered to be an "ad-hoc" Defect."
To create a new ad-hoc Defect, follow these instructions:
-
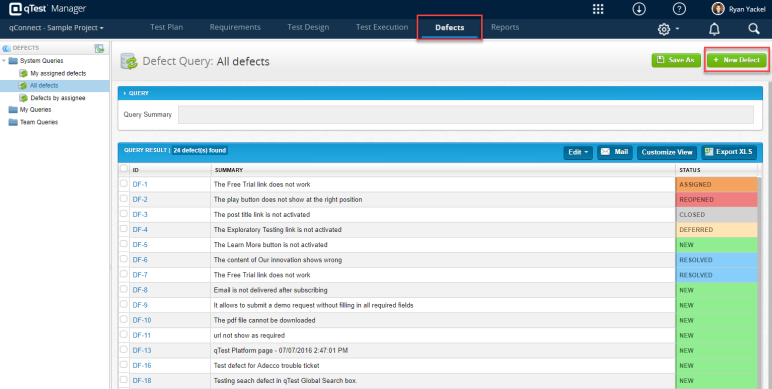
Go to the Defects module.
-
Select the New Defect icon to open a New Defect Submission Form.
-
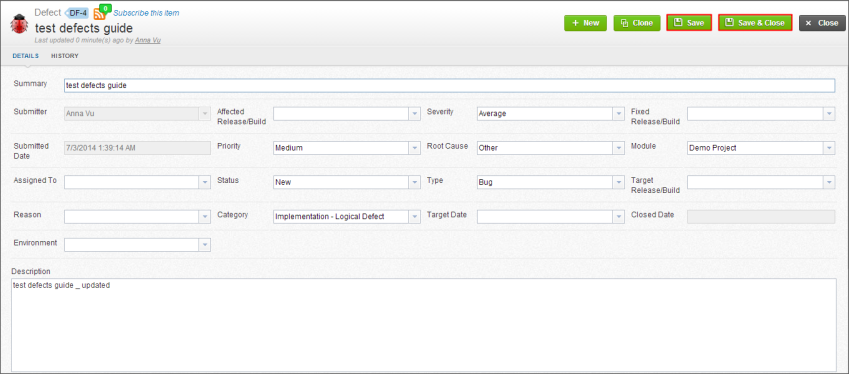
Fill out all required and necessary fields in the Details section.
-
Enter the Description and add Attachments for the Defect.
-
Select the Save icon.
Notes
-
When creating a new Defect, the Comments box is disabled. If you want to comment on a Defect, you can do so on any existing Defect (or refresh the page after you create the Defect).
-
The Linked Test Runs section of a Defect is in "read-only" mode. Any Defects created ad-hoc will not be linked to any Test Runs by default. If you would like to manually link an existing Defect to a Test Run afterward, you can do so from the Test Run page. Then, you will be able to see the linked Test Run information in the Linked Test Runs section of the Defect.
Import New Defects using Excel
To save time, you can import Defects from an Excel spreadsheet. This can be useful to create a number of Defects at one time rather than creating them one-at-a-time through the user interface. This functionality can be used for projects that are not integrated with an external tool like Jira. To create new Defects using Excel, perform the following steps:
-
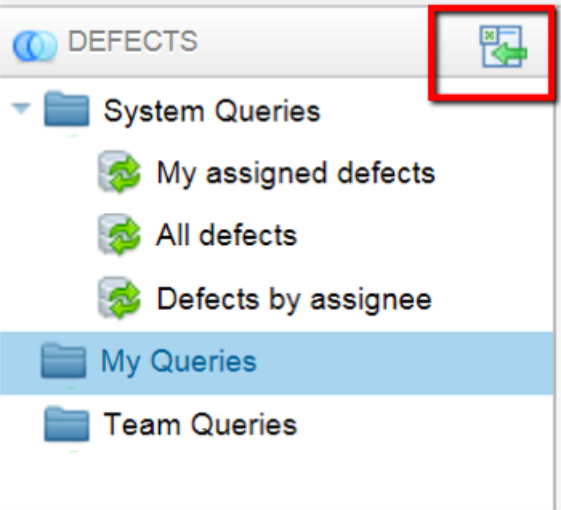
Select the Defects module and select the Import Excel Data icon in the left panel, on the right side of the panel.
-
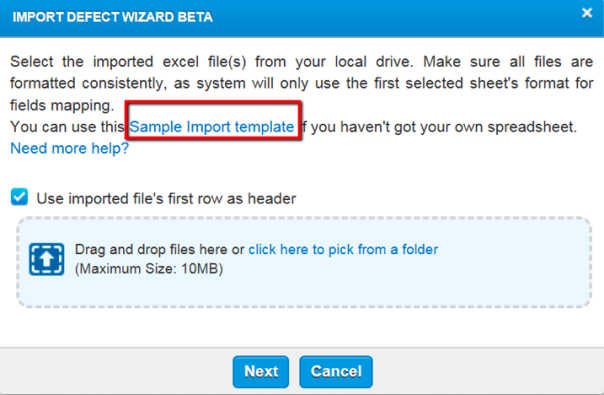
The Import Defect Wizard Beta screen is displayed. Click the Sample Import Template link to download this sample file.
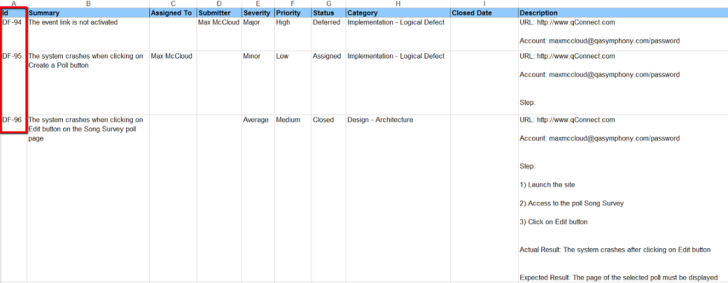
 A sample spreadsheet is displayed that shows you the format your spreadsheet should be in and the fields you can import to qTest Manager. The sample template also provides “dummy” data to show you the type of information you can include in your own spreadsheet.
 -
Using the sample template as a guide, create your own Excel spreadsheet making sure to use the same column names, with one exception. Do not include a column for the Defect ID when importing a new defect. (See Column A in the screenshot shown above.) When you create new Defects using an Excel spreadsheet, qTest Manager will automatically generate a Defect ID for each new Defect.
 If you want to import Defects with custom fields, make sure to first create the custom fields in qTest Manager from Field Settings and then insert the custom fields in your spreadsheet. When finished, save the spreadsheet in your directory.
 -
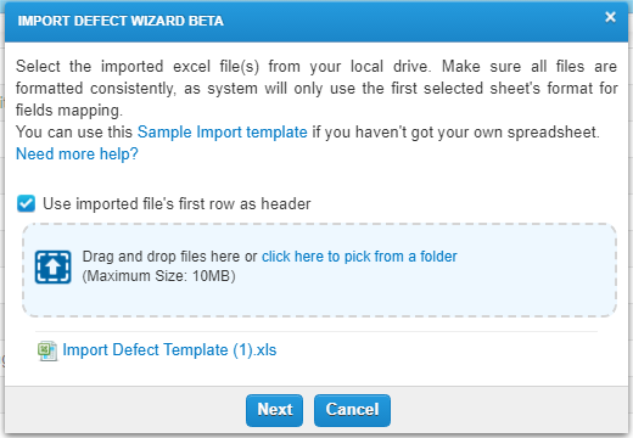
On the Import Defect Wizard Beta screen, click the click here to pick from a folder link and select the applicable Excel file from your local drive.
-
Select the Next icon. The Import Defect Wizard Beta screen is displayed. The column names from your Excel spreadsheet are displayed in the Available fields for mapping area at the top of the screen.
-
Drag and drop each column name from the top area of the page to the Imported Spreadsheets Columns area of the screen to the row in the Imported Spreadsheet’s Columns area next to the corresponding qTest Defect Field. For example, drag and drop the Summary column name in the Available fields for mapping area to the Imported Spreadsheet’s Columns row to the right of the Summary qTest Defect Field.
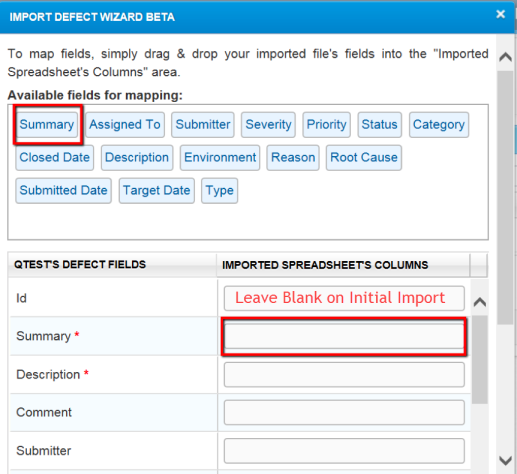 If you do not see the column names you expected at the top of the screen, make sure the top header is the column name on your Excel spreadsheet and ensure the Use imported files first row as header check box is selected.Mapping is required for all qTest Manager Defect fields that are followed by a red asterisk. If you do not wish to have those fields be required for import, simply un-toggle the required radio button in the Field Settings area of your project. If columns mapped to required fields contain no values, the system will generate an error message indicating an unsuccessful import. If columns mapped to non-required fields contain no values, these fields will be imported into qTest Manager with either blank data or default values you define in your project’s Field Settings.
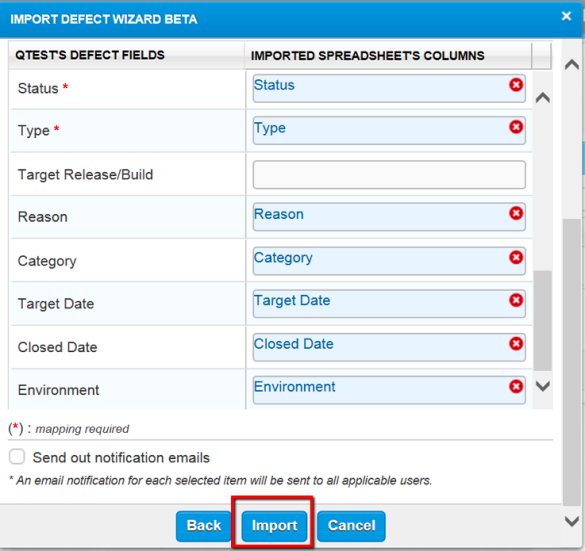
-
When finished mapping all fields, click the Import button. The Defects will be created within qTest Manager with the information from the Excel spreadsheet. qTest Manager will also assign a Defect ID to each defect. A pop-up is displayed which indicates the number of new Defects that have been added to qTest Manager.

-
Select OK.
Modify existing Defects using Excel
The Import Defect Wizard can also be used to update Defects that already exist in qTest Manager. The steps to modify existing Defects are the same as the steps to import new Defects into qTest Manager with two exceptions.
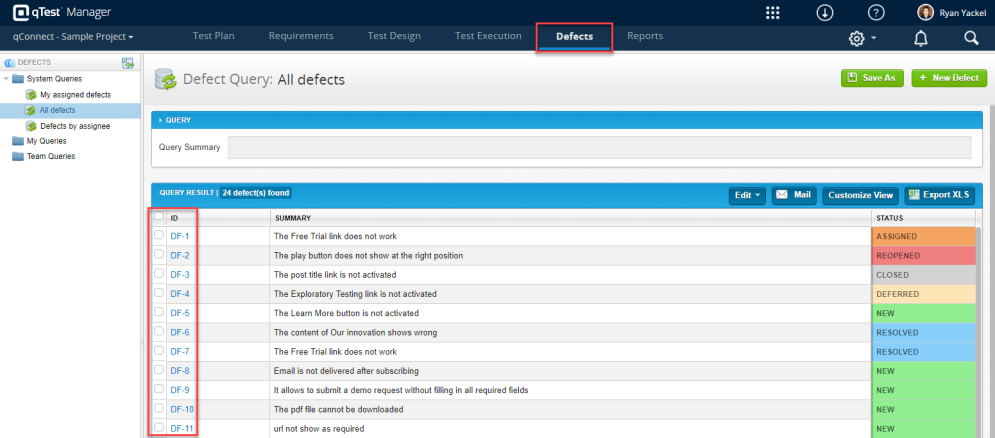
When modifying existing Defects using Excel you must create a column in the Excel spreadsheet for the Defect ID so that when the spreadsheet is imported, qTest applies the updated information to the correct Defects. The Defect ID assigned to each existing defect in the selected project in qTest Manager is displayed in the ID column, as shown in the following screenshot.
Clone a Defect
The Clone Defect function is used to quickly make a copy of an existing Defect. To use this function, you must have both the Create Defects and Edit Defects permissions.
-
Open an existing Defect you want to copy and select the Clone icon. The details of the original Defect are copied to the cloned Defect.
Cloned defects have a status of ‘New’. In addition, Test Runs associated with the original Defect, Attachments, Comments, and History are not copied from the original Defect to the cloned Defect.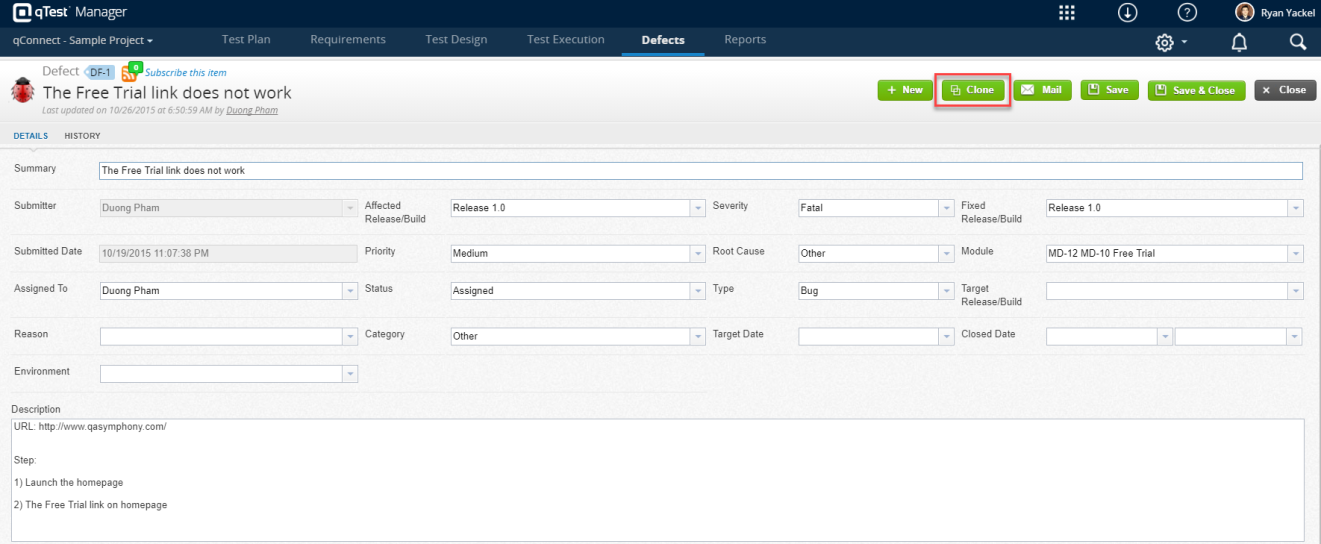
-
Edit any details in the cloned Defect, as needed.
-
Click Save to save the cloned Defect.