Automation Settings
To submit automated execution results back to qTest Manager, make sure to activate the Automation Integration feature within your qTest Manager project. This step is required regardless of which automation integration offerings you choose to leverage:
-
APIs and SDKs
-
Test Automation Scheduling: TestNG, JUnit, Cucumber, JBehave, UFT.
-
CI Integration: Jenkins and Bamboo
- Tosca Integration
Access the Automation Settings page
To activate Automation Integration Settings for a qTest Project, follow these steps:
-
Select the Gear icon in the top header.
-
In the drop-down select Automation Settings.
-
The Automation Settings page displays. Select the Integration tab.
-
In the Automation Integration section, switch on the Activation Status using the toggle.
-
Turning on the Automation Integration enables a Convert icon on a Test Case that allows you to convert a manual Test Case to an automation Test Case.
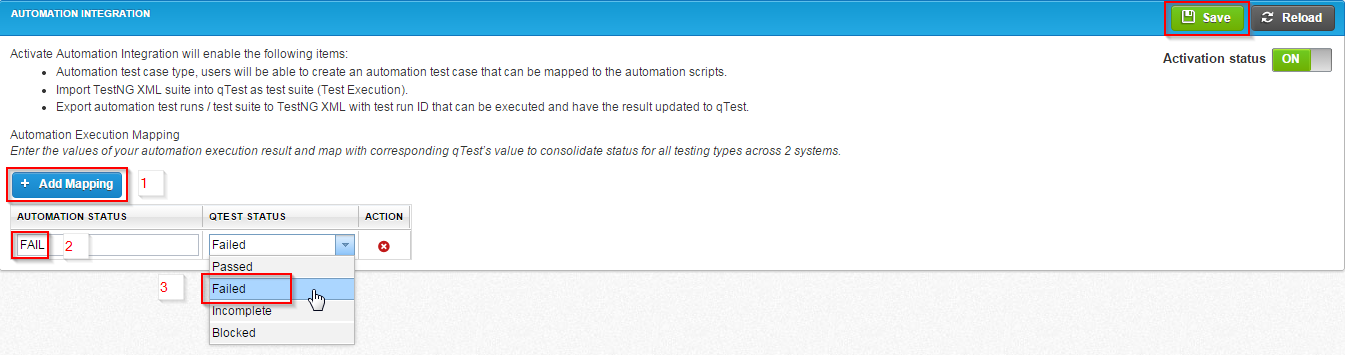
Map Automation Status to Test Run Status
After Automation Integration is turned on for your project, make sure to map your Automation Statuses to qTest Manager statuses:
-
In the Automation Settings page, select + Add Mapping.
-
Input the Automation Status in the left column.
-
Select one of qTest Manager's statuses in the right column.
-
You can select the Delete icon to delete an existing mapping.
-
Select Save.
Example of Mapping Statuses for UFT Test Automation Scheduling
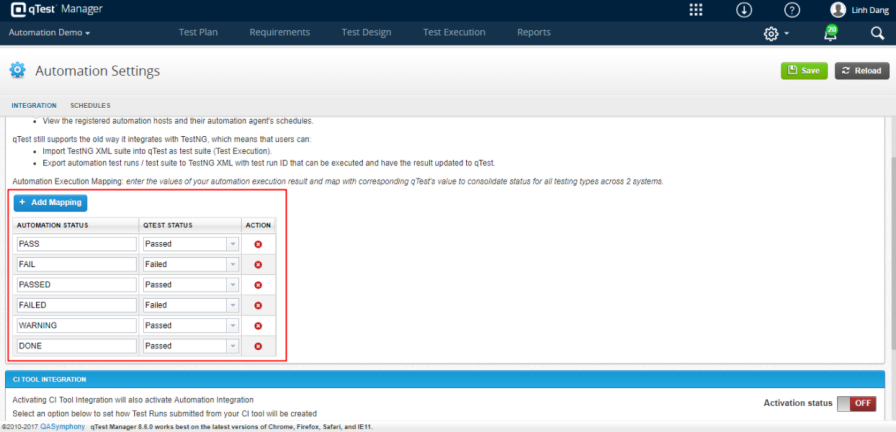
PASSED, FAILED, DONE, and WARNING are UFT's default values and will report to the Test Step level. PASS and FAIL are the agent values and will report to Test Log level following this logic:
-
If there is no FAILED step, the Test Log is PASS
-
Otherwise, the Test Log is FAIL
Tosca Integration
For information about integrating qTest and Tricentis Tosca, refer to Configure Tosca integration settings .