Field Settings
Each project in qTest Manager has its own set of fields and Field Settings.
There are three different categories of fields:
-
A System Field is a default field created by qTest Manager.
-
A Custom Field is a field created by the user for a given project.
-
An Inherited Field is a field passed down from another artifact.
The Field Settings function can be used to modify existing System Fields, create Custom Fields and edit the field display order.
Field Management Overview Video
Access Field Settings
To access Field Settings, follow these steps:
-
Select your Project.
-
Select the Gear icon and select Field Settings in the drop-down menu.
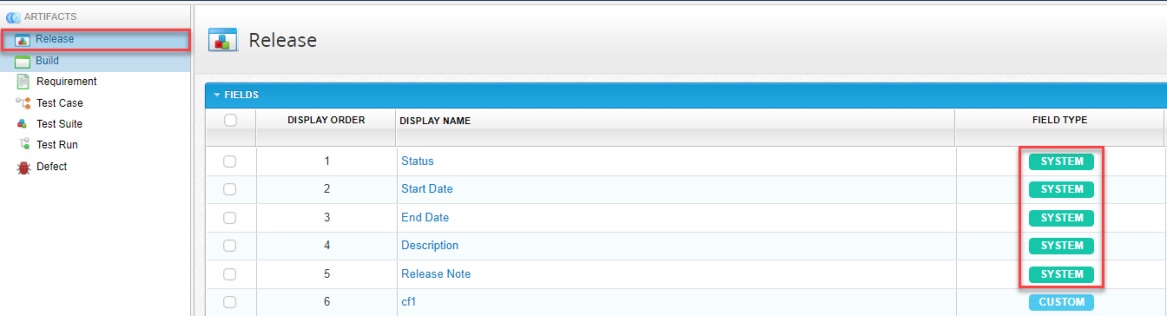
The Release page displays.
In the screenshot shown below, the five fields for the Release object are System Fields.
In the following example, when we select the Test Run artifact from the left panel. The Environment field is inherited:
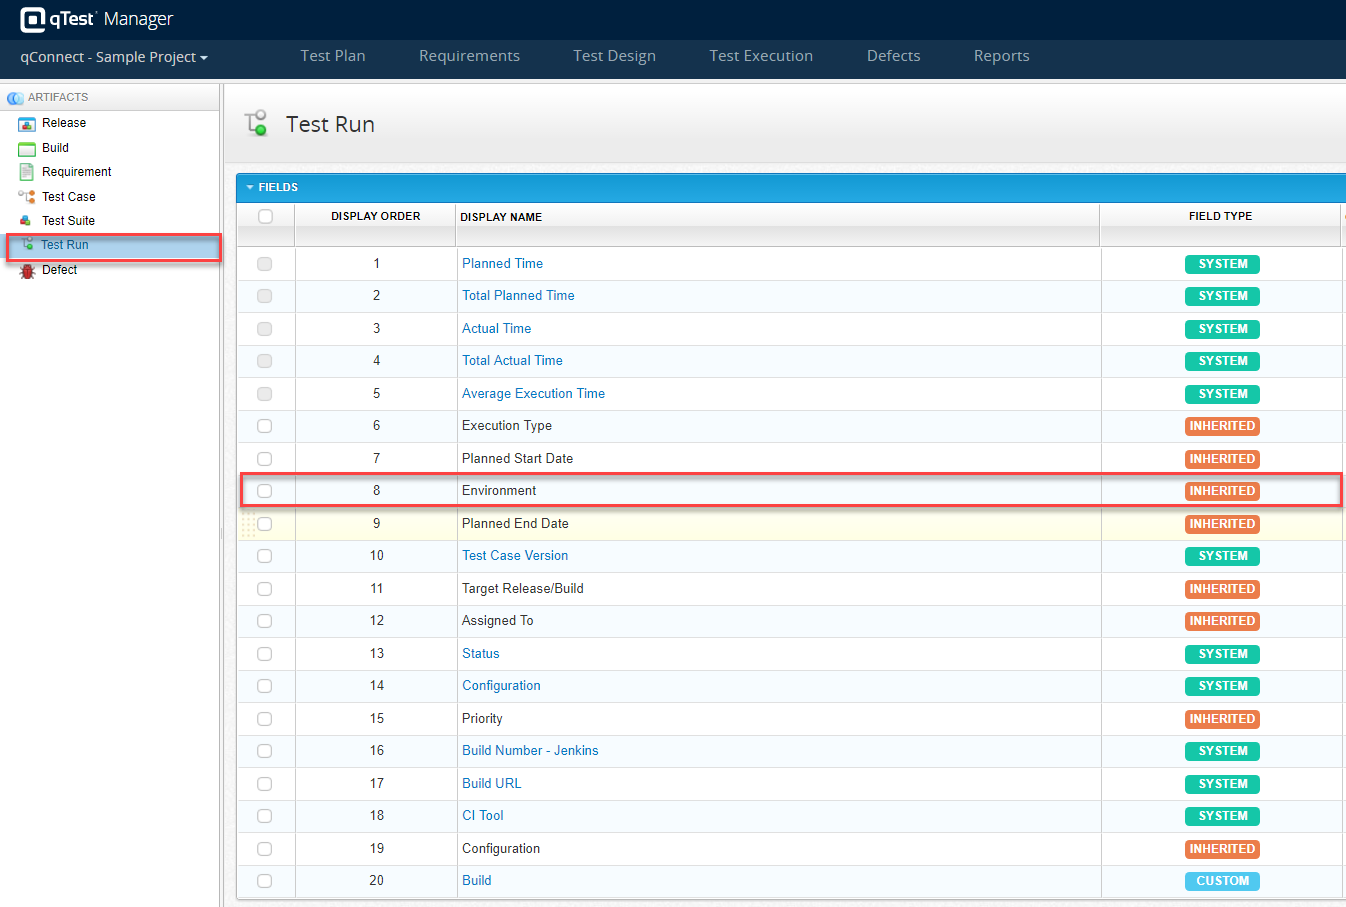
The Environment Field is passed down from the Test Suite to the Test Run. Therefore, when you add a Test Run to a Test Suite, the Test Run will inherit the Environment value from the Test Suite. "Environment" is a special System Field that automatically updates in Test Runs and Defectsas an inherited field when you add/edit its values in the Test Suite.
Modify a System Field
System Fields are provided by default to help users define basic information for creating qTest Manager objects. Accordingly, users cannot delete System Fields. However, all System Field Display Names are editable. qTest Manager allows a maximum of 100 characters
To modify an existing System Field, perform the following steps:
-
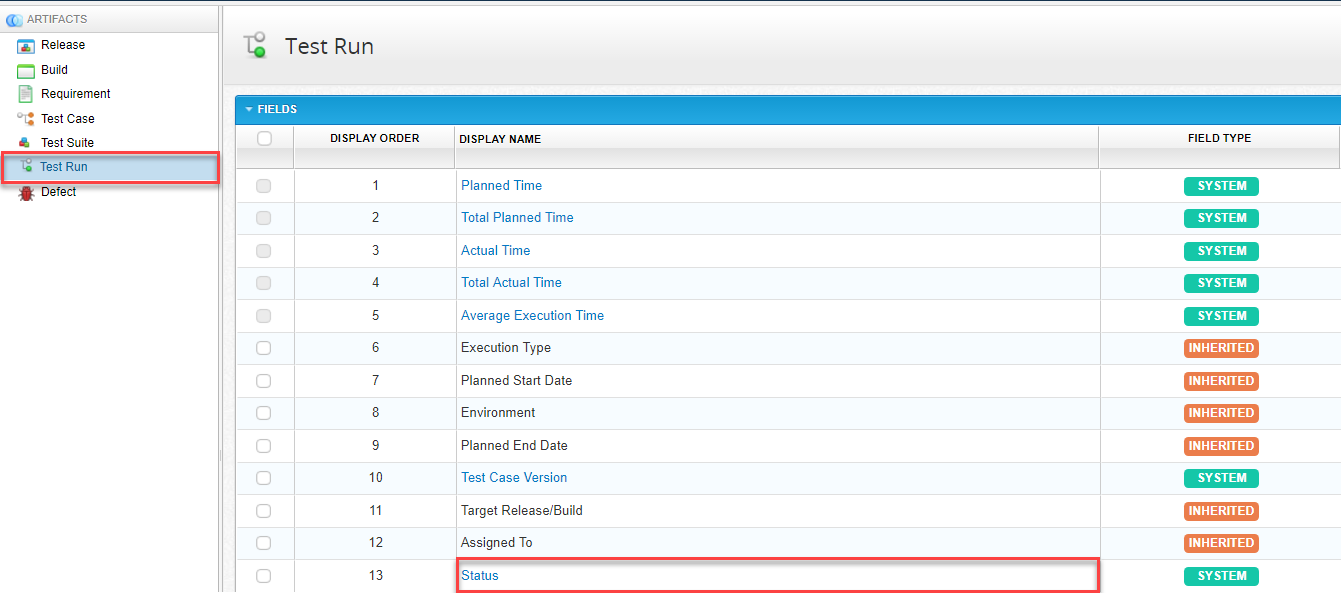
Select the applicable artifact in the left navigation panel. Each artifact (such as, Release, Test Case, or Test Run) has its own set of fields. In this example, we will select the Test Run artifact.
-
Select the System Field that you want to modify by selecting the field in the Display Name column.
-
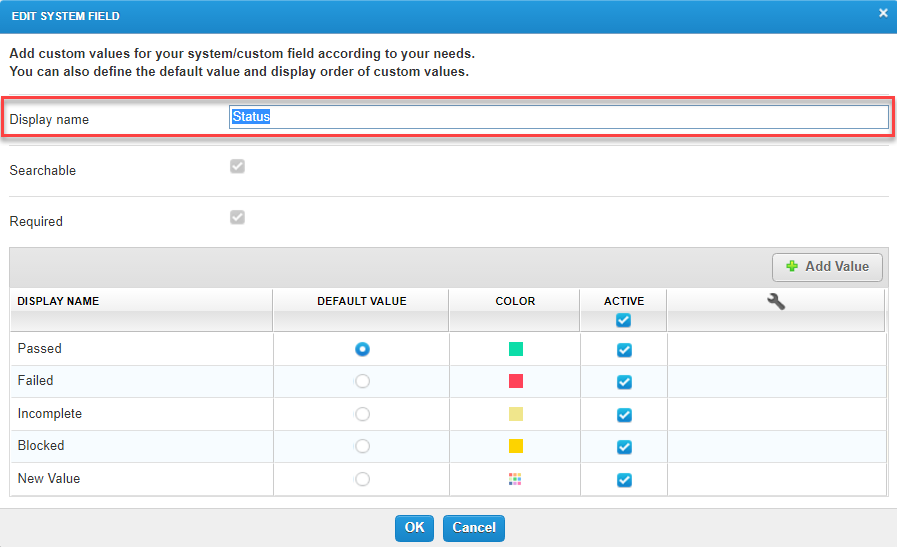
The Edit System Field page displays. In the Display Name field, change the field’s display name.
-
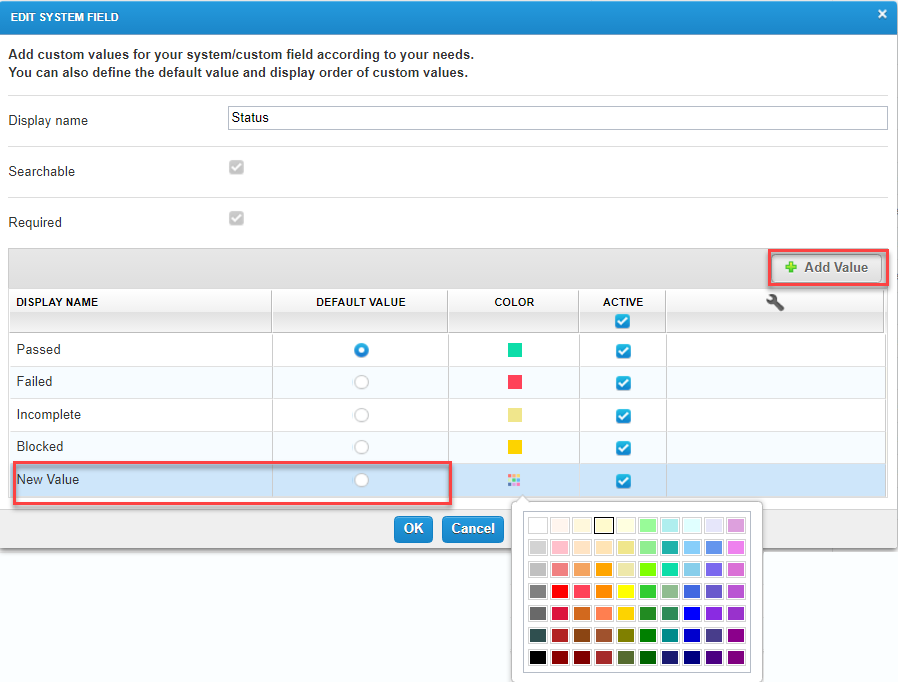
To add values, select Add Value. Enter the New Value name in the Display Name column.
-
Select a color to associate with your value.
You can also change the color associated with an existing value by selecting the Colorfield for the value and selecting a different color. -
If you want to hide a value for this field, you can make the value inactive by clearing the check box in the field for that value.
-
Select OK.
Notes
-
Rich Text Editor, Text area, orText box: Display Name and Default Value are editable.
-
Combo box: Display Name and Values are editable.
-
You can customize all Status fields of Requirements, Test Cases, Test Runs, and Defects.
-
You can map colors to Statuses of Test Runs and Defects in their Field Settings.
-
-
Some combo-box System Fields will automatically populate values, and you can ONLY set their Default Values, including Affected Release/Build, Fixed Release/Build, Module, and Target Release/Build in Defects.
-
For Target Release/Build in Test Suite, you can only change Display Name.
-
-
User-list, Auto-filled, and Date Picker: Only the Display Name is editable. For the field Target Date of Defect, you can set Current Date or a Default Value for Target Date.
Hide Fields from the Display
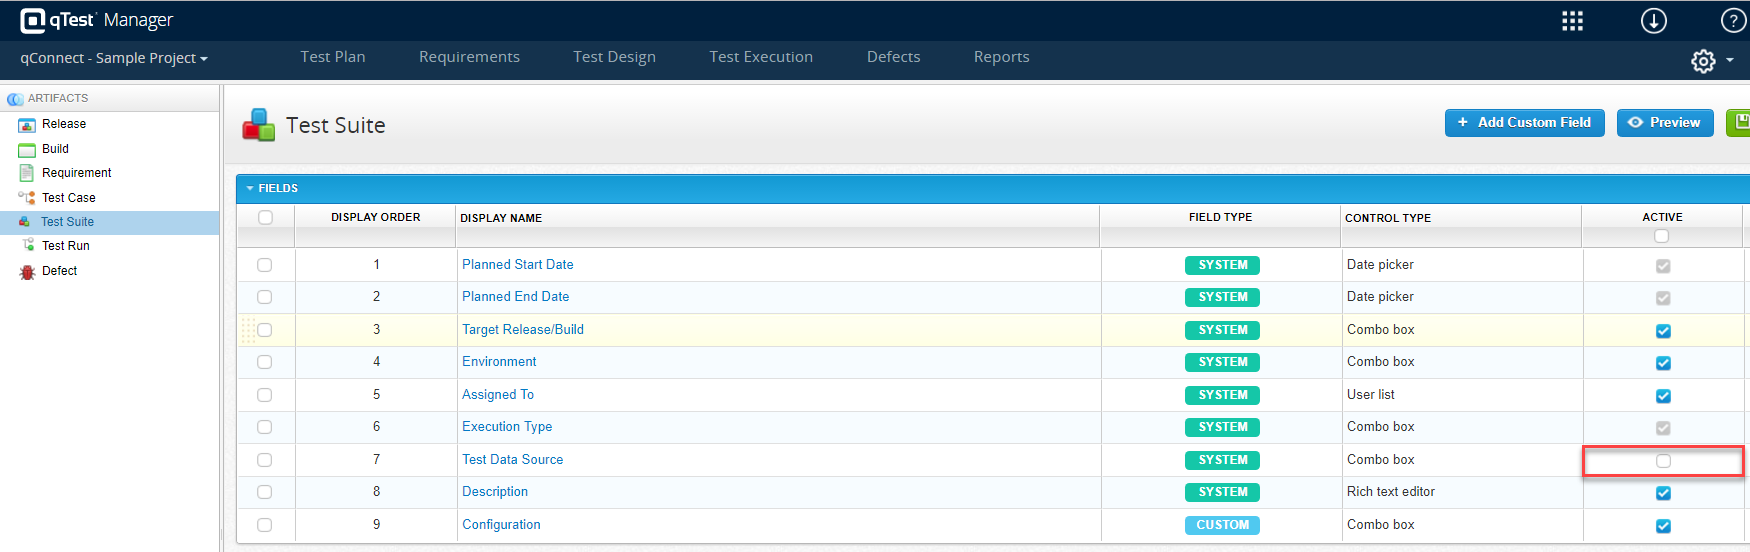
Some fields, such as the Configuration field, can be hidden from the display. Some fields, such as the Status field, are required fields and cannot be hidden. To hide a field for a given artifact, you can make the field inactive by clearing the check box in the Active field for that field.
Reorder a Field Display
To reorder the field display, perform the following steps:
-
Select the applicable artifact in the left navigation panel. In this example, the Test Suite artifact is selected.
The Test Suite page displays.
-
In the Action column (wrench icon), you can select between either a down or up arrow. To move a field down, select the down arrow.To move a field up, select the up arrow.

-
Select the Preview icon to review your work. The Preview Test Suite fields page displays.
-
Select Back. The Test Suite page displays. Select Save.
Add Custom Fields
-
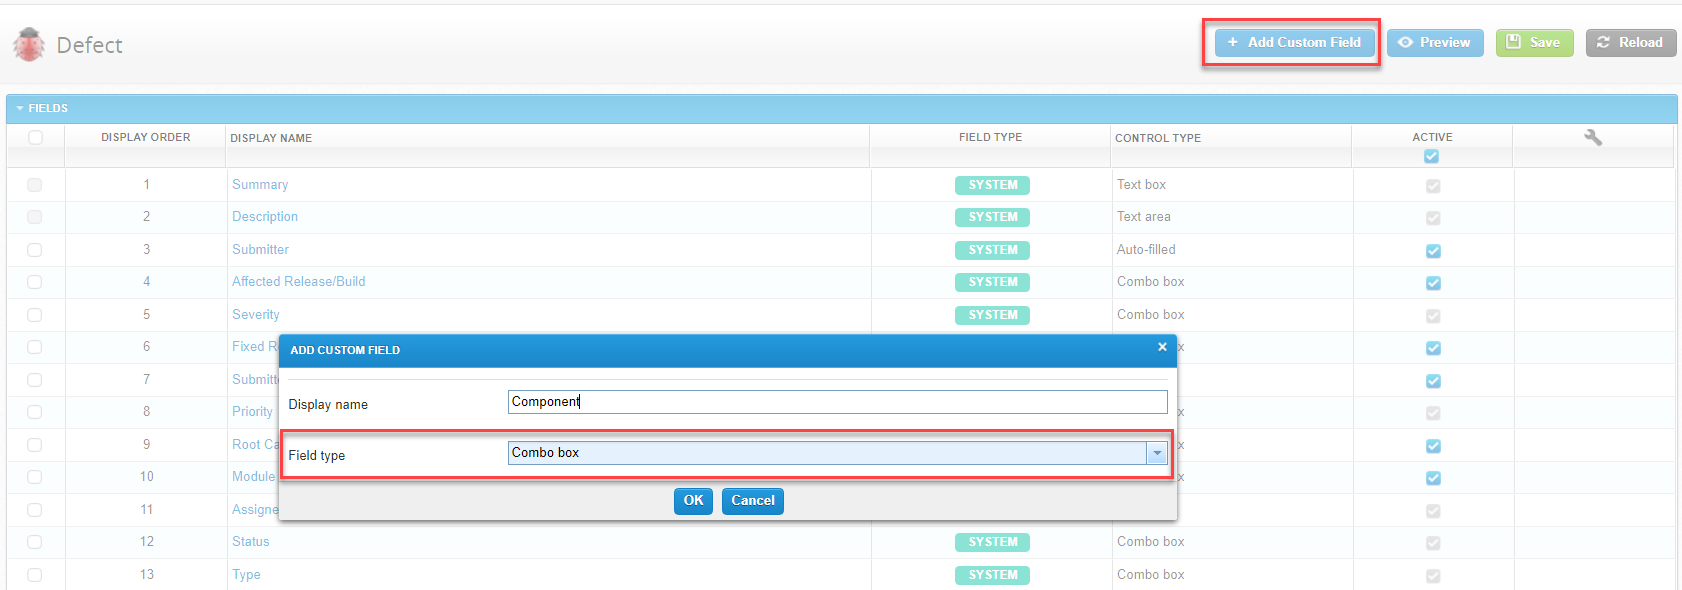
Select an artifact from the left navigation panel. In this example, we will select the Defect artifact. The Defect page displays.
-
Select Add Custom Field. The Add Custom Field dialog displays.
-
Enter your Display Name and choose a Field Type.
-
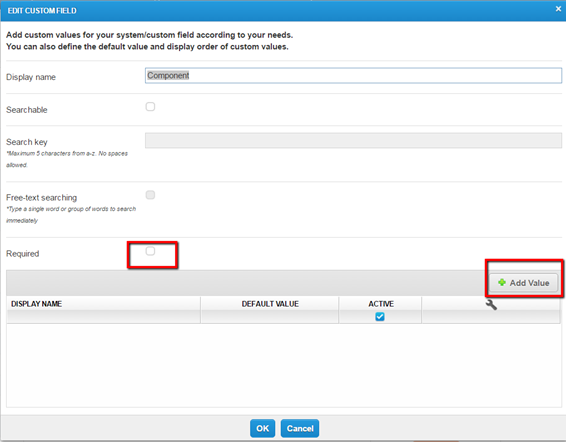
Select OK. The Edit Custom Field dialog displays.
-
Select the Required check box to make the field required. In this example, a tester must fill in this custom field to save the Defect.
-
For certain field types, such as Combo box, Multi selection combo box, and Checklist, you can define the values for the field. To do so, follow these steps:
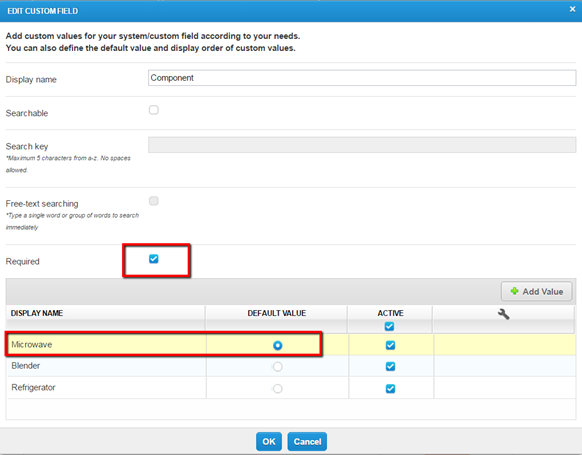
- Select Add Value: In the Display Name field, add a value associated with this field. Repeat this step as needed to add all the values associated with the field.
-
Optionally, select the Default Value radio button to set a default value. In the example shown in the following screenshot, when a tester creates a new Defect, this required field will auto-populate with ‘Microwave’ as the value.
-
Select OK to save your changes.
Description of Each Field Type
| Field Type | Description |
|---|---|
| Rich text editor | Multiple lines text input area integrated with an editing toolbar, maximum input characters allowed |
| Text box | Single line text input area without editing toolbar, maximum input characters allowed = 300. |
| Text area | Multiple lines text input area without editing toolbar, maximum input characters allowed = 500 |
| Combo box | Drop-down lists combined with a single-line editable textbox, allowing users to enter text to search. |
| User list | Control that gets all active users directly from database and display on the screen for selection. Only one user can be selected at a time. |
| Auto-filled | Label-style fields that automatically display some information such as usernames, date and time, etc. |
| Date picker | Control that allows users to select a specific date |
Inherited Fields
Inherited Fields are fields that are automatically inherited from one artifact to another in your qTest Field Settings. There are several conditions surrounding artifacts' field inheritance:
-
Certain System fields can be inherited.
-
Any Custom Field made in the Test Suite will populate in the Test Run artifact. There is no way to change this behavior.
-
The Test Run's Environment field is inherited from Test Suite, and Defect's Environment field is inherited from Test Run.
Notes
-
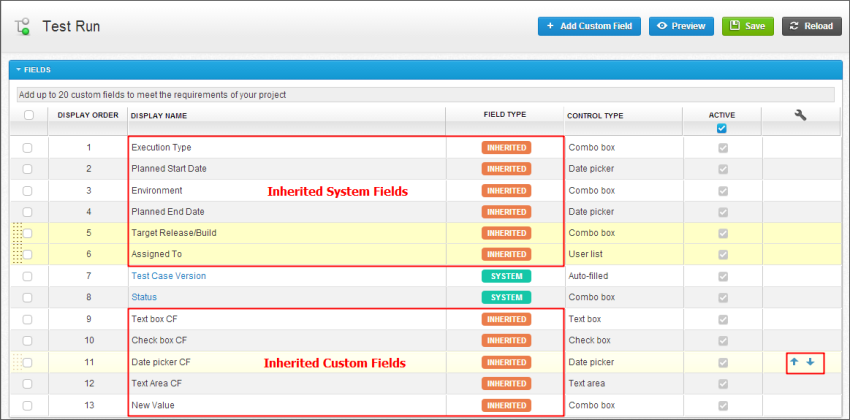
You can only reorder Inherited Fields display in Test Run's Field Settings using the Move Up and Down arrows.
-
You cannot edit the properties of Inherited System Fields.
-
In order to edit Inherited Custom Fields, you must edit the source field. For example, if your Test Run inherited a Custom Field from your Test Suite, you would have to edit that Custom Field in Test Suite and those changes would then take place in the Inherited field in Test Run.
The same applies to removing an Inherited Custom Field -
Currently, there is no option to hide Inherited Custom Fields from Test Suite in Test Run.