Point your Scenario Plug-in to your Data Center Region for Jira Server
qTest SaaS customers integrated with Jira Server need to manually point their Scenario plug-in to their associated data center region.
If you have Scenario Server, your Git provider, or Jira hosted on your own server, note the following regarding network calls and the flow of data between the three applications.
-
Traffic must flow bi-directionally to and from the Scenario Server to Jira.
-
For on-premise Git providers, traffic must be open for inbound requests from the Scenario Server.
Data Center URL Options
Below are the valid base URL options for the Scenario add-on. These are determined by the current AWS Regions/Availability Zones.
-
US-East/Virginia: https://scenario-v2-0.qas-labs.com (current Atlassian marketplace default)
-
US East/Ohio: http://scenario-v2-0-13.qtestnet.com/
-
US-West/Oregon: https://scenario-v2-0-7.qtestnet.com
-
EU-West/Ireland: https://scenario-v2-0-6.qtestnet.com
-
APAC/Sydney: https://scenario-v2-0-8.qtestnet.com/
Configure Scenario
-
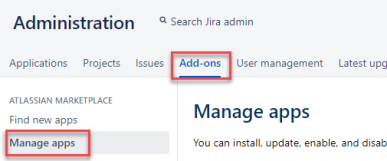
In your Jira Server application, select the Administration icon in the top toolbar and select Add-ons from the dropdown menu.

-
From the Add-ons page, select Manage apps in the left-hand column (this is assuming you have already installed the Scenario plug-in).

-
Locate and expand the qTest Scenario-BDD for Jira add-on and select Configure.

-
The Plug-in Configuration information loads. Verify that the base URL displayed in the Scenario Server Base URL field matches your desired data center. If it does not, update the base URL accordingly.
Example: If you want to target the US West/Oregon region, then the Server URL displayed should be https://scenario-v2-0-7.qtestnet.com.
-
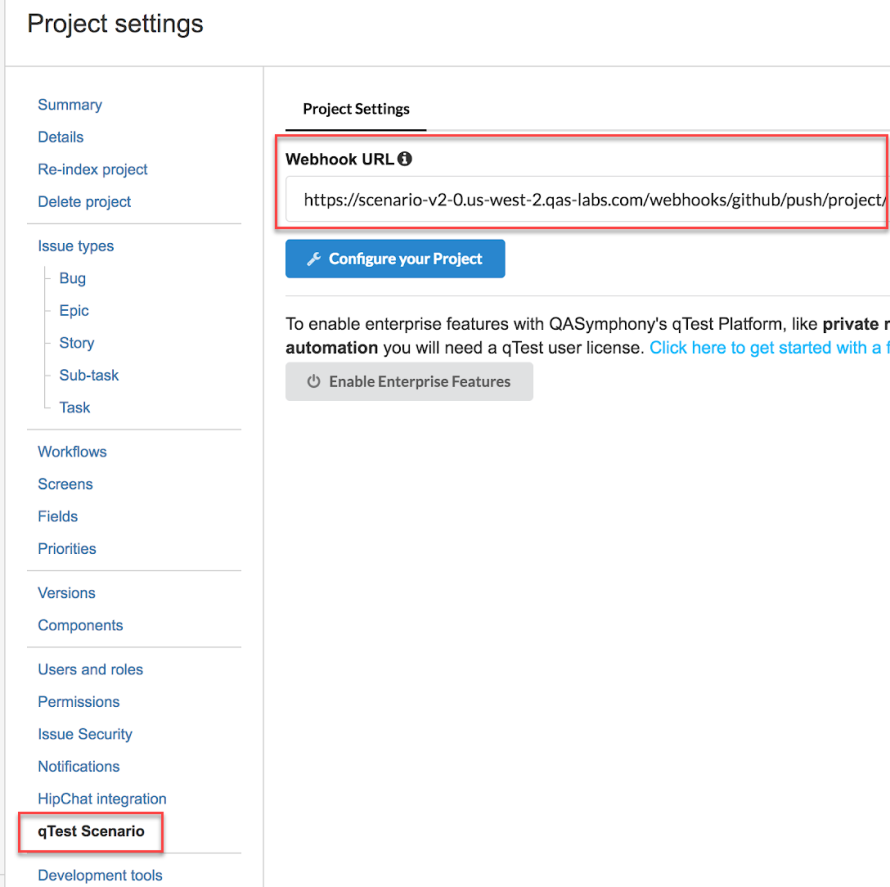
Your Scenario Project Settings in Jira will now display the appropriate data center in the Webhook URL field.

Refer to Amazon Server Elastic IP Addresses Master List for a list of Amazon server elastic IP addresses, should you need to configure your firewall to accept remote requests from Scenario.