Single Sign-On (SSO) Integration with Microsoft Azure Active Directory
This feature allows users to log in to qTest with their SSO credentials. As a site administrator, you can configure your SSO integration with Microsoft Azure Active Directory using the instructions below. Once you have configured the SSO integration, you can enable SSO log in for qTest users.
Update the SSL certificate before configuring your IdP
qTest Manager SSO Service Provider (SP) uses an x509 certificate to sign authentication requests and decrypt SAML assertions. As part of qTest Manager's security process, we update our SP certificate every three years in August. qTest Manager will notify you when the certificate is due to expire.
If you are setting up an SSO integration for the first time for either an SaaS or OnPremises 9.7.2 or later environment, refer to Update qTest Manager SSO Service Provider Certificate on SSO IdP for information on updating the SSL certificate before configuring your IdP.
Configure qTest to your Identity Provider (IdP)
To add your qTest instance as an application on your IdP, you need to:
Locate the URLs and attributes needed to configure the SAML application
The qTest SSO URLs and attributes are used when configuring your IdP in the Configure your IdP with Azure Active Directory and Configure your SSO Integration in qTest sections.
-
In qTest, hover your cursor over your username. Then select Administration on the menu that appears.
-
Click the Authentication tab.
-
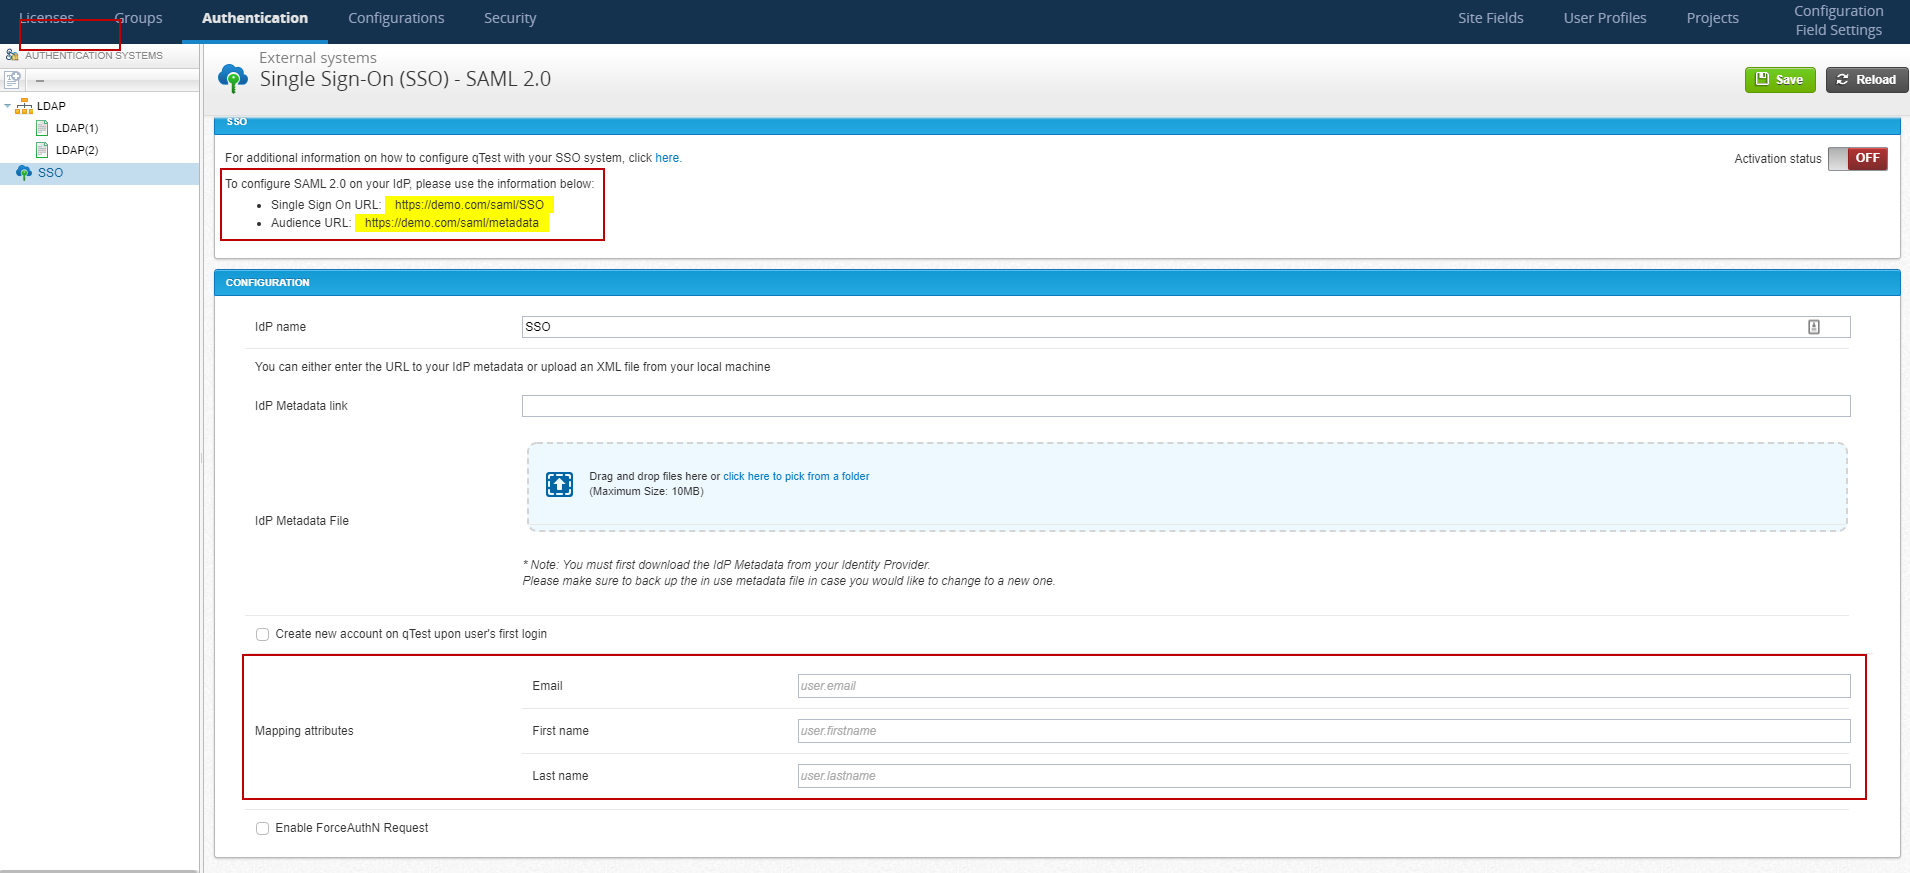
In the Authentication Systems panel, select SSO.
The External systems - Single Sign-On (SSO) screen appears. The URLs required for configuring your IdP are highlighted in the SSO section. The attributes needed for mapping are located in the Configuration section.
Configure your IdP with Azure Active Directory
Configuring your IdP with Azure Active Directory includes the following steps.
-
Enter your qTest SSO URLs to configure the basic SAML settings in Azure.
Configure basic SAML settings in Azure
-
In a separate browser window, access your Azure instance. Then navigate using the following options: Enterprise Applications > New Application > Create Your Own Application > Single Sign-On > SAML.

-
In the Basic SAML Configuration section, click the Edit icon to display a screen where you can enter the URLs you obtained in the Locate the URLs and attributes needed to configure the SAML application section.

-
In the Identifier (Entity ID) field, enter your Audience URL.
-
In the Reply URL (Assertion Consumer Service URL) field, enter your Single Sign On URL.
Map qTest attributes to Azure attributes
-
Access the User Attributes & Claims screen.
 For information about using Microsoft Azure Active Directory and accessing the User Attributes & Claims screen, refer to the Microsoft support site.
 -
On the User Attributes & Claims screen, click Add new claim to map the Azure attributes to the qTest attributes.
-
In the Name field, enter the attribute value.
-
Delete the entry in the Namespace field.
-
In the Source field, select the appropriate source attribute.
Repeat this step for each attribute, including the user's email address, first name, and last name.

-
Assign users in Azure
-
Assign a user to Administrator roles in Azure.
For information on assigning administrator and non-administrator roles to users with Azure Active Directory, refer to the Microsoft support site. -
Assign a user or a group to an Enterprise App in the Azure Active Directory.
For information on assigning users to an app in Azure Active Directory, refer to the Microsoft support site.
Download Azure metadata
-
Download the metadata by selecting the Metadata XML link to download and copy it to the qTest server folder.
For example: c:\Users\johnsmith\Downloads\qTest.xml
Configure your SSO Integration in qTest
-
In qTest, hover your cursor over your username. Then select Administration on the menu that appears.
-
Click the Authentication tab.
-
In the Authentication Systems panel, select SSO.
The External systems - Single Sign-On (SSO) screen appears.
-
(Optional) In the IdP name field, enter a name for your IdP.
-
In the IdP Metadata link field, enter a URL to your IdP metadata. Alternatively, you can upload a metadata XML file from your local machine.
-
Select the Create new account on qTest upon user's first login check box to allow users to create their qTest accounts. This option can help save time and effort by preventing the need to invite or update users.
-
Click the Activation status button to turn the activation status to ON.
-
Click Save to save the configuration.
Run the Service Provider with the SP-Initiated SSO
-
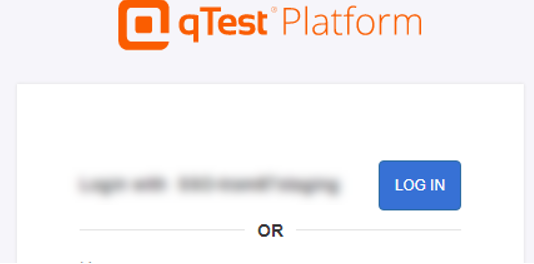
On the qTest log in page, click the SSO log in option.
-
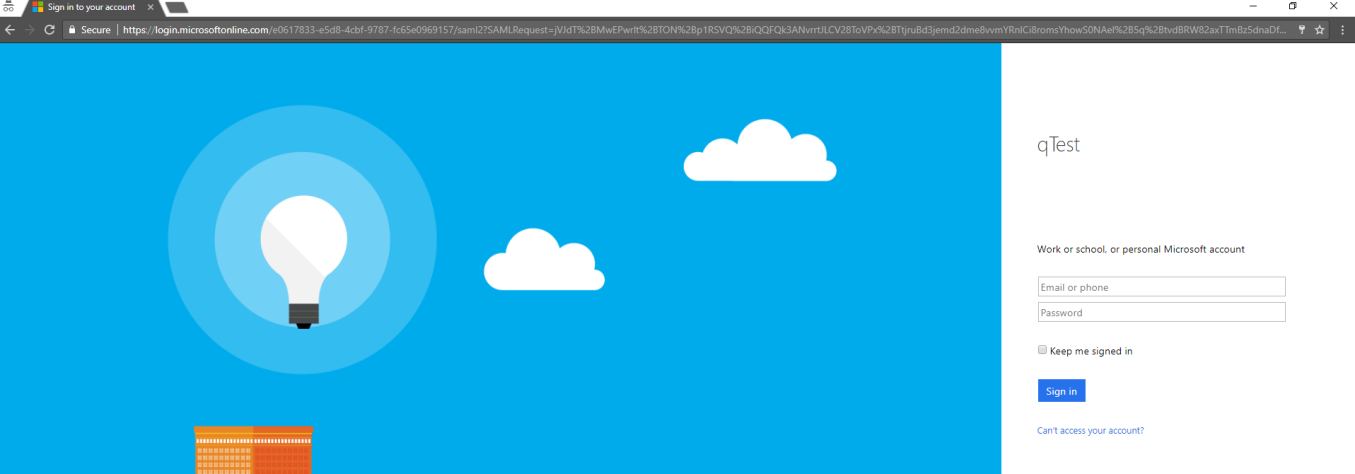
The Azure Identity Provider Log in screen appears. Log in using your Azure Active Directory credentials.
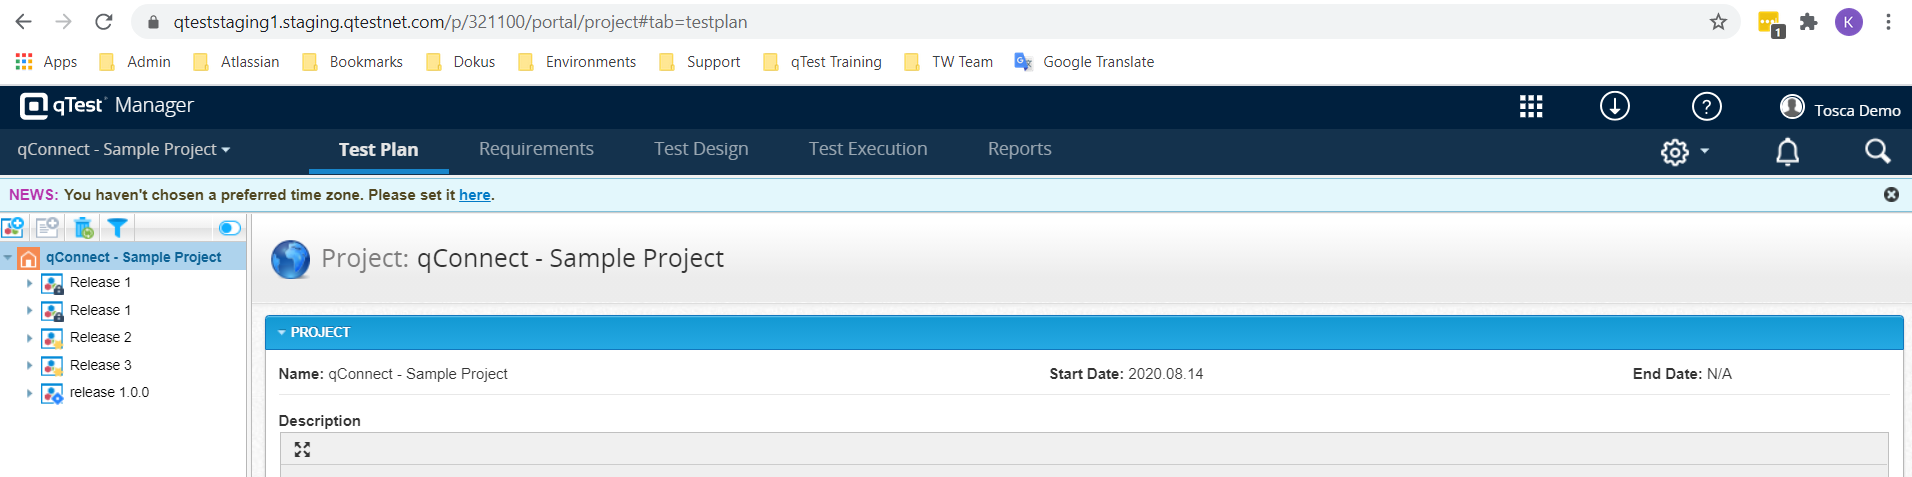
The default screen for the qTest Service Provider appears.
Enable SSO Log in for a qTest User
To log in to qTest Manager with SSO, a user will need an SSO account and an associated qTest account. There are two ways to enable SSO log in for a qTest user: update an existing user manually or allow users to create associated qTest Manager accounts upon their first log in.
(Suggested method) Allow SSO users to create associated qTest Manager accounts on first log in
-
In your IdP, grant users permission to access qTest Manager.
-
In qTest Manager, hover your cursor over your username. Then select Administration on the menu that appears.
-
Click the Authentication tab.
-
In the Authentication Systems panel, select SSO.
The External systems - Single Sign-On (SSO) screen appears.
-
In the Configuration section, select the Create new account on qTest upon user's first login check box.
When users log in to qTest Manager for the first time, they will then need to create an associated qTest Manager account.
Update an existing qTest user
-
In qTest, hover your cursor over your username. Then select Administration on the menu that appears.
-
Click the Licenses tab.
-
In the Authentication System column for the user you want to update, click the Edit icon
 .
. -
In the drop-down menu that appears, select SSO.
-
In the SSO Username field for the user, enter the user's corresponding SSO username.
The user will receive an email notifying them of the authentication change.