Security
The Security tab is used to configure advanced security rules for qTest Manager. These configurations are optional and can be disabled at any time. Only users that are assigned an Administrator profile can access the Security tab.
To access the Security tab, hover your cursor over your username at the top of qTest Manager. Select Administration on the menu that appears. Then click the Security tab.
The following sections are available on the Security screen.
Account Login Management
The Account Login Management section is used to manage the qTest account password criteria for your organization.

The following options are available for configuring password management.
| Option | Description |
|---|---|
| Users are requested to update password after __ days |
Select this check box to enable options for updating passwords. Enter the number of days that users can use a password for before the password must be changed. For example, enter 75 to indicate that a user can use the same password for 75 days before needing to create a new password. |
| Unchanged passwords will be invalid and accounts will be deactivated after __ days |
Enter the number of days after which accounts with unchanged passwords should be deactivated. For example, enter 90 to indicate that a user has 90 days to change their password after being initially requested to before their account is deactivated. This field is only available if the Users are requested to update password after __ days check box is selected. |
| User can reuse an old password after __ distinct passwords |
Enter the number of distinct passwords a user must have before they can reuse a previously used password. For example, enter 8 to indicate that a user must have eight unique passwords before they can use a password that they used before those eight passwords. This field is only available if the Users are requested to update password after __ days check box is selected. |
| Maximum # of login attempts with invalid password is __ times |
Select this check box to enable a maximum number of log in attempts. Enter the number of times a user can attempt to log in with an invalid password before their account is deactivated. For example, enter 10 to indicate that a user can attempt to log in 10 times before the account is deactivated for security purposes. |
Authentication Settings
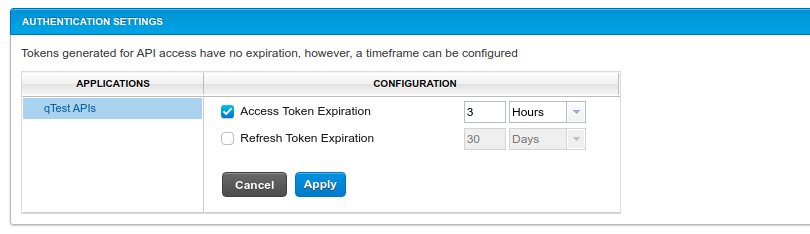
This section is used to configure expiration timeouts for the API Access Token. This option is used with OAuth 2.0 for qTest APIs. Select the Access Token Expiration check box and enter a time to indicate that the Access Token should expire after the set time.
For example, select the Access Token Expiration check box to enable an expiration time for the Access Token. Then enter 3 and select Hours to indicate that the Access Token should expire after three hours.
When an expiration time is configured for the Access Token, a Refresh Token appears on the in the API & SDK section of the Download qTest Resources screen. The Refresh Token is used to renew the Access Token. You can configure an additional expiration time for the Refresh Token using the Refresh Token Expiration check box.
Password Policy
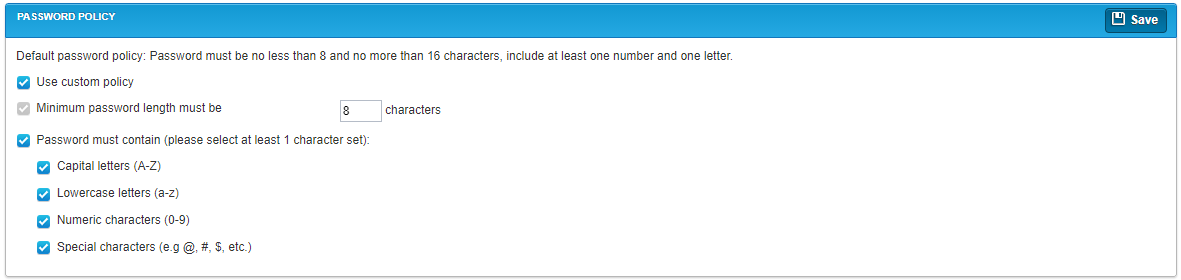
As a Site Administrator, you can configure additional qTest password requirements, such as the minimum password length and whether passwords should include special characters. By default, qTest passwords must be between 8 and 16 characters and must include at least one number and one letter.
The following options are available for configuring password requirements.
| Option | Description |
|---|---|
| Use custom policy | Select this check box to indicate that you want to configure specific qTest password requirements rather than using the default requirements. |
| Minimum password length must be __ characters |
Enter the minimum number of characters that qTest passwords must contain. Passwords must contain at least eight characters. This check box is automatically selected. |
| Password must contain | Select this check box to define specific types of characters that passwords must include. Select the option check boxes to set the corresponding requirements. For example, select the Lowercase letters check box to indicate that passwords must include at least one lowercase letter. |
Audit Log
qTest Manager automatically logs user and site administrator events related to security, such as failed user log in attempts and events related to user groups. Using the Audit Log section, you can select the range of dates to export and the events that should be included in the log. Audit logs are retained for one year. Click Export to export the Audit Log as a .csv file.
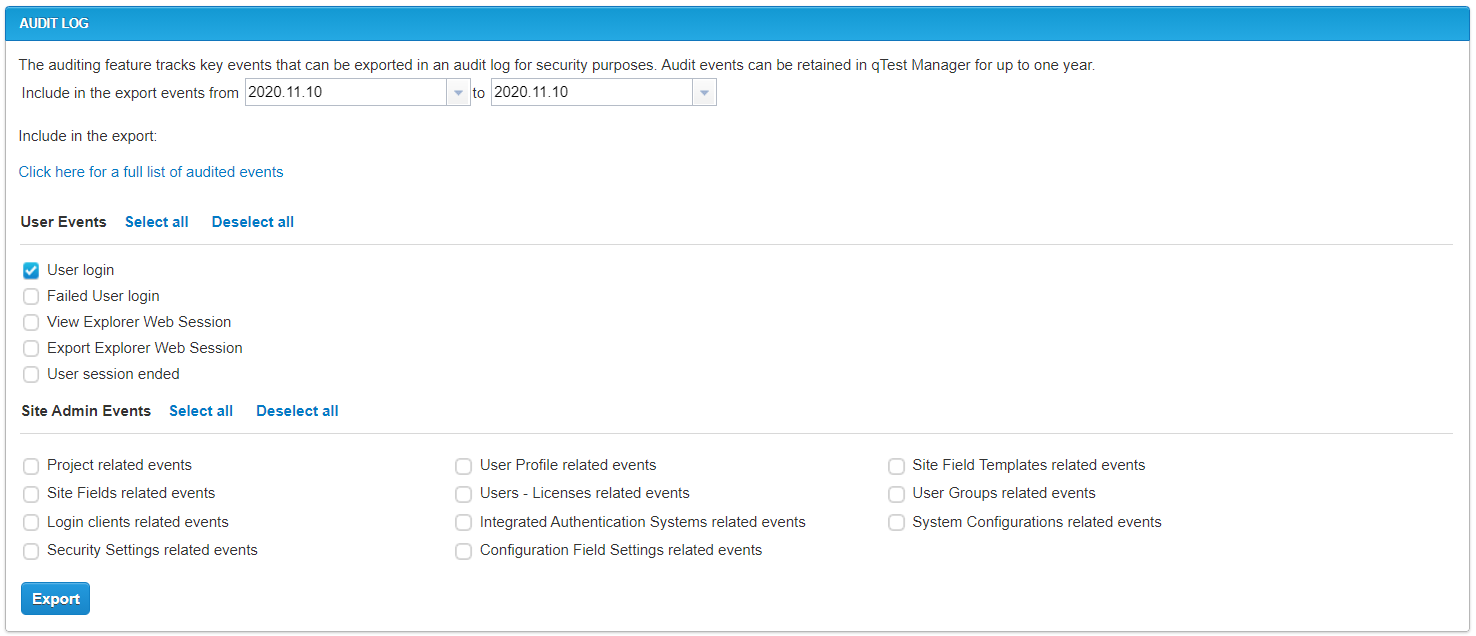
The Audit Log includes the events you select, as well as the following information for each event.
-
The time stamp
-
The application code, such as Manager or Explorer
-
The associated username (external username, authentication system)
-
The event category
-
The source IP address of the associated user
-
The log in source, such as Web or API, and log in details
Mail Recipients Management
The Mail Recipients Management section is used to define external email addresses and domain names that qTest Manager is allowed to send reports and other data to. Email addresses that are already associated with qTest users on the Licenses tab do not need to be entered here. Use a semicolon (;) to separate each email address.

Outbound Request Properties
The Outbound Request Properties section is used to specify custom HTTP headers and values at the site level for all outbound requests from qTest to Tosca. These headers and values can be used to include specific information in outbound requests from qTest to Tosca.

To add a new header, click Add Custom Header. A new row appears in the headers table, where you can enter a header name in the Header column and a corresponding value in the Value column. Click Save to save the new header. To delete a header, click the Delete icon ![]() in the Action column.
in the Action column.
Private Key
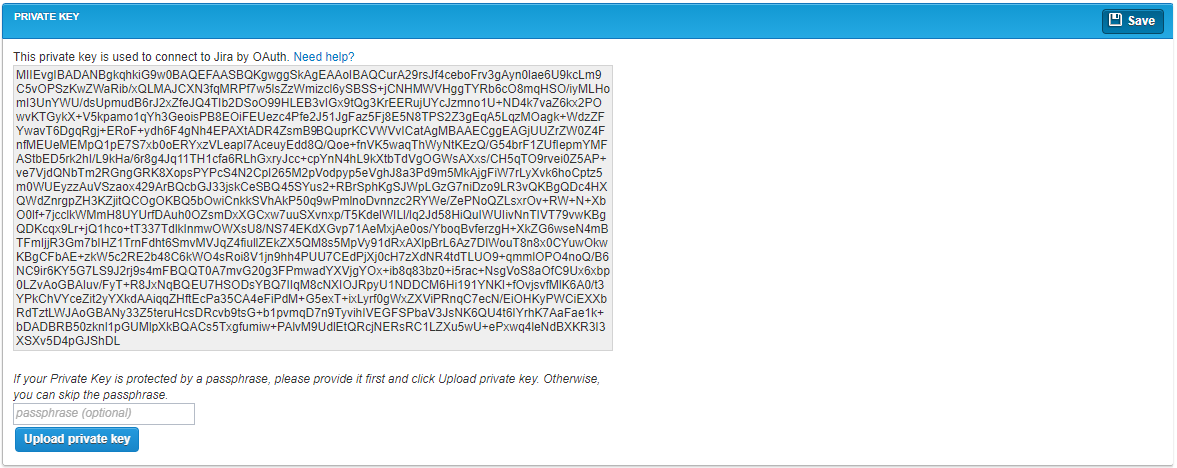
The Private Key section is used to define a private key for use with Jira OAuth. This is not a required field if you are using a public key for your Jira OAuth connection. The private key displayed here is read only. The qTest default private key displays upon initial load of the screen, if you are already using Jira OAuth.
Private keys must be in PKCS #8 format. If you are using a non-PKCS #8 key, you will need to convert it using OpenSSL with the following command. The [server.key] value is the name of your non-PKCS #8 key, and the [server-pkcs8.key] value is the name of the converted key.
openssl pkcs8 -topk8 -in [server.key] -out [server-pkcs8.key] –nocryptTo upload a private key:
-
If your private key is passphrase protected, enter the passphrase in the Passphrase field.
If your private key is not passphrase protected, proceed to step 2.
-
Click Upload private key.
-
Select the file containing your private key. Your private key must be in OpenSSL format.
Your private key will replace the qTest default private key.
The private key will display decrypted in the UI but will display encrypted within your database. -
Click Save.
Best Practices for Security Configurations
This article provides the information you might require based on your organization's security needs.
Password Configuration
Password configurations are established in the Security tab of qTest Administration. The default password lifetime is 75 days.
Refer to Account Login Management for information on qTest password configurations. Note, advanced password configurations are available starting with qTest 9.4, which was released late December 2018.
Single Sign-On Configurations
You need to configure your qTest instance for use with Security Assertion Markup Language (SAML) to set up two-factor authentication for your organization.
If you need more controls in your password configurations and want to bypass the qTest Manager password configuration, please use the Single Sign-On Configuration option.
Refer to Single Sign-On (SSO) Integration with Microsoft Azure Active Directory for instructions on how to configure SAML on the SSO integration page.
Session Timeouts
The default session timeout is 60 minutes, however, you can manage your session timeouts. Refer to Managing Active Sessions for instructions.
ALM Integrations
The links below provide information on how to establish your ALM integrations with qTest.
-
Jira Integration
If you are using Jira OAuth, you can use a private key if you choose. Refer to Private Key for more information about Private Key management.
If you are using APIs to integrate with your ALMs, refer to How to use Interactive API Documentation to understand how to use our interactive API documentation.
Incident Response
In the event, you should need to end an active user’s session and reset their password, you can do so within qTest Manager. These instructions will explain the process:
-
Managing Active Sessions-note, you will need the Global Permission of Manage Client Users to end an active session.
-
Reset a Password
Resetting a user's password will reset all of that user's tokens.