Run Reconciliation tests manually
The sections below provide an overview of the following topics:
Add the TestStep
To add the Reconciliation: Row by Row Comparison TestStep, select a BI folder and click the ![]() Row by Row Comparison icon in the dynamic menu BI Testing.
Row by Row Comparison icon in the dynamic menu BI Testing.
Alternatively, right-click a BI folder and select Tosca BI->Reconciliation: Row by Row Comparison from the context menu or press CTRL+W, CTRL+C.
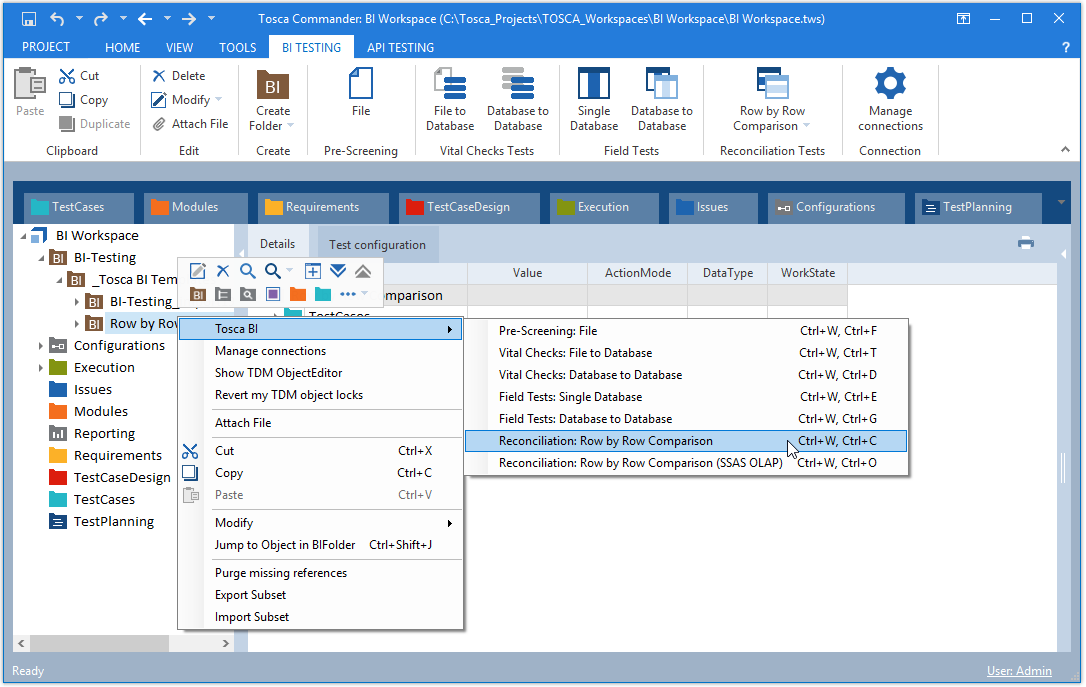
Access the Reconciliation: Row by Row Comparison test through the context menu
Tosca automatically adds a TestCase folder including a Reconciliation: Row by Row Comparison TestStep.
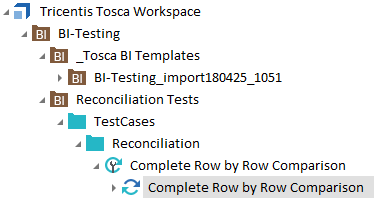
Added Complete row by row comparison TestStep
Use the Row by Row Comparison Module
You can also use the Row by Row Comparison Module provided in the Tosca BI Modules And Samples.tsu subset. It is located in the subset import folder under Modules->BI - DWH/BigData.
If you have more than one Row by Row Comparison Module in your workspace, you need to specify which Module to use. Otherwise, the system uses the first Module it finds. For information on how to do so, see chapter "Specify which Row by Row Comparison Module to use in Reconciliation tests".
Populate the TestStep
Populate the TestStep, so Tosca BI can retrieve the necessary data from source and target. To ensure that your reconciliation tests run at maximum efficiency, follow the steps below:
-
In Tosca Commander, select the Complete Row by Row Comparison TestStep.
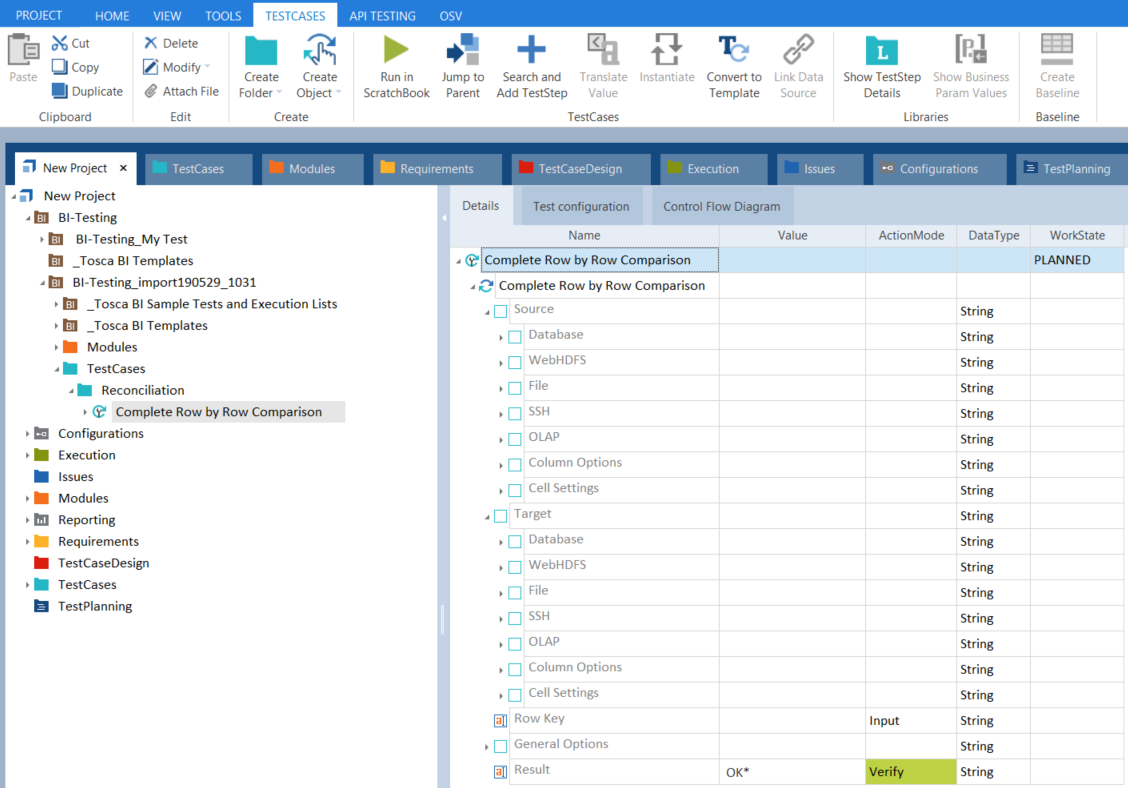
Row by Row Comparison TestStep
-
Use the TestStepValues Source and Target to connect to the source and target of your data:

|
If you have empty rows in the source types File, SSH, WebHDFS, or OLAP, Tosca BI ignores them and continues to process the file to the end. |
In addition to the TestStepValues of the source and target system, Reconciliation tests also offer General Options, Column Options, Cell Settings, and additional TestStepValues for row by row comparisons.
-
Define your RowKey to identify a row uniquely.
-
In the TestStep, navigate to General Options->Error Reporting.
-
To determine whether the system should check both source and target for duplicates, set the relevant ValueRange for Report Unmatched Target Rows.
Set ValueRange to True if you want to check both source and target. Set it to False if you only want to check the data source for duplicates.
-
To determine the number of errors the system accepts before it aborts the comparison, set a numeric value for Max Errors.
-
-
Adjust your source SQL statement to account for any formatting discrepancies between the two data sources.
If you have a Tosca BI license, you can use the SQL Editor to create and test SQL statements before you run your TestCase. -
Define how Tosca BI should handle mismatches as described in chapter "Generate error reports".
Execute the test
To execute your TestStep, select Run from the context menu.
If you have used the Row by Row Comparison Module, drag and drop the populated Module onto a TestCase folder as described in chapter "Creating TestSteps from Modules". You are now ready to execute your test.
Tricentis recommends that you also create the following:
-
A RequirementSet, i.e. a set of functional or non-functional criteria that help you weigh individual tests according to their risk contribution
Once you have executed your TestCase, the Loginfo lists any errors that occurred. Additionally, it displays detailed information on the first 10 errors the system found.
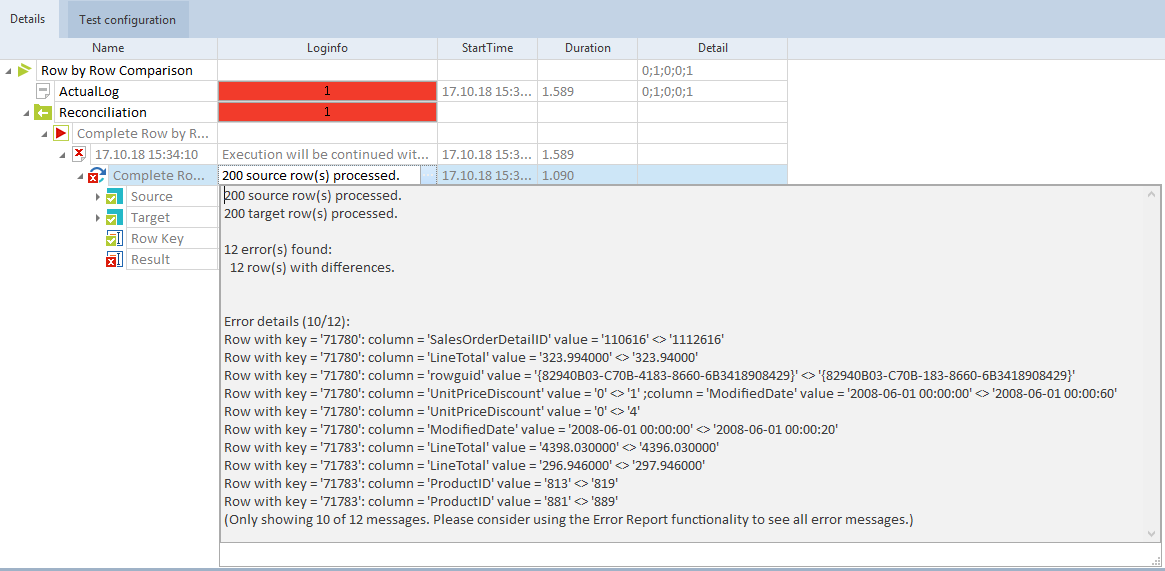
Loginfo for a row by row comparison test
If you want to see details on all errors in your Reconciliation tests, use the Error Report functionality.
To do so, set the Error Report TestStepValue before you run the test as described in chapter "Generate error reports".