Step 1 - Source Database Definition
To specify the source database, choose one of the following options in the Choose input source section:
-
Use ODBC Connection if you want to read your database schema structures directly from system tables.
In this case, you need to tell the Wizard how to read all relevant tables, columns and constraint information from the database system you intend to use.
-
Upload DDL file if you want to read your tables from a .ddl file.
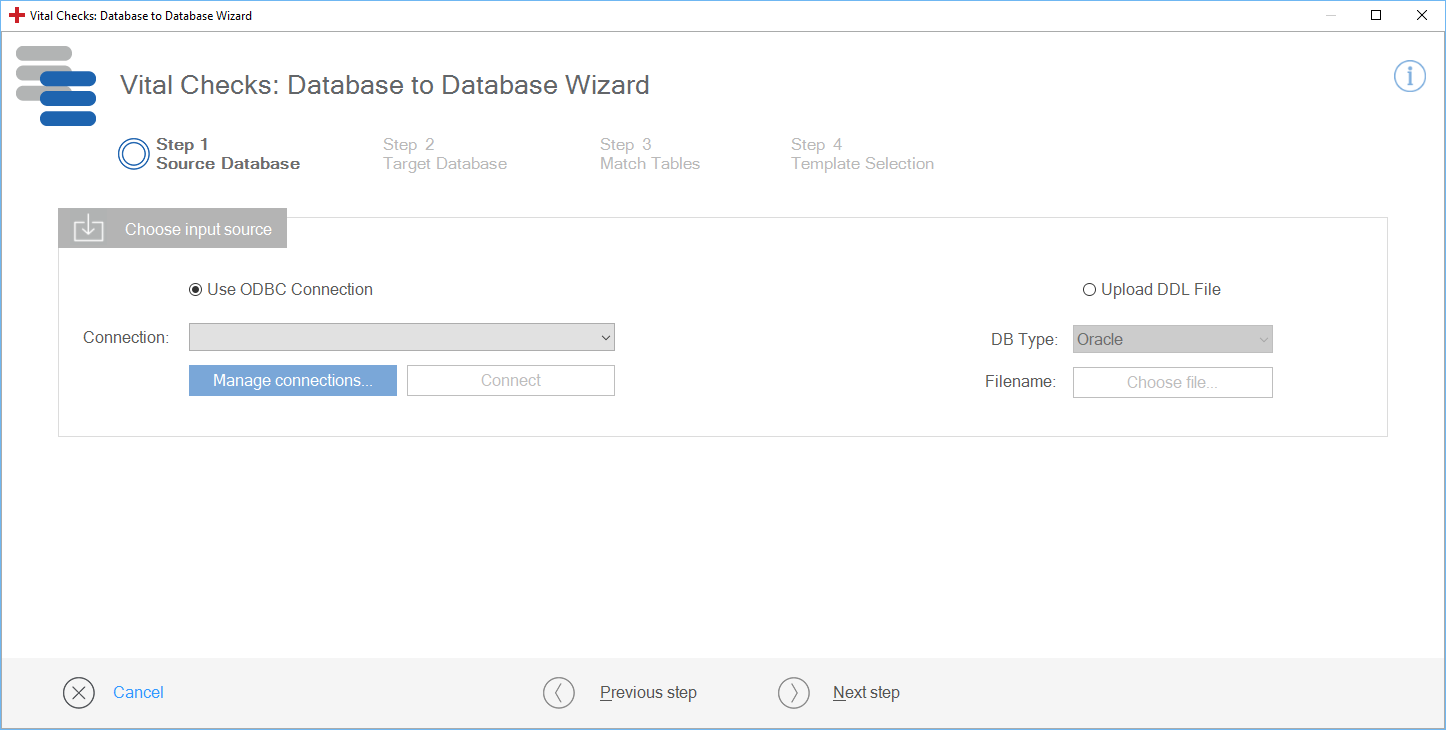
Step 1 in the Vital Checks: Database to Database Wizard
If you have previously defined an ODBC connection in the Connection Manager, select this connection from the Connection dropdown menu and click Connect.
The Connection dropdown menu displays all BI connections, i.e. connections that contain SQL statements.

Select an existing connection
If you have not defined an ODBC connection yet or would like to define a new one, follow the steps below:
-
Open the Connection Manager by clicking Manage connections.
-
Define and save your connection as described in chapter "Define connections in the Tosca BI Connection Manager".
-
Select the ODBC connection from the Connection dropdown menu and click Connect.
To use a .ddl file as your input source, follow the steps below:
-
Select a database type from the DB Type dropdown menu.
-
To select your .ddl, click Choose File....
-
In the subsequent dialog, choose a file and click Open.
Once you have selected your source database, the Wizard loads all available tables into the Tables tab.
If you want to see all issues that occurred during the import, click the tab Parser Messages.
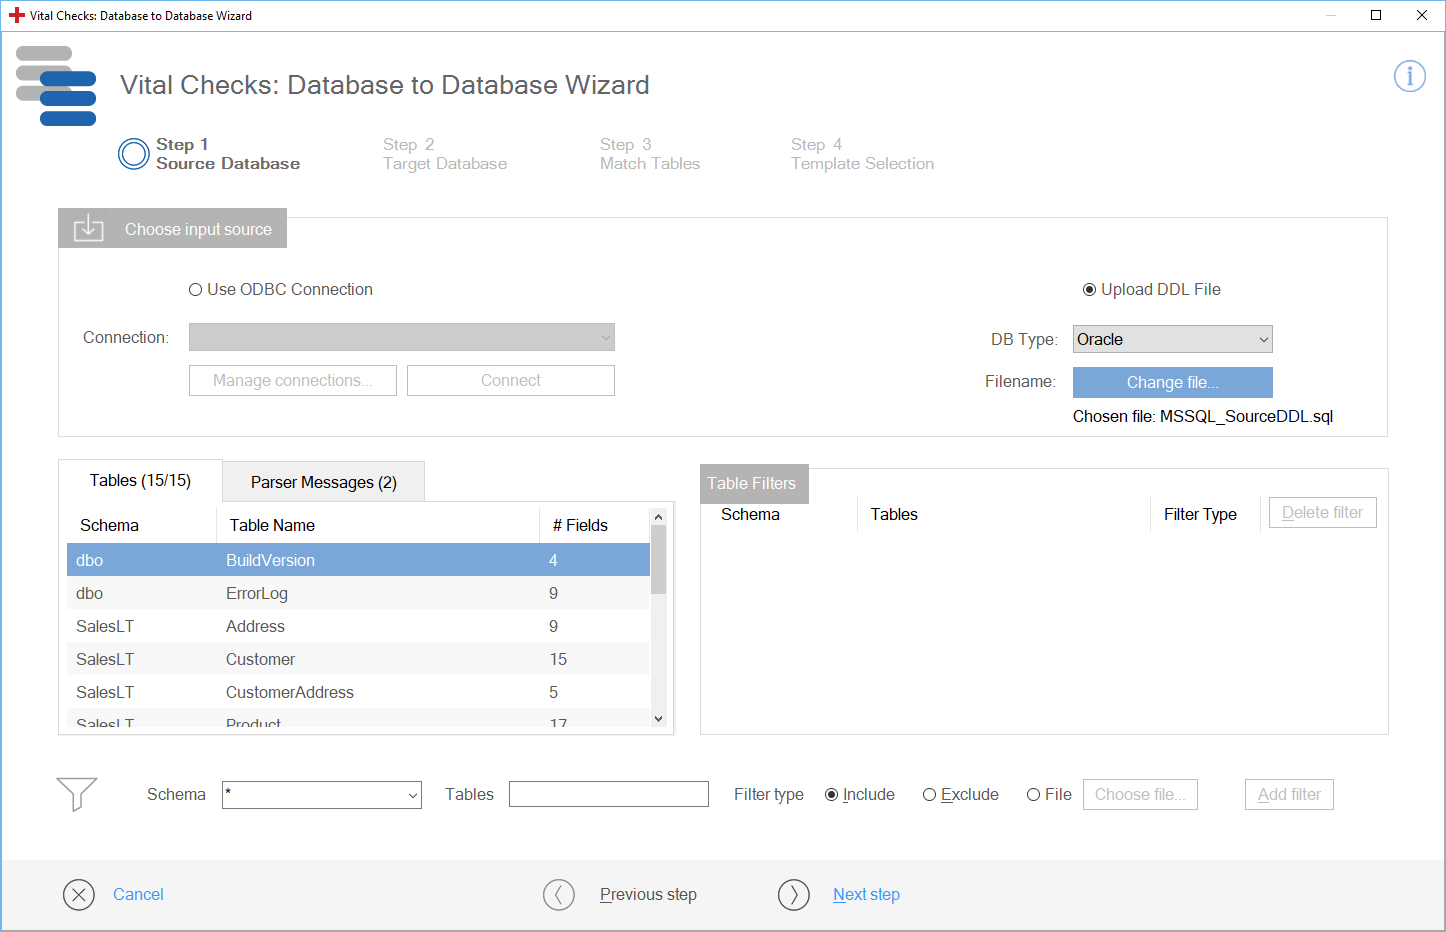
Loaded source tables
You can now filter your tables if required.
To continue with Step 2 - Target Database Definition, click Next step.
Filter tables
To filter your tables, use the filter bar on the bottom of the screen:

Filter bar
-
To filter tables down to a specific schema or table name, select a schema from the Schema drop-down menu. Alternatively, you can define a specific table name in the Tables input field.
Add a predefined text or use the wildcard *. The table filter functionality also supports DotNet Regular expressions.
-
Choose whether you want to Include or Exclude the specified schema or table.
To include multiple tables, create a text file containing the names of all tables you want to include. Make sure that each line contains one table name. Enable the checkbox File and click Choose file. In the upcoming dialog, select your file.
Click Add filter. You can add more than one filter. The Wizard applies these filters hierarchically to drill down to specific tables.
To remove an existing filter, select the respective row in the Table Filters section and click Delete filter.

|
The example below filters all tables that start with the letter A within the schema SalesLT:
|

|
|
The following example uses a DotNet Regular expression to filter tables starting with A, B, C or D within all schemas:
|
