The change history tracks the modifications of the local workspace performed between checking out and checking in the objects. These modifications are handled and saved as one modification with a unique revision number. This option is available for all branches.

|
Changes to AddIn-specific objects can only be shown if the specific AddIns are activated. |
The following modifications can be tracked:
-
Modified attribute values
-
Newly created objects
-
Deleted objects
-
Objects moved between and within two clusters
-
Modified sequence of ordered object lists
The change history of one or more clusters can be displayed by selecting either View Change History or View Local Changes for Tree from the context menu entry Versioning. These two options are described below.
Displays all revisions in which the selected cluster has been modified. To display changes made to objects that have not been selected, the entry Show all changed clusters for selected revision must be selected in the change history window under Options.
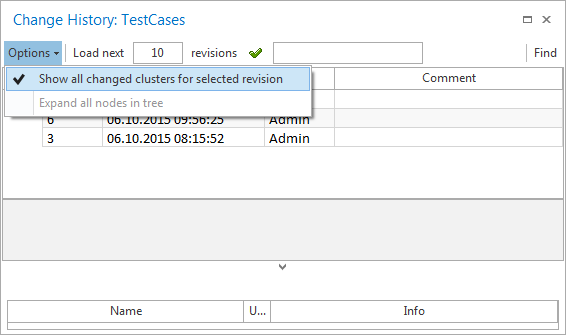
Show all changed clusters for selected revision
Displays all modifications of the selected object and all elements hierarchically below the object. The modifications are grouped by revisions. The modified clusters can be displayed in a list or a tree that shows their positions at the time of the selected revision. If Expand all nodes in tree is selected via the menu entry Options in the Change History window, Tosca Commander displays only the modifications up to the lowest level that contains a modification.
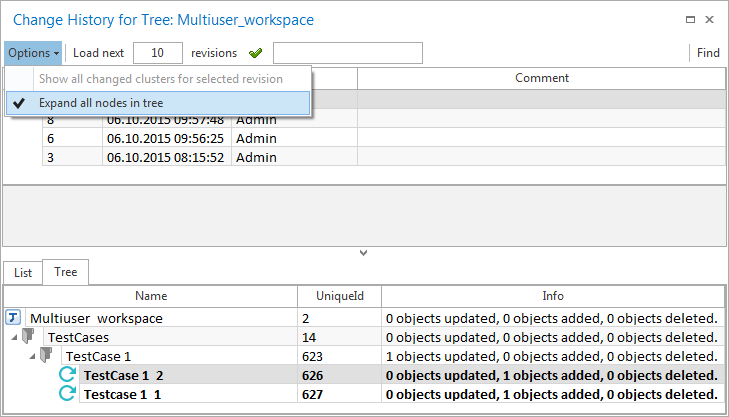
Change history window
Displays the list of revisions in the upper part of the window. You can set the number of displayed revisions via the input field Revision. These revisions are sorted chronologically from the latest to the oldest entry. Load older revisions as needed by entering the number of the required revisions and clicking onto the button next to the input field. Alternatively, you can use the Enter key.
The window Change History shows the following information:
-
Revision number
-
Date and time when the modification was checked in
-
Name of the Tosca Commander user who checked in the modification
-
Optionally, a comment by the user who checked in the modification (see chapter "Commenting modifications")
|
|
If the process View Change History or View Local Changes for Tree is canceled by clicking on Cancel, it may take some time until the process can be completed. Changes found up to this point are displayed in the Change History window. |
By selecting a revision, a list of the cluster objects modified in the revision is displayed in the lower part of the window. Multiple revisions can be selected using Shift + Click. If multiple revisions are selected, all modifications are displayed summarized in one list. The cluster objects on which the option View Change History was performed are displayed and highlighted at the top of the list.
The following information is displayed for each modified cluster object:
-
Object type (symbol)
-
The unique ID (UniqueId) of the cluster object
-
The current name of the cluster object. Deleted cluster objects are displayed under the name they had at the time they were deleted
-
Brief information on the number of modified, deleted or added cluster members.
|
|
You can refresh the Change History window via pressing the F5 key. |
The modifications of the selected cluster are displayed by double-clicking on an item in the Object Delta list or by selecting the option View Local Changes in the context menu (see chapter "View local changes").

Object delta
Recover deleted objects
Administrators can recover deleted objects. To do so, follow the steps below:
-
In the Change History for Project window, select the revision that contains the deleted object you want to recover. The changes within the revisions are shown in the lower pane of the window.
-
Right-click on the object you want to recover, and select Recover deleted object. Objects can only be recovered one at a time.
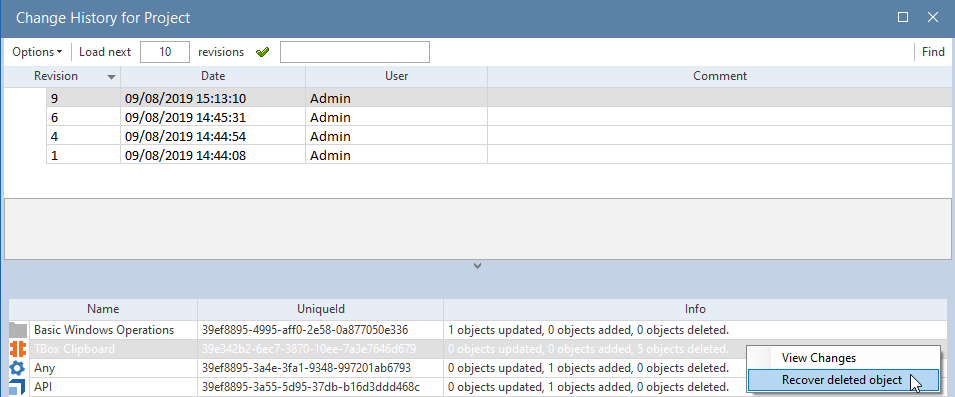
Recover deleted object
-
Click OK to confirm that you want to recover the deleted object.
This opens a TQL Search window with the recovered object. Use drag and drop to place the object back in the project tree.

Drag and drop recovered object to project tree

|
Make sure to check out the folder or other objects onto which you want to drag and drop the recovered object. |