Create HOST Modules
HOST Modules are XModules. You create them by using Tosca XScan on your HOST emulator.
To do so, follow the steps below:
-
Ensure that you have an active, connected HOST emulator session.
-
Open Tosca Commander.
-
Right-click a Module folder or use the dynamic menu Modules and select
 Scan->Host.
 -
This opens the Host Scan window. In the Host Scan window, define which control you want to steer:
-
Specify a control type by clicking the respective button in the ribbon menu: Label, TextBox or Table.
-
Click on Search TextBoxes to automatically search for text boxes.
-
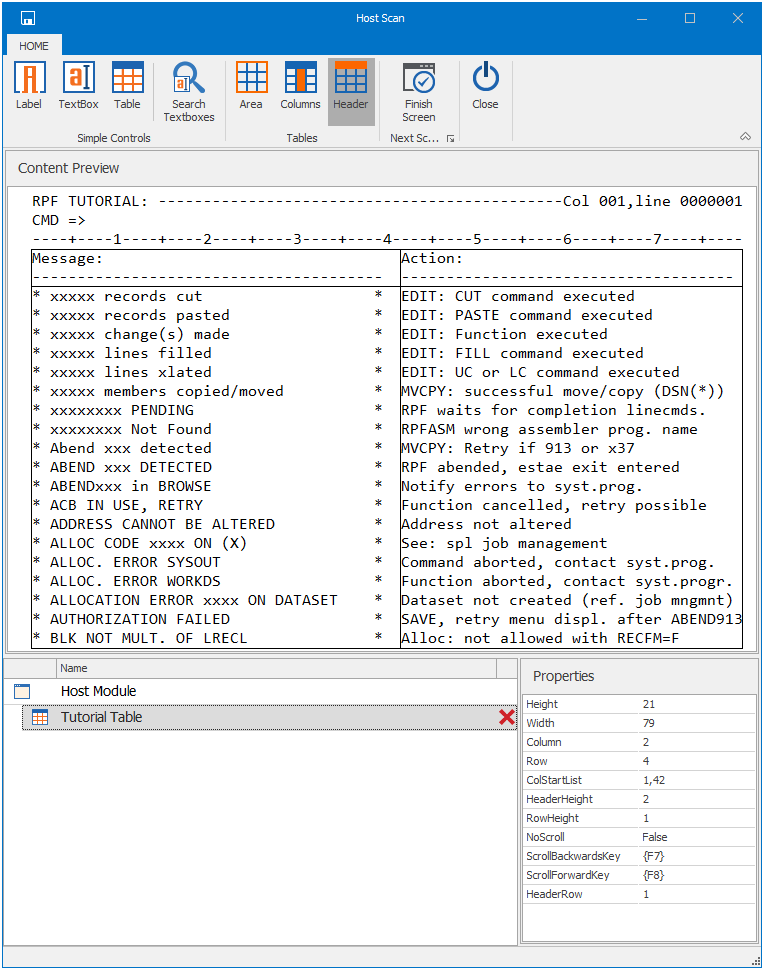
Host Scan window
-
Select the control you would like to create, then highlight the area you want to steer in the Content Preview.
The Properties of the selected area are filled in automatically:
-
Height specifies the height of the control.
-
Width specifies the width of the control.
-
Column specifies the on-screen position of the starting column of the control.
-
Row specifies the on-screen position of the starting row of the control.
Height and Width are applicable to the module itself. They contain the resolution of the screen in characters. Screen resolution is detected automatically during scan.
The following properties can only be set on Table controls:
-
ColStartList is a comma-separated list for the first character of every column, relative to the control coordinates. This property always starts with 1.
-
HeaderHeight specifies the height of the header. The default value is 0.
-
RowHeight specifies the row height. The default value is 1.
-
HeaderRow specifies whether the table has a header or not. The default value is -1.
-
NoScroll specifies whether the table spans over multiple screens or not. The default value is False.
-
ScrollForwardKey specifies the key to scroll the table forward. The default value is {F8}.
-
ScrollBackwardsKey specifies the key to scroll the table backwards. The default value is {F7}.
-
-
If you specify a table control, you can fill out the table specific properties with the following buttons:
-
Click Area and highlight the area that is your table.
-
To define columns, click Columns. Then click where you want the column to start. To remove a column, click on the column again.
-
To define the header, click Header. Then click where you want the header to end.
-
-
Optionally, you can manually modify the control properties on the Properties pane. You can also do this instead of highlighting the area to be steered.
If you enter the control coordinates manually, that is reflected on the Content Preview.
-
Save your Module.