Edit settings
You can edit the OSV settings directly in the Tosca OSV Monitor.
To open the Settings tab, navigate to Environment->Environment Settings.
The Settings tab consists of the following elements:
-
Purge / Export / Import section where you can purge the database, export logs, and import archived logs
-
Fallback Mode section where you can configure fallback mode
-
Settings section where you can disable validation and logging
-
XSD Files tab where you can upload schema files
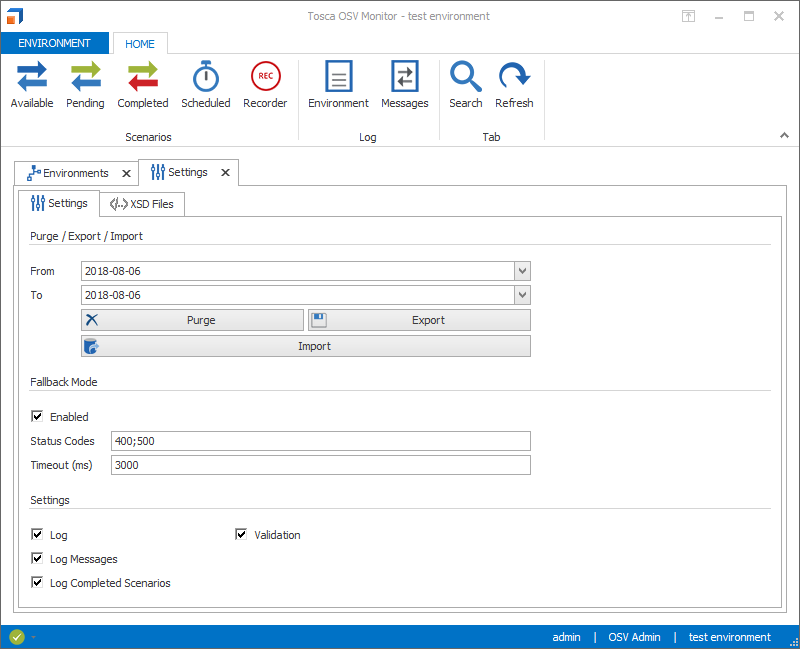
Settings tab
Purge the database
You can purge the environment log, messages log, completed Scenarios log and recorded messages from the database.
To do so, select a time period via the From and To dropdown menus and click Purge.
Export logs
You can export your logs as an archive file. To do so, follow the steps below:
-
Select a time period via the From and To dropdown menus and click Export.
-
In the subsequent dialog, select where you want to save the file and click Save.
Import logs
You can import a previously exported archive file. To do so, follow the steps below:
-
Click Import.
-
In the subsequent dialog, select a file and click Open.
Configure fallback mode
Fallback mode starts if a service is not available or responds with an error. It allows OSV to send a virtualized response instead, if it finds a fitting Scenario.
To enable and configure fallback mode, follow the steps below:
-
To enable fallback mode, enable the checkbox next to Enabled.
-
Specify which Status Codes trigger fallback mode. Enter the status code numbers as strings separated by semicolon, e.g. 400;500.
-
In the Timeout (ms) field, specify how long OSV waits for the service to respond before fallback mode starts. Enter the time in milliseconds, e.g. 3000.
Disable validation and logging
Validation and logging are enabled by default. You can disable these settings as desired.
If you disable validation, OSV does not verify messages against a schema.
If you disable logging, Tosca OSV Monitor does not store information in the respective logs. This can help to improve performance. For instance, if you run Scenarios with a very high number of messages for load testing, you can disable message logging to avoid creating logs for each message.
To disable validation and logging, disable the respective checkboxes.

|
If you disable logging, the respective logs still display failed executions by default. |
Upload schema files
You can upload XSD schema files to validate your messages against them. To do so, follow the steps below:
-
Go to the XSD Files tab and click Upload Schema Files.
-
In the subsequent Open dialog, select a file and click Open to upload it to the environment.
To verify messages against this schema, Validation has to be enabled in the Settings tab.
To delete or update an uploaded XSD file, right-click it and select Delete or Refresh from the context menu.
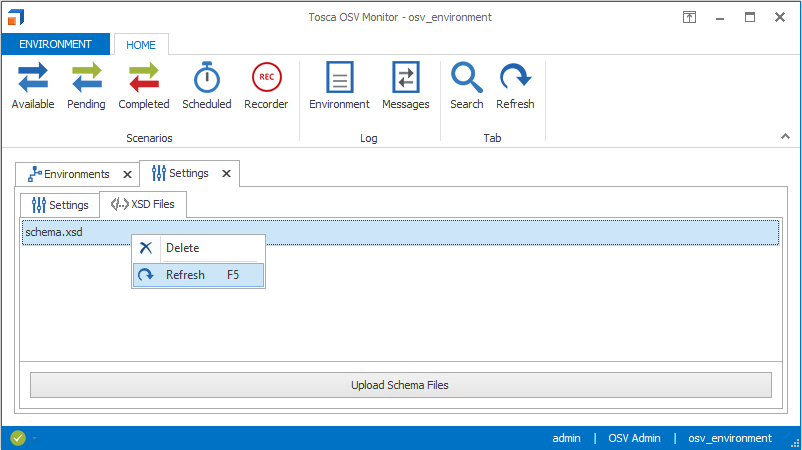
Schema file in the XSD Files tab