 Perform migration
In this chapter you will find information on how to migrate your projects and where to find the migration logs.
Before you can migrate a project, you have to add the project to the Project Overview section of the Tosca Administration Console (see chapter "Add project"). You can migrate a single project, or migrate all your projects at once.

|
During the migration a new workspace will be added to the repository you migrate. |
Migrate single project
You can perform a schema migration and a TestCase (XEngine) migration. Migrating a project will first trigger a schema migration and then the TestCase migration. The schema migration migrates your projects to the Tosca version you have installed on the machine on which you perform the migration.
To perform the migration of a single project, follow the steps below:
-
Click on the Migrate button in the Actions column of the project you want to migrate. If no schema migration is required, the caption of the button is Migrate TestCases, since only a TestCase migration will be performed.

Migrate project
The Migration Options dialog opens.
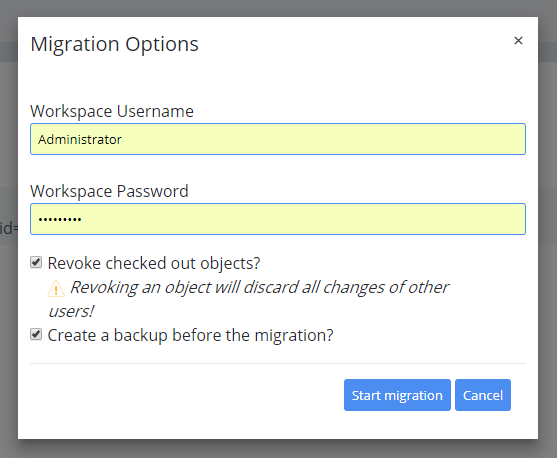
Migration Options dialog - select migration options
-
Enter the username and password for the workspace.
-
Select the checkbox next to the Revoke checked out objects? field, if you want to revoke objects during migration automatically, that are checked out by other users.
-
Select the checkbox next to the Create a backup before the migration? field, if you want to create a backup before the migration.
The backup file will be saved in the directory %TRICENTIS_ALLUSERS_APPDATA%\Automation\MigrationBackup. For information on how to restore a project see chapter "Backup and restore database repositories" -
Click on the Start migration button to perform the migration.
Migrate all projects
You can migrate several projects at once. All projects you added to the Project Overview section will be migrated in sequence. If required a schema migration is performed first, before the TestCase migration is performed.
To migrate all projects, follow the steps below:
-
Click on the Migrate all button.

Migrate all projects
The Migrate All Options dialog opens.
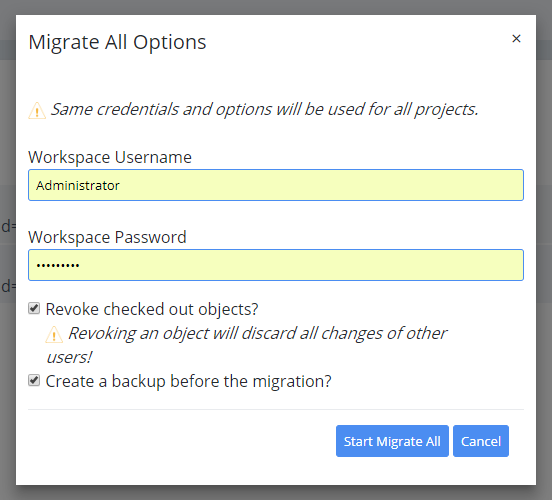
Migrate All Options dialog
-
Enter the username and password for the workspace. The entered username and password will be used for all workspaces.
If the username or password are not valid for a certain workspace, this will be logged in the migration log and the migration continues with the next project.
-
Select the checkbox next to the Revoke checked out objects? field, if you want to revoke objects during migration automatically, that are checked out by other users.
-
Select the checkbox next to the Create a backup before the migration? field, if you want to create a backup before the migration.
The backup file will be saved in the directory %TRICENTIS_ALLUSERS_APPDATA%\Automation\MigrationBackup. For information on how to restore a project see chapter "Backup and restore database repositories" -
Click on the Start Migration All button to perform the migration.
Show migration logs
In the Migration details dialog you can view the migration state and the migration logs of the last migration of your project.
To display the logs of the migration of your project, click on the ![]() Show log icon the Actions column.
Show log icon the Actions column.
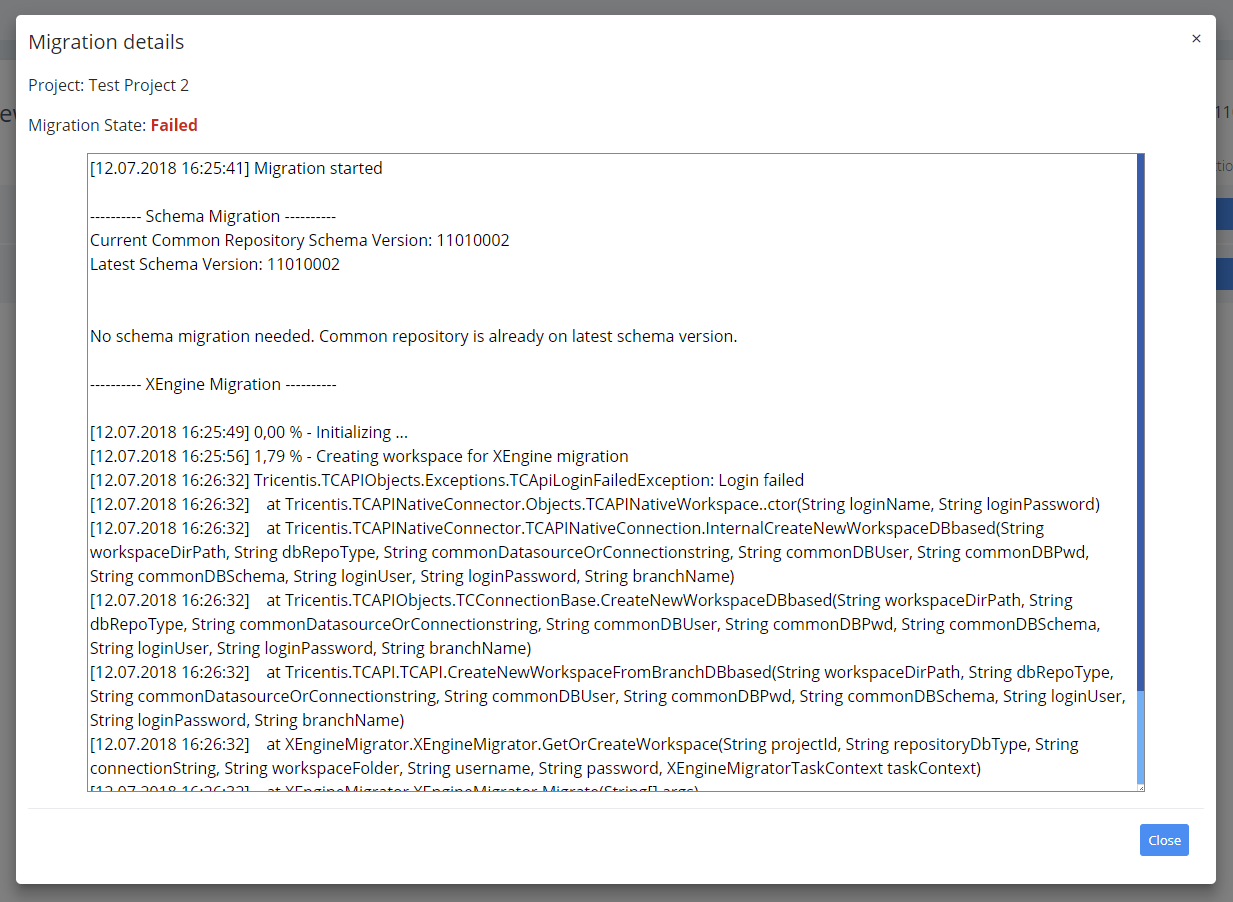
Migration details dialog