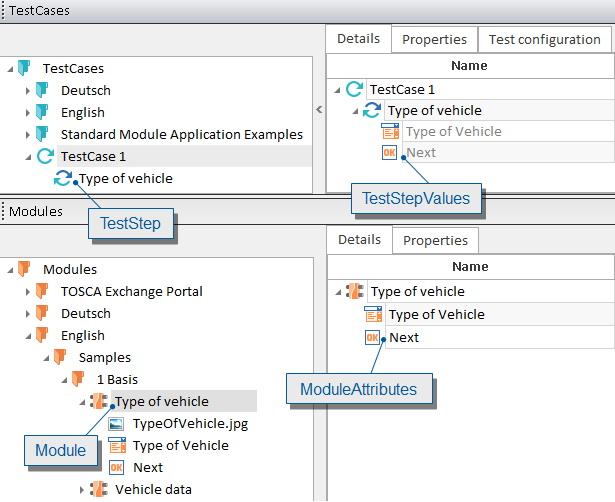
In order to create a TestStep, you need to assign a Module to a TestCase. A TestStep is thus created on the basis of the ModuleAttributes. In the TestStep, the ModuleAttributes correspond to the TestStepValues.
Alternatively, you can also drag the required Modules onto a TestCase folder to create a new TestCase. The TestSteps are created automatically in the same manner as with the creation of a single TestStep.
Follow these steps to create a TestStep for an existing TestCase.
-
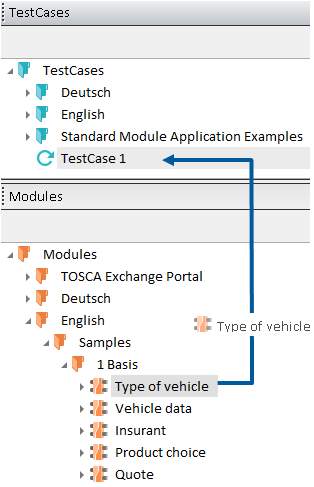
Left-click on the required Module and keep the mouse button pressed. It is also possible to select several Modules by keeping the Ctrl key pressed.
-
Drag the selected Module over the required TestCase.
-
Now release the left mouse button.
-
The Module(s) are now part of the TestCase. Each Module represents a TestStep. The TestSteps are named after their Module, but they can be renamed by either clicking on Rename in the context menu of the selected TestStep or by simply pressing the F2 key. You can also left-click on the TestStep and select Modify->Rename from the dynamic menu TestCases.

|
If you change the order of ModuleAttributes within the Module, Tosca will automatically update the TestStepValues order in the TestStep. |