 Add projects
In the Projects Overview of the Tosca Administration Console, you can add, edit, and delete projects.

Tosca Administration Console - Projects Overview
Add a new project
To add a project to the Tosca Administration Console, follow the steps below:
-
Click on the Add project button. This opens the Project details dialog.
-
Define a Name for your project.
-
Select the type of your repository from the drop-down list.
-
Define the Connection string to your repository. Click the
 icon to display a template connection string for the selected repository type.
If you want to test your connection, click Test Connection.
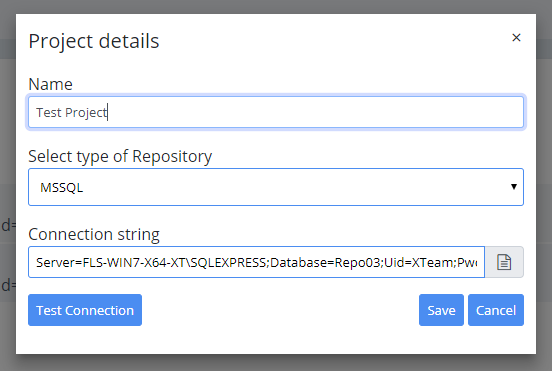
Project details
-
Click Save.

|
SQLite repositories are only supported if located on local hard disk drives. |
Edit project
To edit a project, follow the steps below:
-
Click the
 icon in the row of the project that you want to edit. This opens the Project details dialog.
 -
Edit the project details and click Save.
Delete project
To delete a project , follow the steps below:
-
Click
 icon in the row of the project that you want to delete.
 -
In the subsequent dialog, click Yes to confirm.