Manage screenshots
During exploratory testing you can capture screenshots in order to document any errors found. You can add results screenshots and design screenshots to a scenario in the Scenario Manager.
Add Result Screenshots to TestSteps
You can take any number of result screenshots for each TestStep.
To add a result screenshot to a TestStep or TestStepValue of a scenario, click on the Add Result Screenshot![]() icon in the Scenario Manager. The option is available in the Results column of the List view and in the Screenshot tab of the Media view.
icon in the Scenario Manager. The option is available in the Results column of the List view and in the Screenshot tab of the Media view.
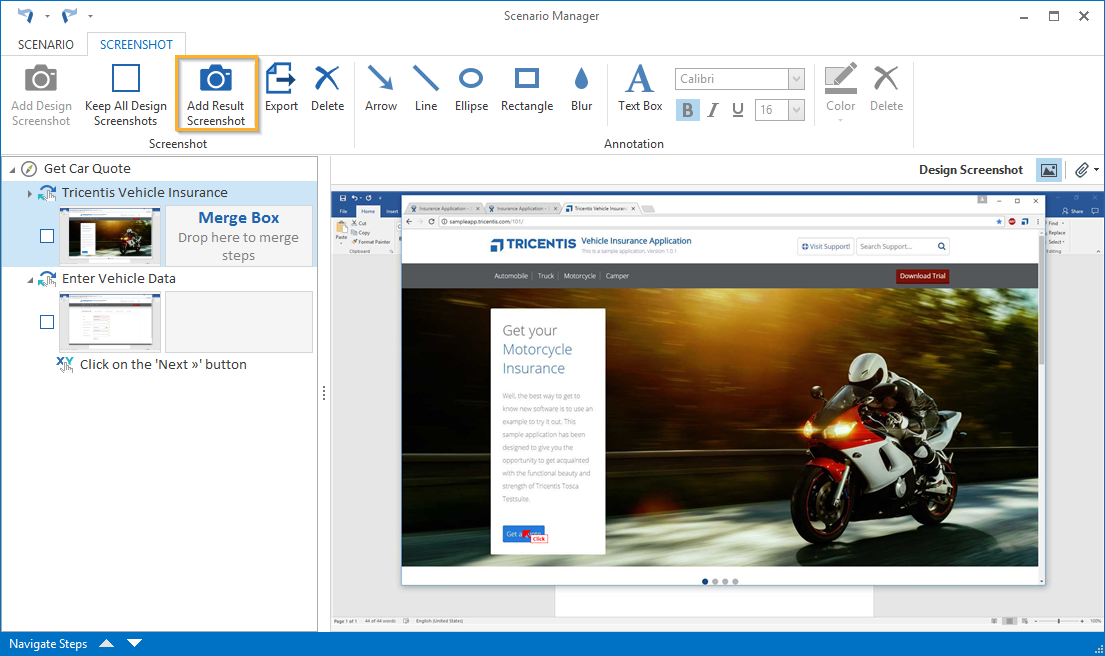
Add Result Screenshot in Media view
Add Design Screenshots to TestSteps
You can either edit design screenshots of a TestStep or add a newly created design screenshot. You can capture only one design screenshots for each TestStep.
To manually add a design screenshot to a TestStep of a scenario, click on the Add Design Screenshot![]() icon in the Scenario Manager. The option is available in the Design column of the List view and in the Screenshot tab of the Media view.
icon in the Scenario Manager. The option is available in the Design column of the List view and in the Screenshot tab of the Media view.
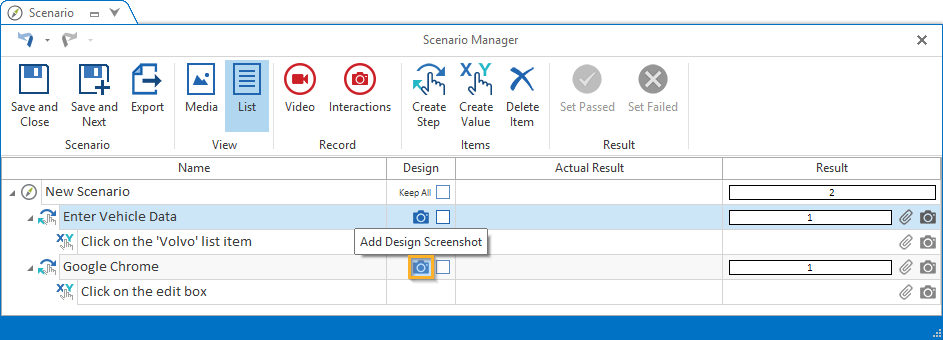
Add Design Screenshot in List view
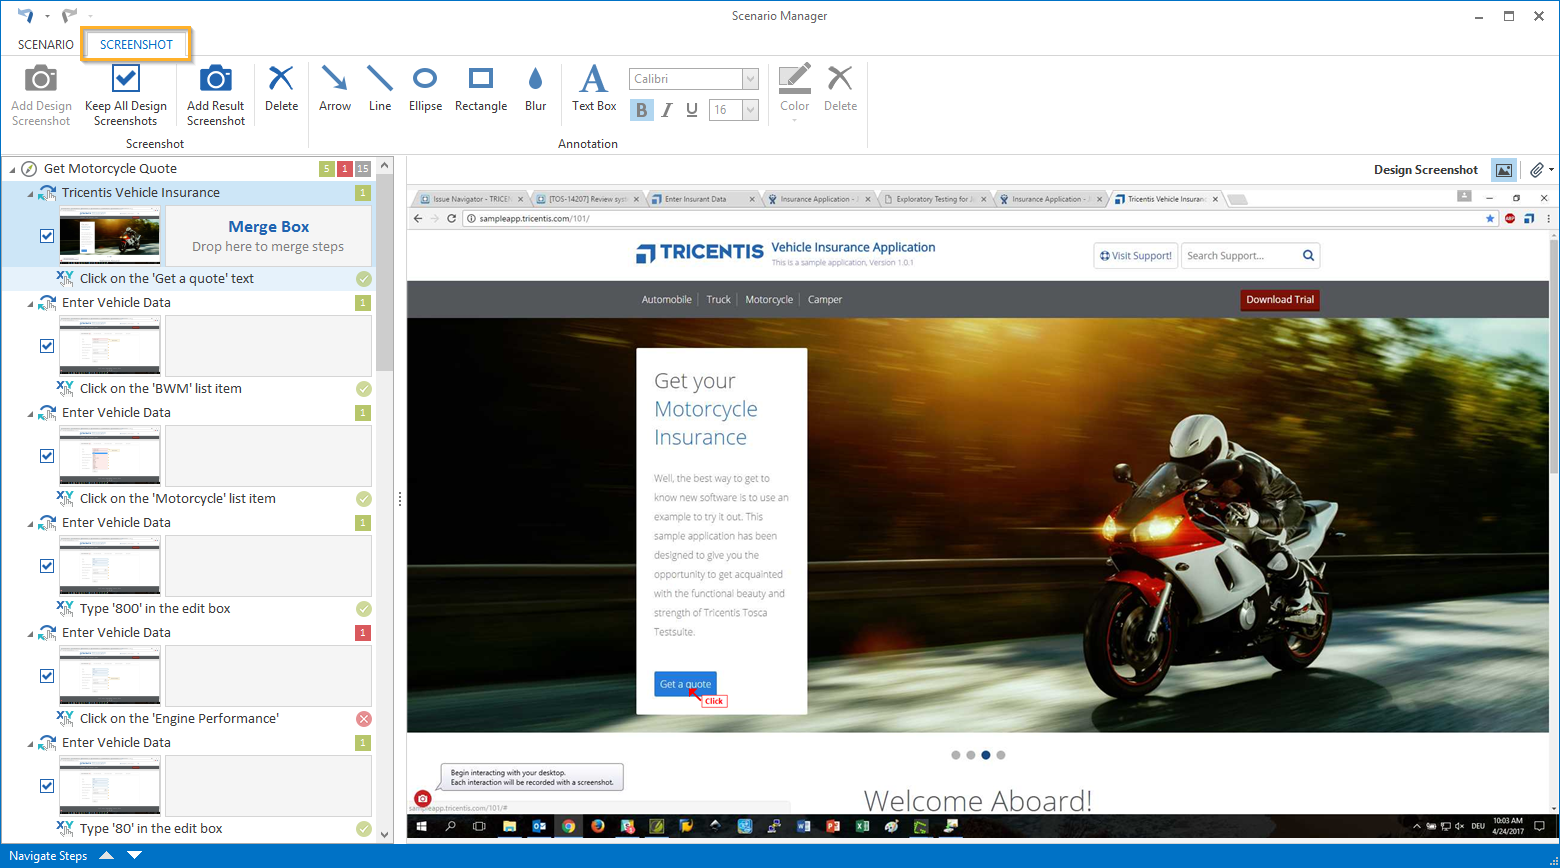
Once you save a scenario, all design screenshots that are selected in the Design column in the Scenario Manager are saved. Enable the checkboxes next to the screenshots you would like to keep. Click on Keep All in the Screenshot tab if you would like to keep all design screenshots.
Edit screenshots
You can edit screenshots in the Screenshot Editor or in the Screenshots tab in the Media view of the Scenario Manager.
Edit screenshots in the Media view of the Scenario Manager
The Screenshot Editor
The Screenshot Editor enables you to add annotations (comments, shapes) to your screenshots. The Screenshot Editor opens whenever you capture a new screenshot or double-click an existing screenshot in the List view of the Scenario Manager.
If you have added a screenshot, a video or a file, a window will open when you left-click the corresponding icon in the List view of the Scenario Manager.
In this window you can either add objects, view, export or delete them.
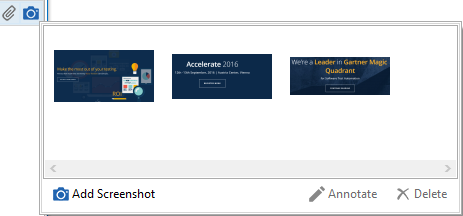
Window containing screenshots
Select, for instance, a screenshot and click on Annotate in order to edit the screenshot in the Screenshot Editor. Double-click onto an existing screenshot to open and edit a screenshot in the Screenshot Editor.
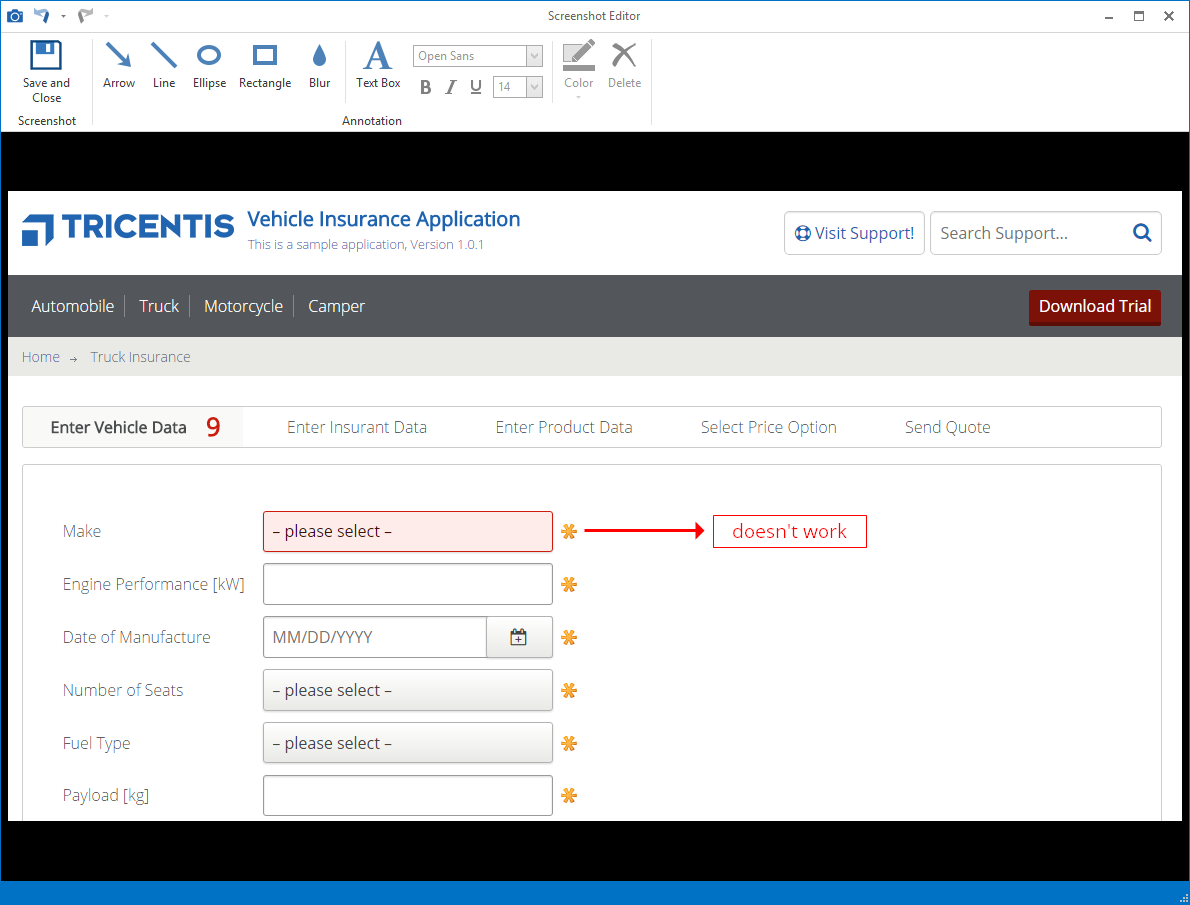
Adding annotations
The following options are available for selection:
|
Option |
Description |
|---|---|
|
|
This options saves the screenshot and closes the Screenshot Editor. |
|
Annotation section |
This contains a text field and shapes for your annotations. |
|
|
Previously performed actions are canceled. |
|
|
Restores recently performed actions. |
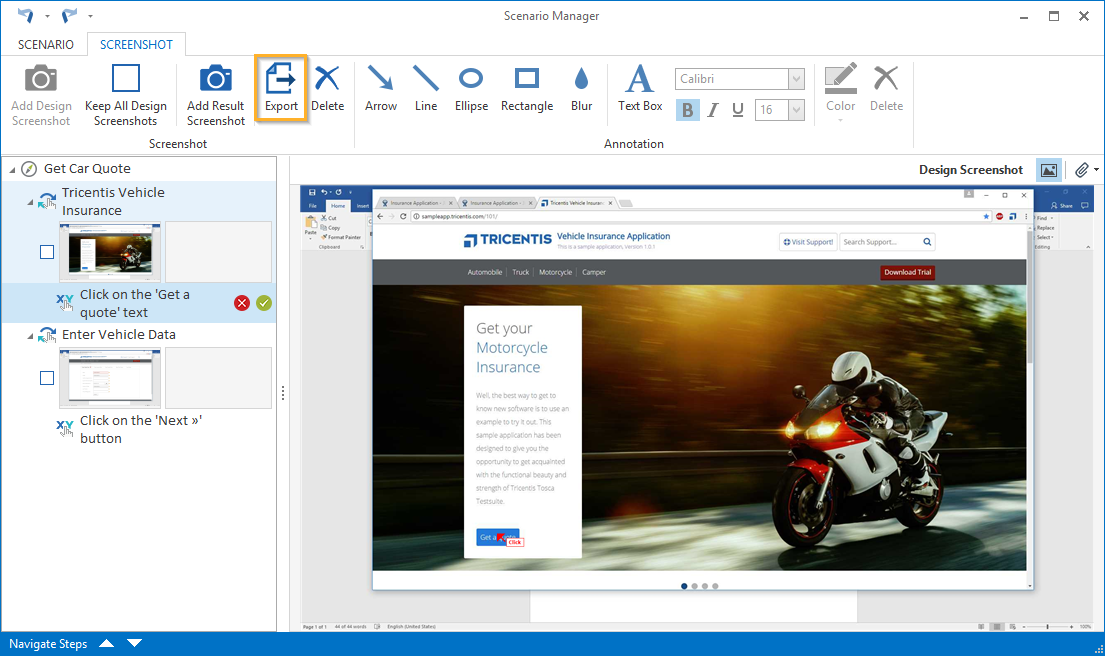
Export Screenshots
In the Scenario Manager you can export any screenshot which is added to your scenario.
To export a screenshot, follow the steps below:
-
Select the TestStep or TestStepValue to which the screenshot you want to export is attached to.
-
Click on
 Export in the Screenshot tab of the Media view in the Scenario Manager. You can also choose the Export option in the List view of the Scenario Manager by clicking the
  icon in the Design or Result column.
Export Screenshot in Media view