Tosca Wizard is part of Tricentis Tosca and is used for scanning and creating classic Modules. It collects technical information required to identify and steer the test object. This data is then saved to the ObjectMap of the Module (see chapter "Properties for classic Modules").
For further information on how to scan XModules, please refer to chapter "Scan Modules".
Starting Tosca Wizard
-
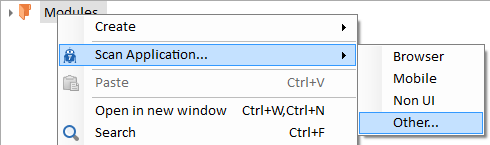
Select the Module folder where the new Module should be created.
-
Select Scan Application->Other... from the context menu or from the dynamic menu Modules.
Tosca Commander™ won't accept any new inputs as long as Tosca Wizard is open. Data are transferred to Tosca Commander™ only after Tosca Wizard has been closed.
For detailed information on how to configure Tosca Wizard, please refer to chapter "Tosca Wizard menu".
-
Start the scan process either with the mouse or by using a hotkey.

|
You can launch Tosca Wizard via the Windows start menu in order to create an ObjectMap. ObjectMaps are saved as xml files and can be imported into Tosca Commander (see chapter "Importing ObjectMaps (classic Module)"). |
Scanning applications with the mouse
Tosca Wizard allows an entire application window or parts of the application window to be scanned with the mouse.
|
|
Scanning one or more regions is currently possible for HTML, Java, WPF and SAP applications. |
How to scan the current window
-
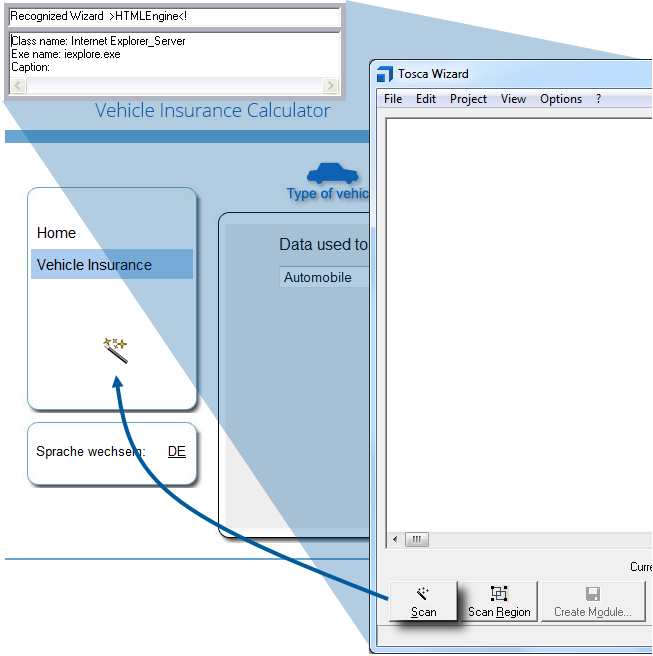
Click on the Scan button. The Tosca Wizard window is then minimized, and the mouse pointer is converted into a magic wand.
-
Click on the application window to be scanned and the scan will start immediately.
|
|
Use the key combination Alt + Tab to navigate between the windows and to put the required window to the foreground if needed. |
Scanning the currently active window
-
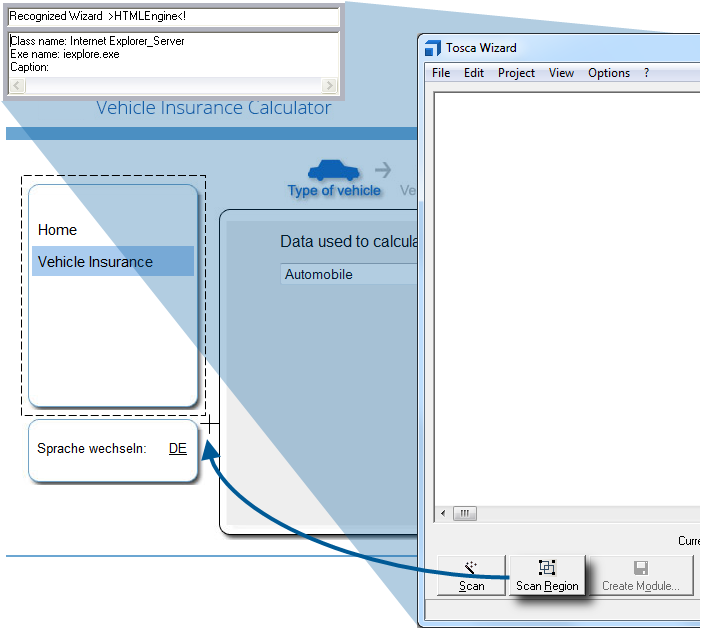
Click on the Scan Region button. The Tosca Wizard window is then minimized, and the cursor's shape will change to a reticle.
-
Keep the left mouse button pressed and move the mouse pointer to define the region to be scanned. You can define a rectangular region which is scanned as soon as you release the left mouse button.
Scanning a specific region
-
Click on the Scan Region button. The Tosca Wizard window is then minimized and the cursor's shape will change to a reticle.
-
Hold both the left mouse button and the Ctrl key down to select the regions to be scanned. The mouse pointer takes on a different shape:
 . The selected regions are framed in red. The scan phase will start once you release the Ctrl key.
Scanning applications with hotkey
You can use hotkeys to scan applications or parts of applications which cannot be selected with the mouse. This applies for instance to context menus that close automatically.
In this case, you need to define the following settings in the Settings dialog under Settings->Wizard: Enable Hotkey for Wizard and Hotkey for Wizard
Open Tosca Wizard and press the defined hotkey in order to start the scan phase.
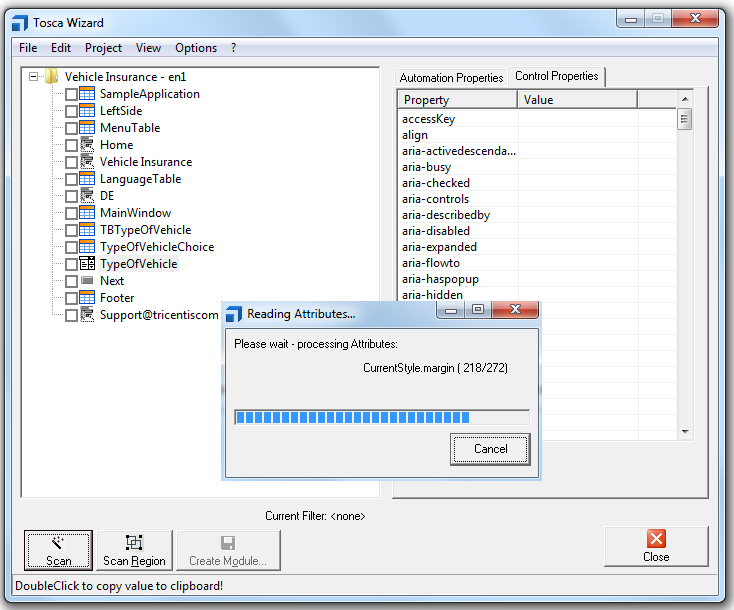
The scan phase
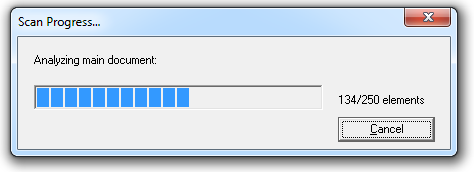
Tosca Wizard analyzes the application upon scanning.
The Scan Progress window shows the status of the scan process and the number of found and scanned elements.
You can cancel the scan process by clicking on the Cancel button. In this case, only the results that were found up to that point will be displayed.
Settings in the WizardMappings.dat file
When Tosca Wizard is launched, it uses the WizardMappings.dat file to identify the applications to be scanned and the engines to be used for this purpose (see setting "Class Mapping Path"). All test objects to be scanned have to be entered here.
Many programs have already been entered beforehand, e.g. Microsoft® Internet Explorer.
Example
The example below uses the Tosca WIN32 Engine to steer Microsoft® Internet Explorer, and the Tosca HTML Engine to steer the browser content.
[IEXPLORE.EXE]
EnginePrefix=Win32
EngineName=Win32Engine
UserControlRepresentationClassName=Win32Engine.Win32DetailsPage
[Class=Internet Explorer_Server]
EnginePrefix=HTML
EngineName=HTMLEngine
UserControlRepresentationClassName=HTMLEngine.HTMLDetailsPage
If no assigned engine is found for an application when the scan process starts, a dialog window will open, prompting you to select one of the engines provided.
Please note that this functionality cannot be used along with the option Scan Region.
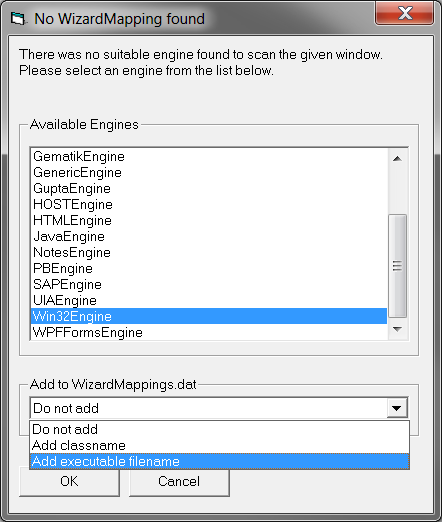
Assigning an engine
The section Available Engines provides you with the available technologies.
In the Add to WizzardMappings.dat field you can define the technology to be used for steering the test object later on.
-
Do not add: the assigned technology is not saved.
-
Add classname: the class name is assigned to the technology and saved.
-
Add executable filename: the file name is assigned to the technology and saved.
Scan result
Once the scan process is completed, Tosca Wizard lists the results in a tree view in the left section of the window. The list includes all items which can be used for test automation.
Enable the checkboxes next to the items you would like to test and add to the Module:
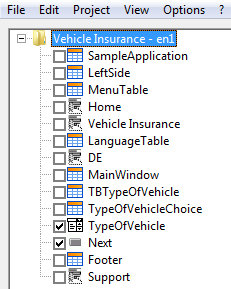
List of found controls with selected items
The right section of the window shows the technical details for your selected items.
The following table shows an excerpt of items in an HTML application:
|
Icon |
HTML Element |
Objectmap Element |
|
|
<INPUT type=text ..> |
HTMLEditBox |
|
|
<INPUT type=password ... > |
HTMLEditBox |
|
|
<TEXTAREA..> |
HTMLEditBox |
|
|
<BUTTON ..> |
HMTLButton |
|
|
<INPUT type=button ..> |
HTMLButton |
|
|
<INPUT type=submit ...> |
HTMLButton |
|
|
<A ...> |
HMTLLink |
|
|
<INPUT type=image ..> |
HTMLImageLink |
|
|
<INPUT type=checkbox ..> |
HTMLCheckbox |
|
|
<INPUT type=radio ..> |
HTMLRadiobutton |
|
|
<INPUT type=hidden ..> |
HTMLHiddenField |
|
|
<TABLE ...> |
HTMLTable |
|
|
<SELECT ...> |
HTMLComboBox |
The system assigns both a technical description and a logical name to each found object, depending on the engine.
If no logical name is found, the corresponding entry will be marked red in Tosca Wizard.
The following chapter describes the properties of the objects found by Tosca Wizard. For further information on how to use these properties, please refer to chapter "Steering Test Objects".
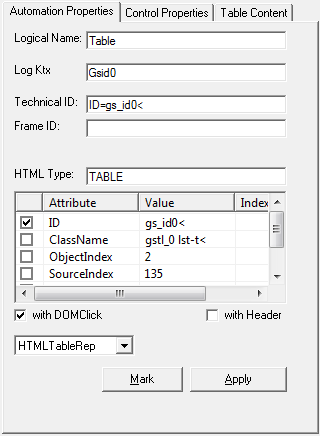
Technical details of a control
The Automation Properties section in the Tosca Wizard window provides the technical details (properties) for each object. These properties can be edited.
|
Name |
Description |
|
Logical Name |
Logical name of the control or screen. |
|
Log Ktx |
Logical context |
|
Technical ID |
Technical description which is used to identify the control |
|
Frame ID |
Technical description of the frame where the control is located |
|
HTML Type |
Indicates the control type, e.g. Button, Table, Select etc. |
|
with DOMClick |
If the application cannot be steered via coordinates, you can use this option to steer a control via the DOMObject methods. |
|
This option is available if a table control has been selected. You can specify whether a table has a header or not. |
If a control cannot be uniquely identified, you can load additional properties for this control in the Control Properties tab. The number of control properties provided depends on the test object.
-
Select a control and click on the Control Properties tab to load all properties that are available for this control.
Loading the control properties
-
Select the required property from the list and copy this to the clipboard as described in chapter "Copying values to the clipboard".
-
Switch to the Automation Properties tab.
-
Insert the value from the clipboard into the TechnicalID field.

|
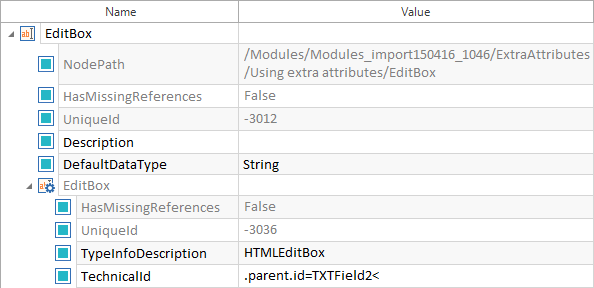
This example shows how to identify an HTMLEditbox via the parent element by using the .parent property.
Example: .parent parameter |
The Table Content tab is provided once you select a table control. This tab shows how the table looks like.
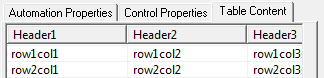
Table Content tab
The displayed view may differ depending on whether the table has a header or not. The option With Header must be selected to be able to scan tables with headers.
Copying values to the clipboard
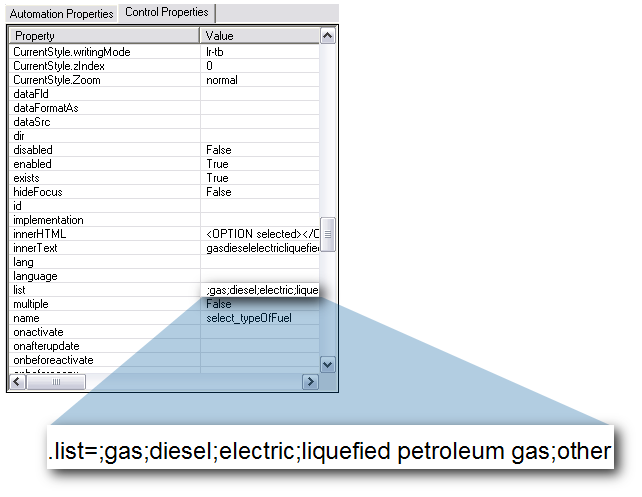
The Control Properties tab shows all available properties for a selected control along with its values (see "Control Properties"). Double-click onto the required properties to copy their values to the Windows clipboard. You can insert them into any text fields later on.
|
|
Example - ValueRange (.list)
Copying values to the Windows clipboard
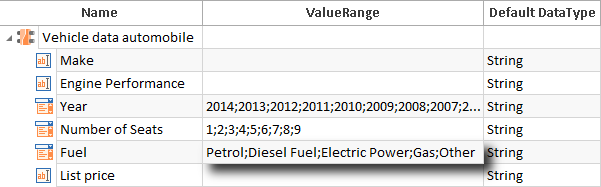
Copying values to the ValueRange column
Selecting values |
Grouping controls (ControlGroup)
Tosca Wizard can be used to combine controls of the same type such as RadioButtons into ControlGroups.
For this purpose, you have to assign exactly the same Logical Name to all controls which should be part of this particular ControlGroup.
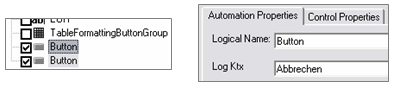
Example: defining all buttons as ControlGroup
|
|
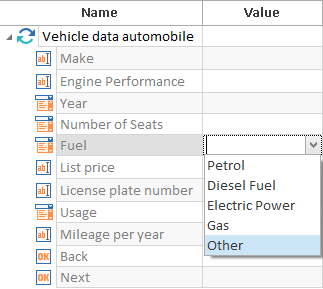
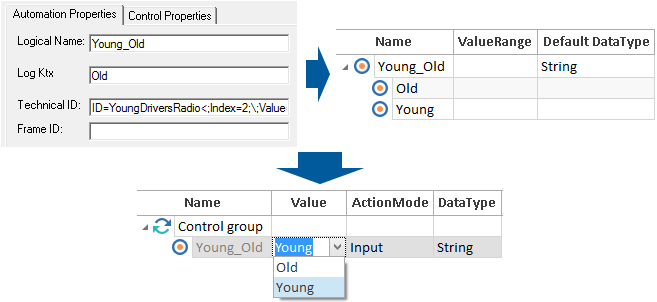
In the example below, we will combine several radio buttons into one ControlGroup. In the TestCase you can select individual control group items from a drop-down list.
Grouping controls - ControlGroup |
Creating the Module
Once you have selected the required elements, you are ready to create the Module.
If you launched Tosca Wizard directly from Tosca Commander™, simply click on the Create Module button to create your Module.
Use the Create ObjectMap button if you opened Tosca Wizard via the start menu.
The root element's Logical Name will be assigned to the new Module as Module name.