
You can create specific Project settings for both single and multi-user workspaces.
In multi-user workspaces, the project settings are checked into the repository and saved. This ensures that the project settings are identical for all workspaces and can be managed centrally.
Create a project settings root element
To use project settings, you must first create a project settings root element.
-
Open the project window under Home->Project.
-
Make sure that the project root element is checked out.
-
Right-click the project root element and select
 Create Project Settings from the mini toolbar.
Tosca automatically adds the object TCProjectSettings to the tree view, and creates the following files:
In the directory %TRICENTIS_PROJECTS%\TOSCA_WORKSPACES\<Workspace name>:
-
MetaSettings.xml
In the directory %TRICENTIS_PROJECTS%\TOSCA_WORKSPACES\<Workspace name>\Settings:
-
ProjectSettings.xml
-
WorkspaceSettings.xml
The new MetaSettings file is an extension of the default MetaSettings, which is referenced to the files ProjectSettings.xml and WorkspaceSettings.xml (see chapter " Hierarchy of the Settings Files").
Import project settings
After you have created the project settings object TCProjectSettings as described above, you can import project settings directly into your project window in Tosca. To do so, follow the steps below:
-
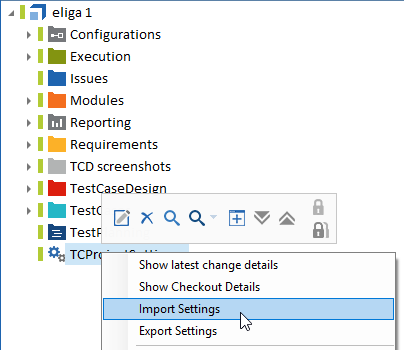
In Tosca Commander, select the option Import Settings from the context menu of TCProjectSettings.
Tosca opens the following directory: %TRICENTIS_HOME%\dll\Settings\XML.
-
Select the project settings template ProjectSettings.xml from this directory and click Open.
If a project settings file is already defined that is based on a valid settings file such as ProjectSettings.xml, Settings.xml, you can use this file.

|
ProjectSettings.xml is the template for project settings and contains default settings that are used in order to manage projects. |
-
Imported settings are displayed in the tree view. Edit them according to your requirements. You can also delete any settings you do not need for the project.
-
Click on the option Checkin all in the Start menu.
These settings are now available to all workspaces and users associated with the project.
Export project settings
You can export project settings and save them to your machine. To do so, follow the steps below:
-
Open your project window by navigating to Home->Project. Select the object TCProjectSettings in the tree view.
-
Right-click on TCProjectSettings in the tree view, and select the option Export project settings from the context menu.
-
In the subsequent dialog, select where the export file should be saved and confirm your selection.
Edit project settings
You can edit project settings either directly in the Tosca Commander™ user interface or in the Settings dialog. Use the Settings dialog to display the setting values that are currently being used.
-
In a multi-user environment, make sure that the project settings are checked out before you edit them.

|
If the project settings are checked in, any changes to the Settings dialog will be saved to the WorkspaceSettings.xml file. If the settings in this file are defined, they will be used in the current workspace instead of the project settings. |
-
Navigate to the Settings dialog by clicking the Project tab in your workspace, and then selecting Settings.
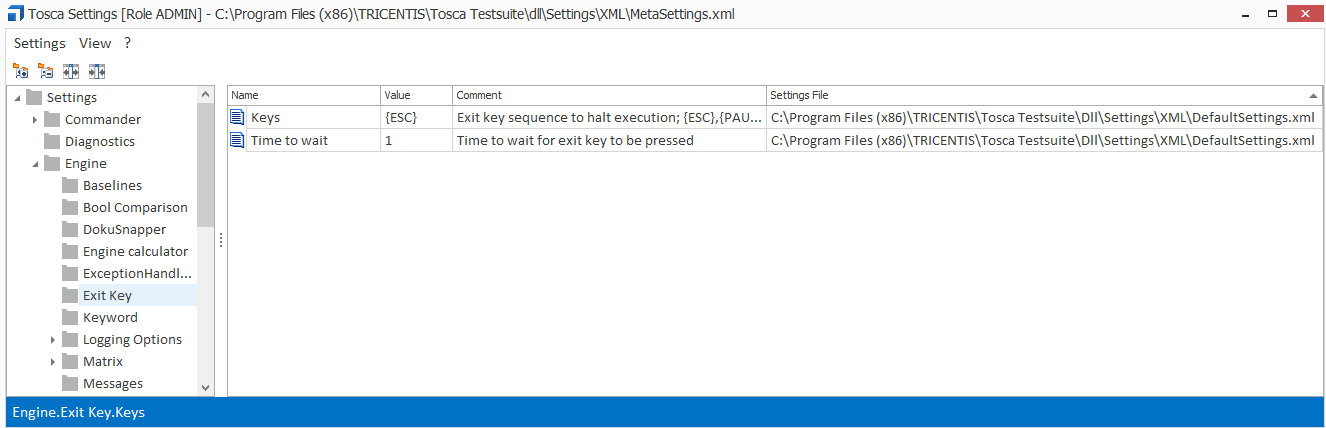
Currently used values and files in the Settings dialog
Alternatively, you can navigate to the project window and select the setting you would like to edit in the details view of the Project settings. You can edit values of individual settings or delete settings.
Attach a reference to project settings files
In Tosca you can attach files which should be used to define individual properties in the project settings.
-
Open the project window under Home->Project.
-
Make sure the object TCProjectSettings is checked out.
-
Drag and drop a file directly from your File Explorer onto the checked out TCProjectSettings object in the tree view of your project window.
Alternatively, you can right-click the TCProjectSettings object in the tree view of your project window, and select Attach File from the context menu. Select Embedded from the subsequent pop-up window (see chapter "Embed files").
-
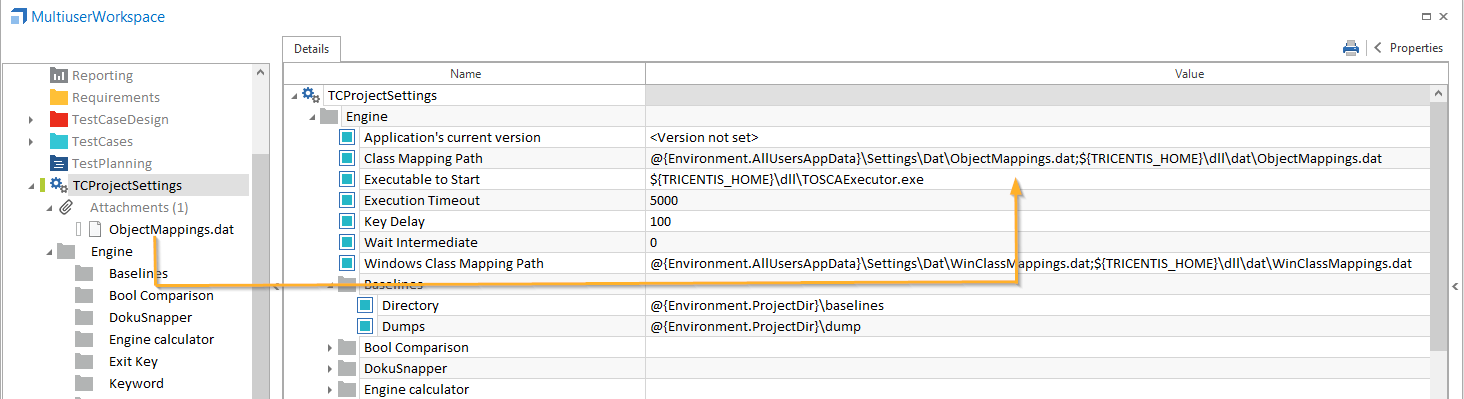
After you have attached the file, drag it onto the details view of the required setting.
The following file types are supported:
-
.dat
-
.vbs
-
.xml
-
.doc
-
|
|
Extensions with files of the same type are supported. |

|
In this example, the customized ObjectMappings.dat file is added to the setting Class Mappings Path.
Add project settings file |
Delete project settings
-
Open the project window under Home->Project.
-
Make sure the object TCProjectSettings is checked out.
-
Select the option Delete from the context menu of the TCProjectSettings.
-
In addition, you have to manually delete some files from the workspace directory for each user.
-
From the directory %TRICENTIS_PROJECTS%/TOSCA_WORKSPACES/<Workspace Name> delete the file MetaSettings.xml.
-
From the directory %TRICENTIS_PROJECTS%/TOSCA_WORKSPACES/<Workspace Name>/Settings delete the files ProjectSettings.xml and WorkspaceSettings.xml.
-
Add specific Tosca project settings
This chapter describes specific project settings in Tosca that can only be added by Administrators.
ShowDeleteObjectsWarning
If you enable the setting ShowDeleteObjectsWarning, you will be notified whenever an object in the workspace is going to be deleted permanently.
This setting is included in the project settings template ProjectSettings.xml.
-
Import the ProjectSettings.xml as described in chapter "Import project settings ".
-
Set the value of the setting ShowDeleteObjectsWarning to True.
-
Delete any other setting of the project settings you don't need.
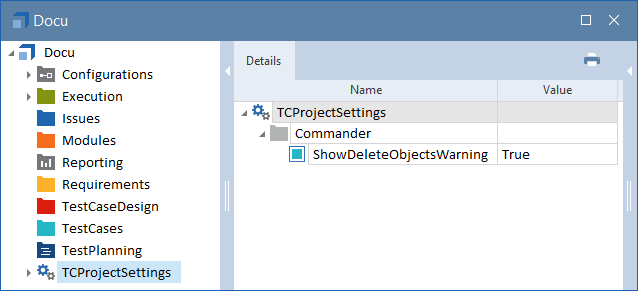
Setting ShowDeleteObjectsWarning