Prepare your Mac for mobile test automation
With the macOS Mobile Configuration Wizard you can quickly configure your Mac for the Mobile Engine 3.0 test automation of iOS and Android mobile applications. The macOS Mobile Configuration Wizard establishes a remote connection to your Mac and installs necessary components for mobile test automation.
Follow the instructions in this chapter to:
-
Configure your Mac via the macOS Mobile Configuration Wizard.
-
Optionally, verify the Appium installation.
Prerequisites
Before you run the macOS Mobile Configuration Wizard, you have to:
-
Install the following components on your Mac:
-
Xcode 11.1 or higher
-
Java 8
-
-
Enable the remote login on your Mac under Preferences->Sharing->Remote Login.
-
Have an active Apple Developer Profile and your Xcode is linked to this profile.

|
For a list of components that are installed during the process of Mac configuration, see chapter "Components on your Mac". |
Open the macOS Mobile Configuration Wizard
To open the macOS Mobile Configuration Wizard, follow the steps below:
-
Open the Project window in Tosca Commander.
-
Right-click the project root element and select macOS Mobile Configuration Wizard from the context menu.
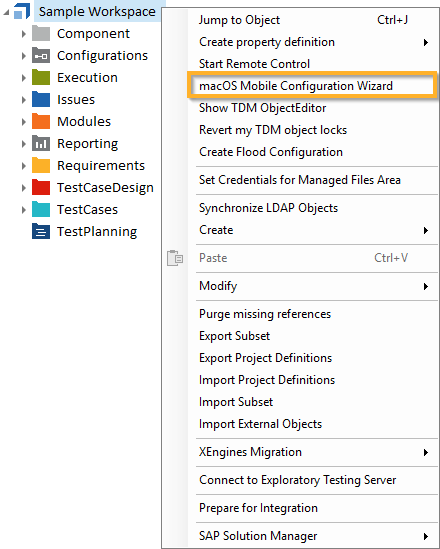
macOS Mobile Configuration Wizard in the context menu
Configure your Mac via the macOS Mobile Configuration Wizard
After you have launched the macOS Mobile Configuration Wizard, an introductory page provides you with an overview of the Wizard.
Click Next to start the configuration.
Step 1: Setup Remote Connection
In this step, you have to enter the IP address and your credentials to establish a remote connection to your Mac. Enter the parameters as described in the table below.
|
Parameter |
Description |
Example |
|---|---|---|
|
Username |
Enter your user name. |
YourUsername |
|
Password |
Enter your password. |
YourPassword |
|
IP Address |
Enter the IP address of your Mac. |
15.23.100.24 |
|
Port number |
Enter the SSH Port for your Mac. This box is obligatory only if it's different than the default port 22. |
22 |
|
Platforms |
In the What do you want to automate? section, select which platforms you want to automate. |
iOS only |
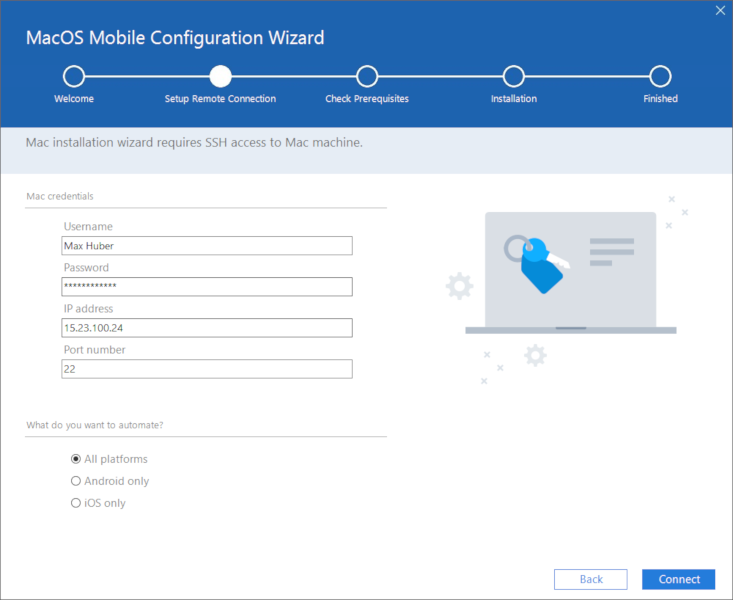
IP address and login credentials for a remote Mac
Click Connect to start a remote connection with your Mac and go to the next step.
Step 2: Check Prerequisites
In this step, the macOS Mobile Configuration Wizard verifies whether you have installed the following components on your Mac:
-
Xcode
-
Java
If these components are not installed, the macOS Mobile Configuration Wizard displays an error message.
In this case, you have to install the missing components on your Mac and click Retry.
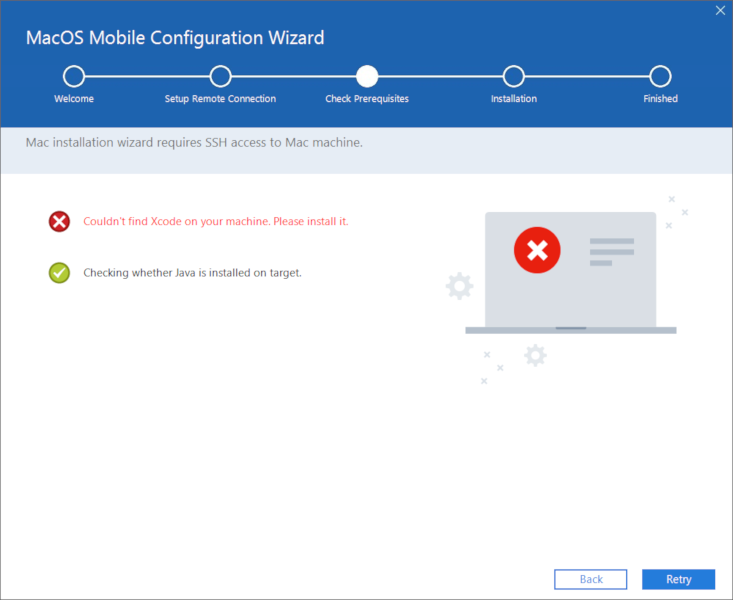
Example of messages on the Check Prerequisites page
Step 3: Installation
In this step, the macOS Mobile Configuration Wizard installs components on your Mac.
In case of failure, you can view the installation logs in the MacOSMobileConfigurationWizard file located at %TRICENTIS_ALLUSERS_APPDATA%\logs\Automation.
If the installation is successful, click OK to go to the Finished page.
Step 4: Finished
After successful configuration, the macOS Mobile Configuration Wizard displays the Finished page.
Click Finish to close the macOS Mobile Configuration Wizard.
Install Android SDK Tools
If you want to automate Android devices via a Mac, you have to install Android SDK Tools on your Mac.
To do so, install Android Studio. For more information, go to the official Android Studio web page.
Alternatively, you can install the stand-alone Android SDK Tools. For more information, go to the official Android Studio documentation.
Verify the Appium installation
The macOS Configuration Wizard carries out the installation of the Appium Server on your Mac.
To verify the Appium Server address, paste it into your browser. The address consists of your Mac IP address, the default port 4723, and the standard path for the Appium Server: /wd/hub. For example, https://15.23.100.24:4723/wd/hub.
You use the Appium Server address to establish a connection with an iOS device or a remote Android device in the following situations:
-
When you add devices in the Mobile Scan, you have to enter the Appium Server address in the Add connection window.
-
When you configure your tests, you have to specify the test configuration parameter AppiumServer.
Check the Appium logs
If you want to see the Appium logs for debugging purposes, you can:
-
Run the Appium Server manually.
-
Run the LogViewer.exe file located at the %TBOX_HOME% directory.
Set a provisioning profile
After you have configured your Mac with the macOS Mobile Configuration Wizard, you have to set a valid provisioning profile in Xcode. To do so, follow the steps below:
-
In the WebDriverAgent directory, run the scripts\bootstrap.sh file.
-
Open Xcode.
-
Open the project WebDriverAgent.xcodeproj.
The project is located either in the usr or opt directory under /usr/local/lib/node_modules/appium/node_modules/appium-webdriveragent.
-
Under Targets, select the target WebDriverAgentLib and go to the General settings tab.
-
In the Signing section, select the check box next to Automatically manage signing.
-
In the Signing section, select a valid provisioning profile in the Team box.
-
-
Under Targets, select the target WebDriverAgentRunner and go to the General settings tab.
-
In the Signing section, select the check box next to Automatically manage signing.
-
In the Signing section, select a valid provisioning profile in the Team box.
-
-
Save the project WebDriverAgent.xcodeproj.
-
Build the project to verify that everything works as expected.
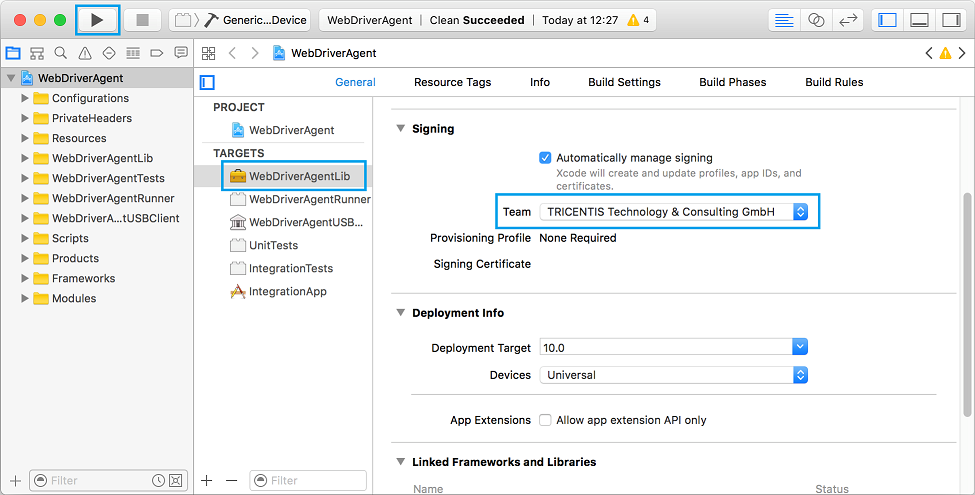
WebDriverAgentLib in Xcode
|
|
If you have problems with setting a provisioning profile, refer to this Knowledge Base article. |
Components on your Mac
When the macOS Mobile Configuration Wizard installs Appium on your Mac, additional components are installed. If you have problems with Appium installation, you may need to install some of them manually.
Additionally, the macOS Mobile Configuration Wizard installs the Tosca Mobile Assistant. This component automatically detects and displays locally connected Android devices and emulators when you run the Mobile Scan.
In the table below you can find a list of all these components and their versions.
|
Component |
Version |
|---|---|
|
Appium |
1.20.2 |
|
Carthage |
0.37.0 |
|
Java |
8 |
|
Node |
12.18.0 |
|
npm |
6.11.3 |
|
Tosca Mobile Assistant |
1.0 |
|
Xcode |
11.1 and 12.3 Tricentis recommends to use Xcode 11.1 for devices with iOS 13.1 and Xcode 12.3 for devices with iOS 14.4. |