Install and configure Tricentis Analytics
To install and configure Tricentis Analytics, you must have local administrator rights.
For detailed information regarding software versions and hardware requirements for Tricentis Analytics, see the System Requirements.
Tricentis Analytics requires port 80 and 443. This is not configurable.
The ports 80 and 443 are also the default ports for Tosca Server. So if you use Tosca Server, you need to perform either of the following actions:
-
install Tricentis Analytics on a different machine
-
use a different default port for Tosca Server
Installation process
To install and configure Tricentis Analytics, follow the steps below:
-
Make sure you have Tricentis Tosca installed.
To allow for communication, Tosca Commander and Tricentis Analytics must be of the same version.
-
Download the Tricentis Analytics installation file from the Tricentis Support Portal and unzip it.
-
Double-click the file TricentisAnalytics12.1.exe. This opens the Tricentis Analytics Setup dialog.
-
In the Tricentis Analytics Setup dialog, click Install.
-
Accept the license agreement.
You can view the Qlik Sense® license agreement in your default application for viewing PDF files, for example PDF Reader or Internet Explorer.
Please note that the number of Tricentis Analytics users per installation is initially limited to 1500. If you have a higher demand, please contact our licensing team via license@tricentis.com.
-
Configure the following parameters in the respective tabs of the Configure install parameters dialog:
-
Folders: specify the installation root folder.
-
Ports: specify the User management port and the Internal database port.
-
Database connection: specify the connection string to the reporting database.
-
Tosca Data: define which repositories are included in Tosca Data.
-
qTest Data: define which projects are included in qTest Data.
-
Scheduler: specify when to make snapshots.
-
Admin user: specify the username and the password of the admin user.
For more information on individual parameters, see chapter "Configure installation parameters" below.
-
-
Once you have configured your installation, click Done.
-
Once the setup is complete, click Close.
Configure installation parameters
You can configure the install parameters in the Tricentis Analytics Setup dialog.
Alternatively, you can configure Snapshotter and Scheduler after the initial installation (see chapter "Configure snapshots after installation").
Specify the installation root folder in the Analytics data folder entry field.
By default, the folder name is Analytics, and it contains the Shared folder and QVDFiles (QlikView Data) subfolders. You can specify a different path to each in the respective entry fields.
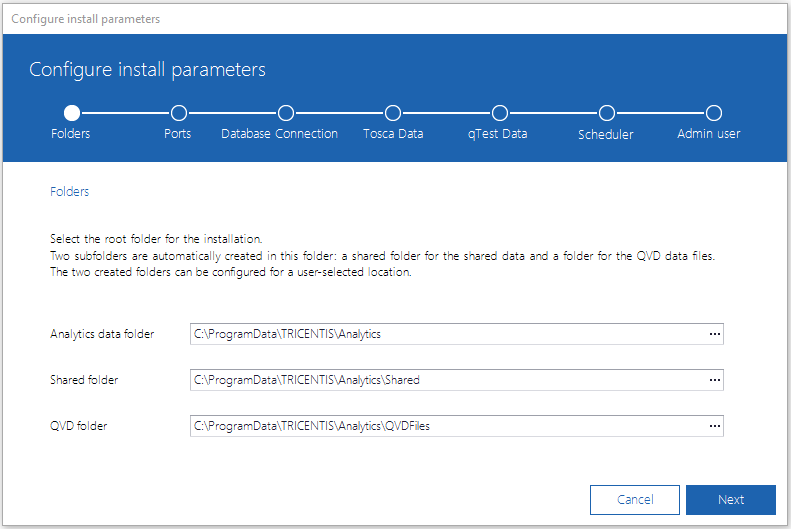
Specify installation folders
Specify the User management port and the Internal database port in the respective text fields.
By default the User management port is 5000 and the Internal database port is 4432. If other applications use these ports, you can specify different ports through the text fields.
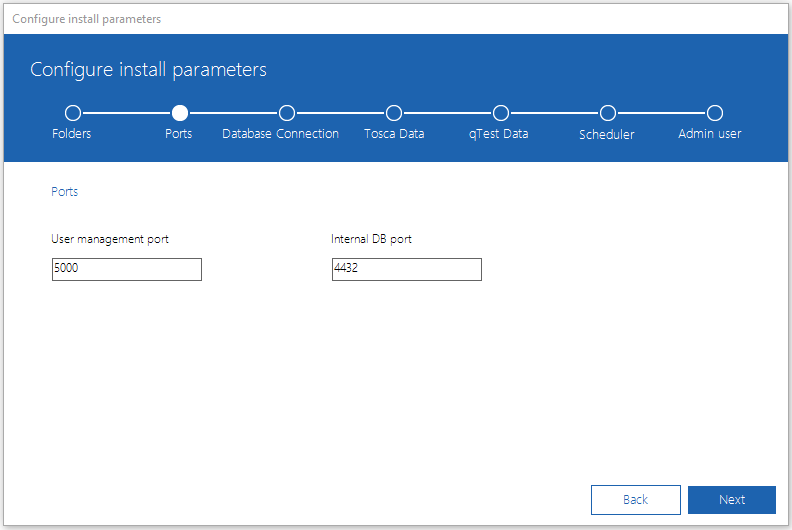
Specify ports for user management and the internal database
Specify the connection string to the reporting database in the Connection string entry field. Tricentis Analytics supports Microsoft SQL Server databases.
If you want to use a Microsoft SQL Server Express edition, you will need to take additional steps to connect to the server. If your connection string uses a data source or a server named
host\SQLEXPRESS, enable the TCP (Transmission Control Protocol) on port 1433 in your SQL Server Configuration Manager. For further information, read more here.
If the database does not exist yet, it will be created by the snapshotter.
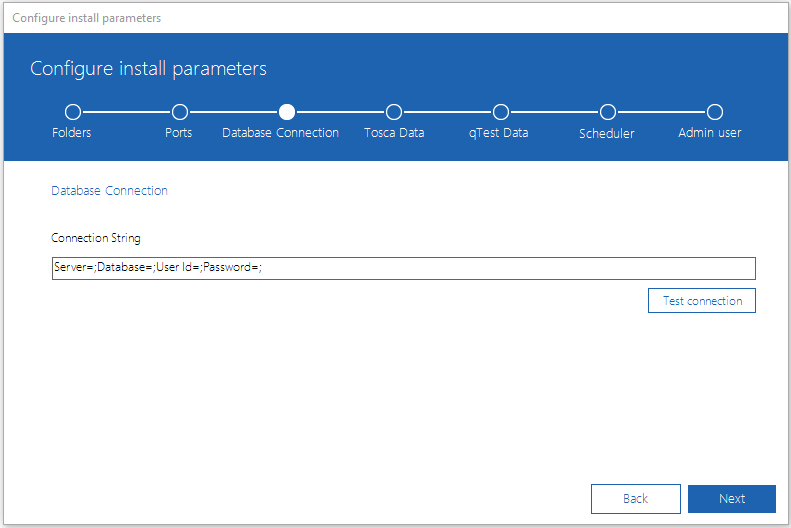
Specify connection string
Define which repositories are included in Tosca Data.
To do so, select the respective repository and click Add.
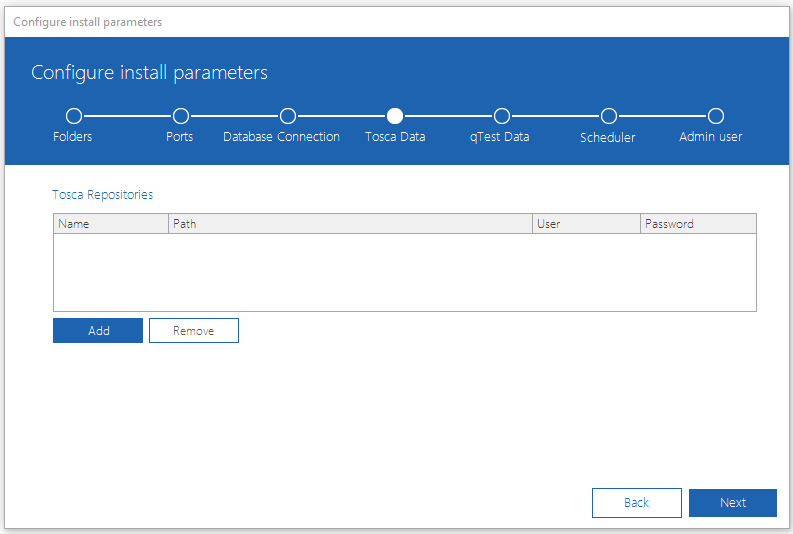
Define repositories in Tosca Data
Tricentis Analytics allows qTest OnPremise customers to define the projects for which you want to include qTest Data.
To do so, select the respective project and click Add:
-
Specify the qTest Project Url: the Elastic Search server's IP address. The default port value is 9200.
Example: http://10.101.17.48:9200
-
Specify the Customer Id: for OnPremise customers, the default value is 2.
-
Specify the Project Id: the Id number associated with the qTest project you want to pull data for in Tricentis Analytics. You will find this numeric value in the qTest URL of your web browser once you have selected the appropriate qTest project in your project drop-down menu.

Example: Project Id
In the qTest API Endpoint field, enter the qTest URL for your environment (Example: https://qas.qtestnet.com).
If you do not want to add any qTest projects, you can skip this install parameter and click Next.
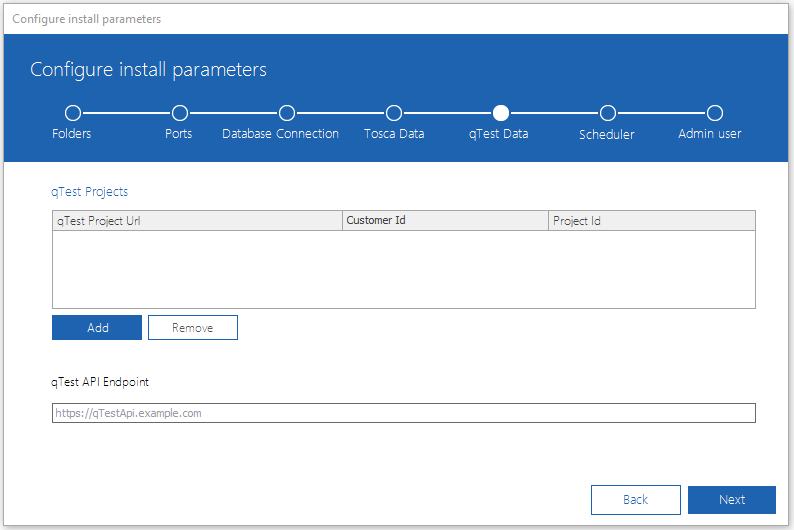
Define projects in qTest Data
Tricentis Analytics can only take snapshots of multi-user workspaces.
Tricentis recommends that you create a new local multi-user workspace for the common repository that you want to snapshot. After adding the new multi-user workspace to Tosca Data or qTest Data, do not make any changes to this workspace.
You can create workspace snapshots at a specific time or in defined time intervals.
Choose your preferred option in the Schedule type dropdown menu:
-
TimeOfDay creates workspace snapshots every day at a specific time. Specify which time in the Time of day entry field.
-
Interval creates workspace snapshots at specific time intervals. Specify the interval in the Minutes entry field.
The recommended scheduled interval is 60 minutes.
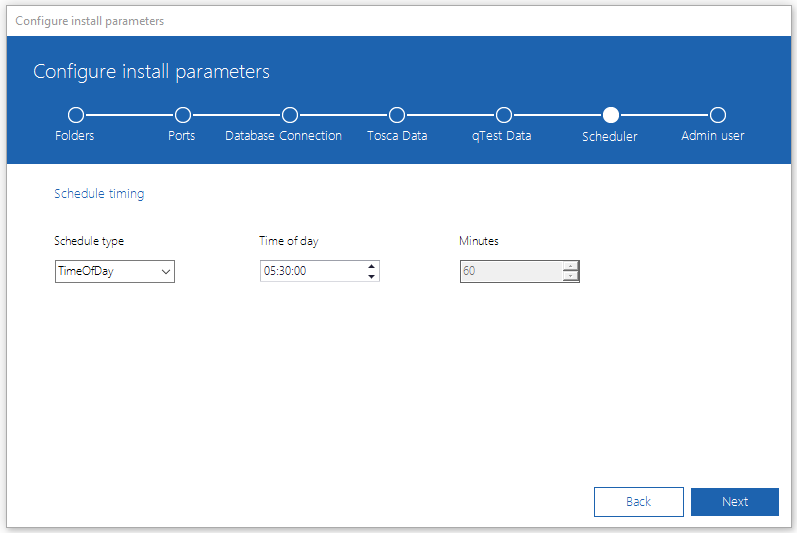
Schedule snapshotter
Define a local windows user for using Qlik Sense® services. The user then has the future administrator rights in Qlik Sense, i.e. the licensing and administration of the user groups.
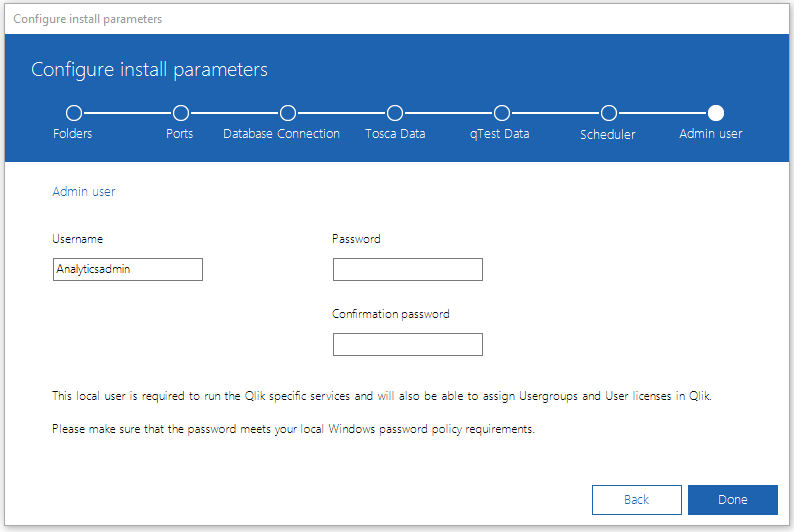
Define admin user
Changing the local Windows username may result in errors.
Tricentis recommends that you only change the password of the local Windows user if absolutely necessary.
Please note that if you change it, you must also update all Qlik services that run with these credentials in the Services extension of the Qlik Management Console (refer to the third-party Qlik manual for more information).