Integrate JMeter with Universal Agent
In this article you will learn how to integrate JMeter with the Universal Agent
The sample source code of JMeter project is located at https://github.com/QASymphony/jmeter-sample
Prerequisites
-
Your machine needs to have JMeter installed. You can download and install JMeter from here: https://jmeter.apache.org/download_jmeter.cgi
Create JMeter Universal Agent
-
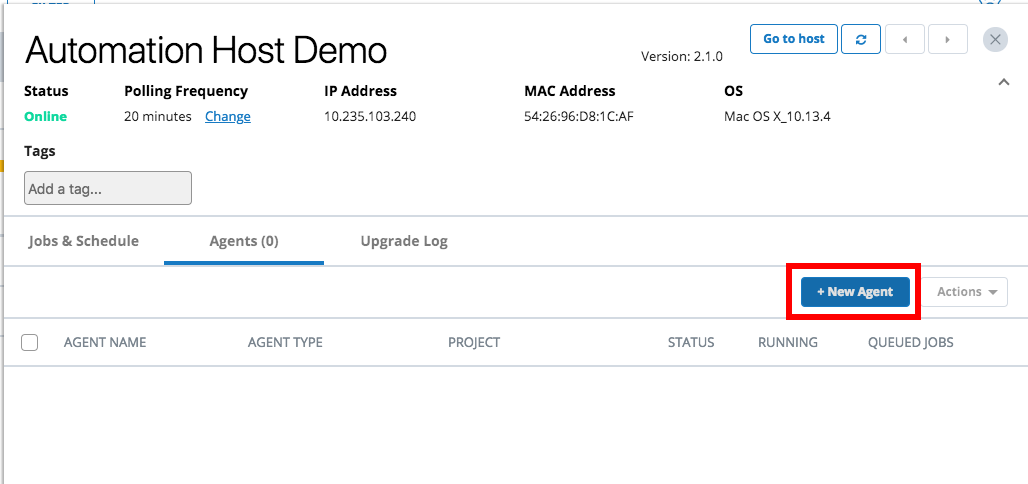
From Launch. open the host machine where you want to create the new agent.
-
Select the + New Agent button.
-
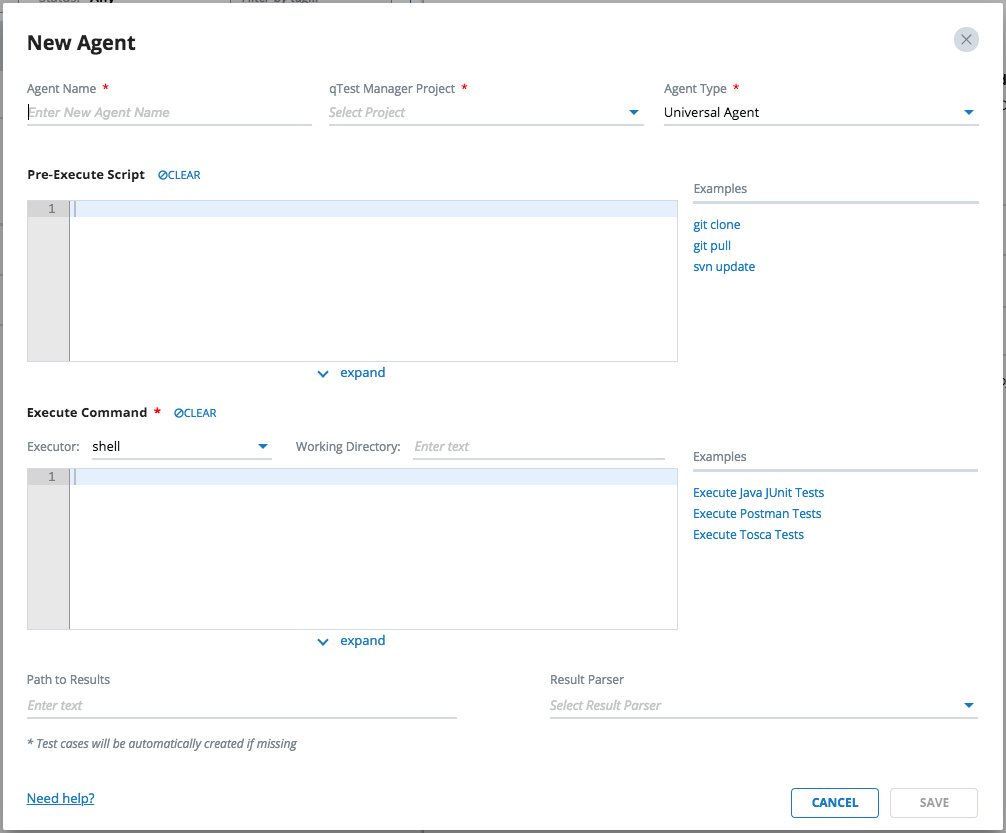
The New Agent dialog will display.
-
Enter the information below for the new agent.
General Agent Information

-
Agent Name: name of the agent, e.g. JMeter Agent
-
qTest Manager Project: select a qTest Manager project from which the agent is going to execute scheduled tests, e.g. qConnect Sample Project
-
Agent Type: select Universal Agent
Pre-Execute Script
Enter the script below in the Pre-Execute Script editor, which is specific to the Operating System that the host is running.
Linux/Mac
#!/bin/bash
 if [ ! -d "/usr/local/var/jmeter-sample" ]
then
  cd "/usr/local/var"
  git clone https://github.com/QASymphony/jmeter-sample
else
  cd /usr/local/var/jmeter-sample
  git pull --all
fi
Windows
if not exist "D:\jmeter-sample" (
  cd /d D:\
  git clone https://github.com/QASymphony/jmeter-sample
 ) else (
  cd /d "D:\jmeter-sample"
  git pull --all
)
Execute Command
Executor
-
If your host machine is running on Linux or Mac, select shell as the executor.
-
If your host machine is running on Windows, select batch as the executor.
Working Directory
-
If your host machine is running on Linux or Mac. enter /usr/local/var/jmeter-sample
-
If your host machine is running on Windows. enter D:\jmeter-sample
Execute Command
Enter command below to Execute Command editor.
Linux or Mac
/usr/local/opt/apache-jmeter-5.0/bin/jmeter -n -f -t Users.jmx -l results/result.xml -Jjmeter.save.saveservice.output_format=xml -Jjmeter.save.saveservice.response_data.on_error=true
Windows
C:\apache-jmeter-5.0\bin\jmeter -n -f -t Users.jmx -l results/result.xml -Jjmeter.save.saveservice.output_format=xml -Jjmeter.save.saveservice.response_data.on_error=true
Path to Results
Optional field. Enter the value below to specify the path to the test result generated by Jmeter project
-
If your host machine is running on Linux or Mac: /usr/local/var/jmeter-sample/results
-
If your host machine is running on Windows: D:\jmeter-sample\results
Result Parser
Optional field. Select JMeter as the Result Parser.
-
Save the JMeter Agent. You'll be return back to Automation Host dashboard
-
Download JMeter parser HERE
-
Access qTest Launch and follow this article to upload the Parser to qTest Launch
-
Go back to Automation Host UI, refresh the page for it to load the new parsers
-
Select to edit JMeter Agent and you'll find the JMeter parser from the Result Parser list
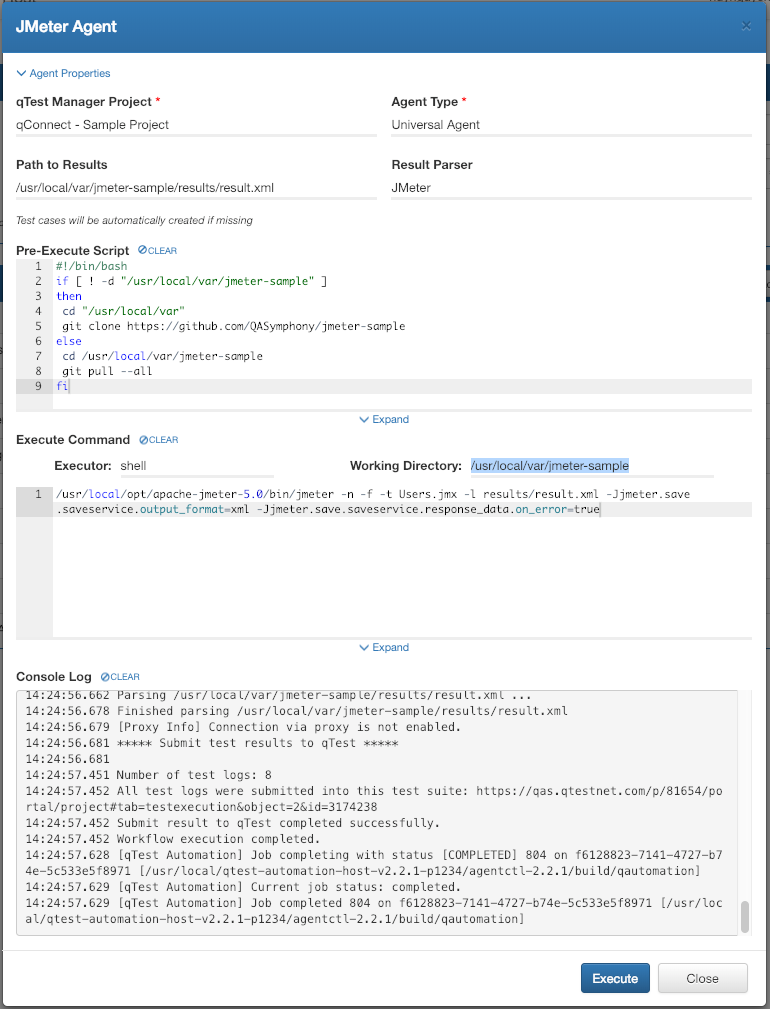
The screenshot below shows how the new JMeter Agent is configured, on Mac.
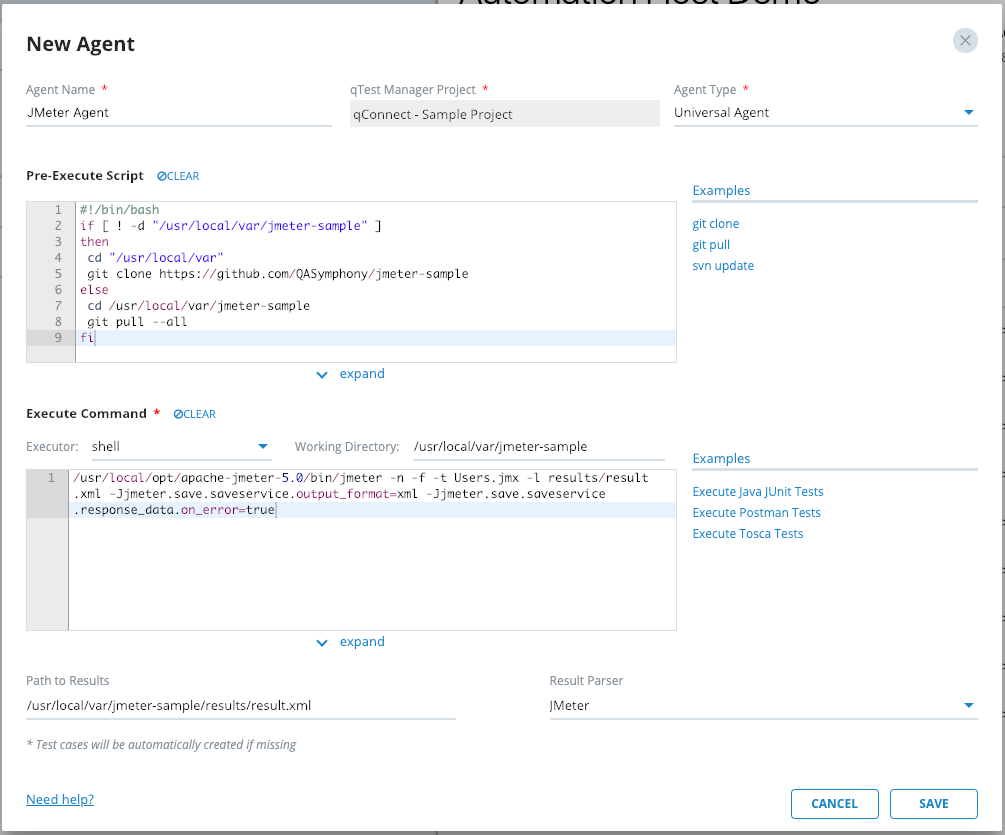
Select SAVE to finish creating the agent. The agent will be available the next time the host machine polls to qTest Launch.
Execute JMeter Universal Agent
-
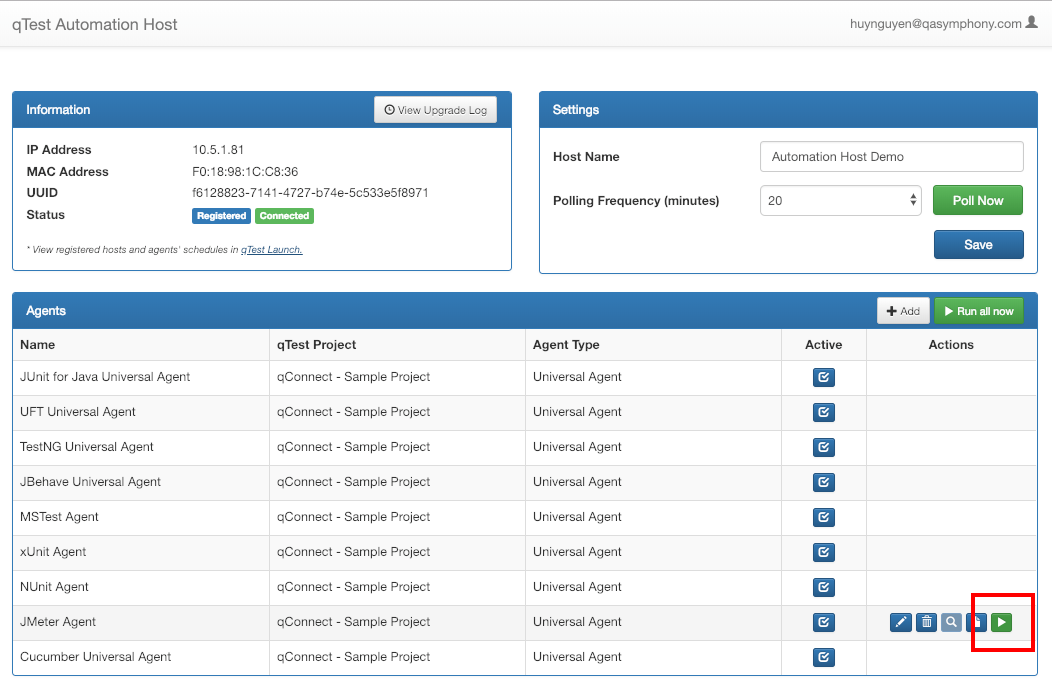
Access the host machine where the JMeter Agent was created.
-
Locate the agent in the Agents list and select the Run now button.
-
The Universal Agentexecution dialog will display.
-
Select the Execute button to kick off the agent execution and you will see the logs shown in the Console Log section. If the execution is successful, you'll see the test run logs being submitted to qTest Manager.
Next, access to qTest Manager. Select qConnect Sample Project then go to Test Execution module. You'll see the test results submitted to qTest Manager as Test Runs under a Test Suite naming Automation YYYY-MM-DD, as below.
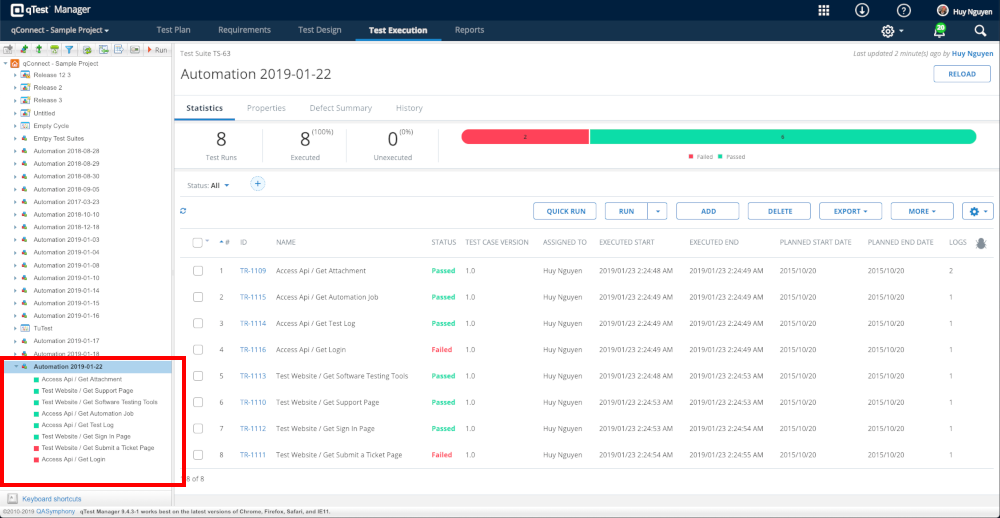
You have successfully integrated and executed your JMeter test with Universal Agentand have it reported the execution result to qTest Manager.