Schedule and Kickoff Test Automation
Automation Integration V2 allows you to create schedules to execute automation tests on a recurring basis or to trigger tests to be executed immediately.
Prerequisites
You can create schedules only if these setup steps have been completed:
-
Activate Automation Integration settings in your qTest project.
-
Install and Register the Automation Host. Make sure the host is currently online.
-
In the Agent Configuration pop-up input configurations based on your framework:
-
Create your automation Test Cases in qTest Test Design. You can either manually create the test cases in Test Design or instead, the agent can scan your scripting directory, detect test cases, and automatically create them in qTest.
Create Test Cases from TestNG or jUnit based on test class or method
Create Test Cases from Cucumber or JBehave based on feature or scenario
NOTE:
-
If you select manual Test Runs, they are excluded from the schedule.
-
You cannot create a schedule if no Automation Test Run is selected.
-
In Test Execution, select a Release, Cycle, or Test Suite object from the left navigation toolbar and click on the Add Test Runs icon from the top of the left navigation toolbar to add test runs into that location.
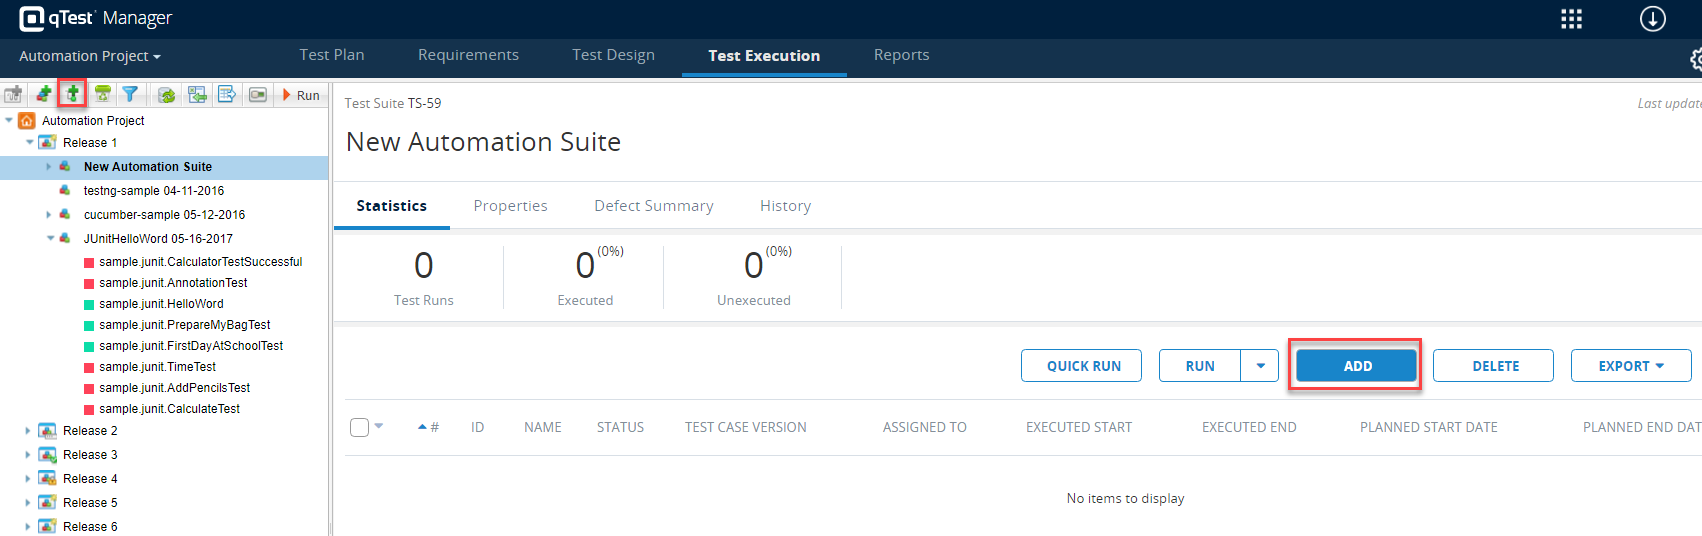
-
In the Add Test Runs window, navigate to the Test Cases tab and select the automation test cases to add as test runs
Create Schedules
-
To create a schedule for a single test run, click on the Schedule button from the Test Run page:

-
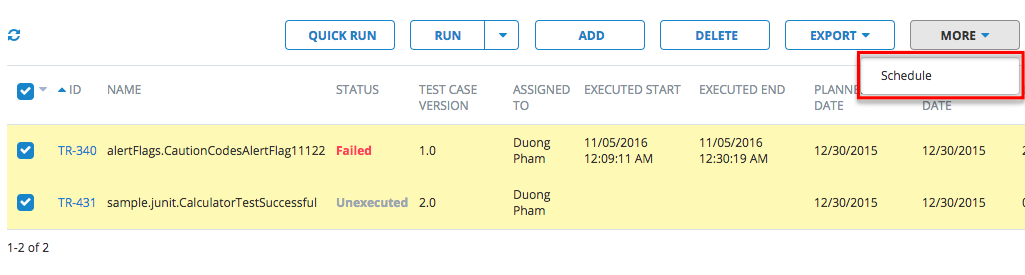
Alternatively, to create a schedule for more than one test run, use the checkboxes in the Test Run Grid (within a Release, Cycle, or Suite) to select the Test Runs you wish to schedule, and select the Schedule button.
-
In the pop-up window that appears, choose your desired settings:
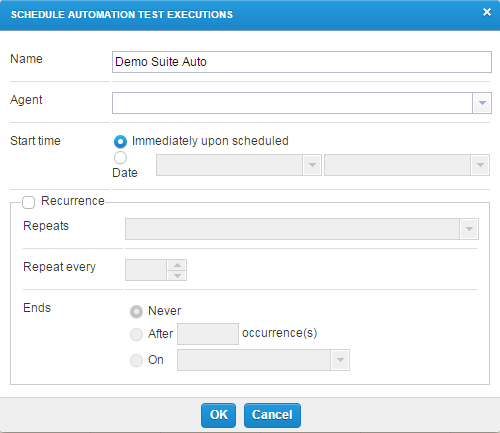
Name: schedule's name.
Agent: select your desired agent which will execute your automation scripts. Only agents which are online and active are listed out.
Start time: you can either select the current date and time or specify future date and time.
Recurrence: check it if you want to make it a repeating event.
Repeats: select if the event will repeat every day, week or month.
Repeat every ... days: Specify the interval (the number of days) between 2 events in the same series. It can be weeks or months depending on your selection of Repeats field.
Ends: specify when the event stops repeating
Never: the event will not stop repeating.
After ... occurrences: the event will repeat x times before it stops.
On: specify a date after which the event will stop.
-
Click on OK button to create the schedule.
View Existing Schedules
NOTE: In order to view an agent's schedule, you need Project Admin permissions.
-
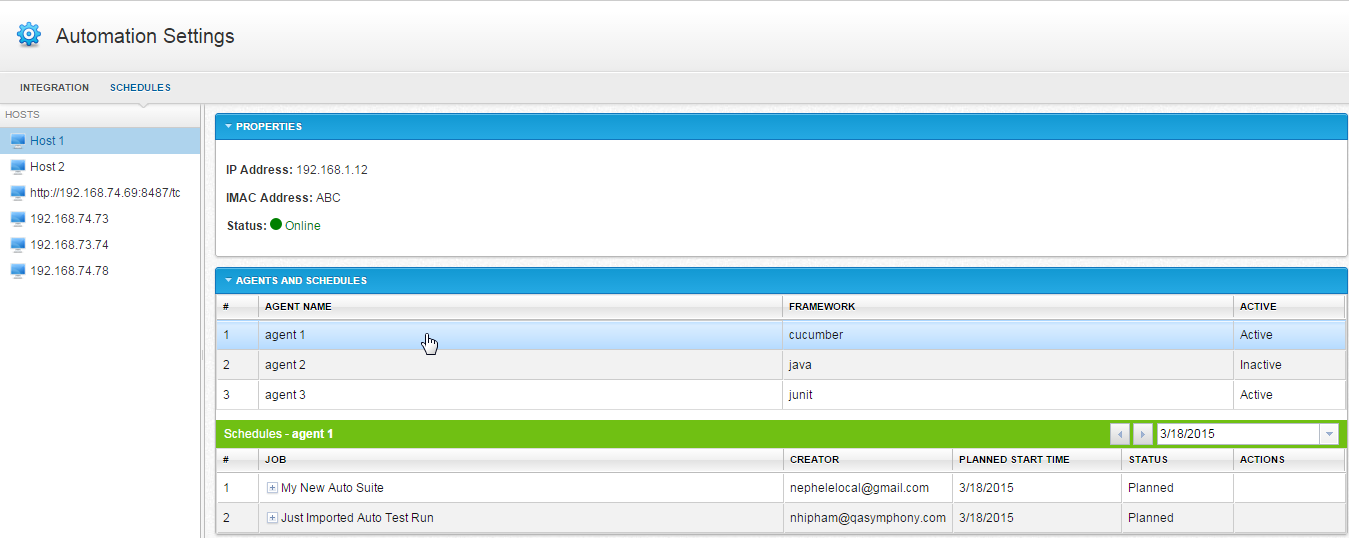
Under the Gear icon, click on Automation Settings and select tab Schedules.
-
On the left panel, all registered Automation Hosts, including Online and Offline ones, are listed out.
-
Each Host displays this info:
IP and MAC addresses.
Status: indicates whether the host is online or offline.
Agents: list of the host's automation agents.
-
Each agent displays this info:
Framework: TestNG. jUnit, Cucumber. JBehave
Active: Active or Inactive
-
Select your desired agent to view its schedules. By default, it shows schedules on the current date. You can change the date to view schedules for other dates
Delete Schedules
Schedules whose status is Planned can be deleted. Click on the Delete icon. There are 2 options:
-
Delete occurrence: only the selected item is deleted.
-
Delete series: the selected item and its following Planned events in the series are deleted. The historical events are retained.

Schedule Status
Job status transitions must follow the diagram below:
![]()
The Automation Agents polls qTest for new schedules frequently based on a configured interval. They will then run the corresponding tests on your Automation Host. After the execution is done, the test and test step results are posted back to qTest. If there are any errors and the Test Execution cannot be completed, the schedules' status will change accordingly in qTest. You can view the agents' logs for the errors.
Kick off Tests to be Executed Immediately
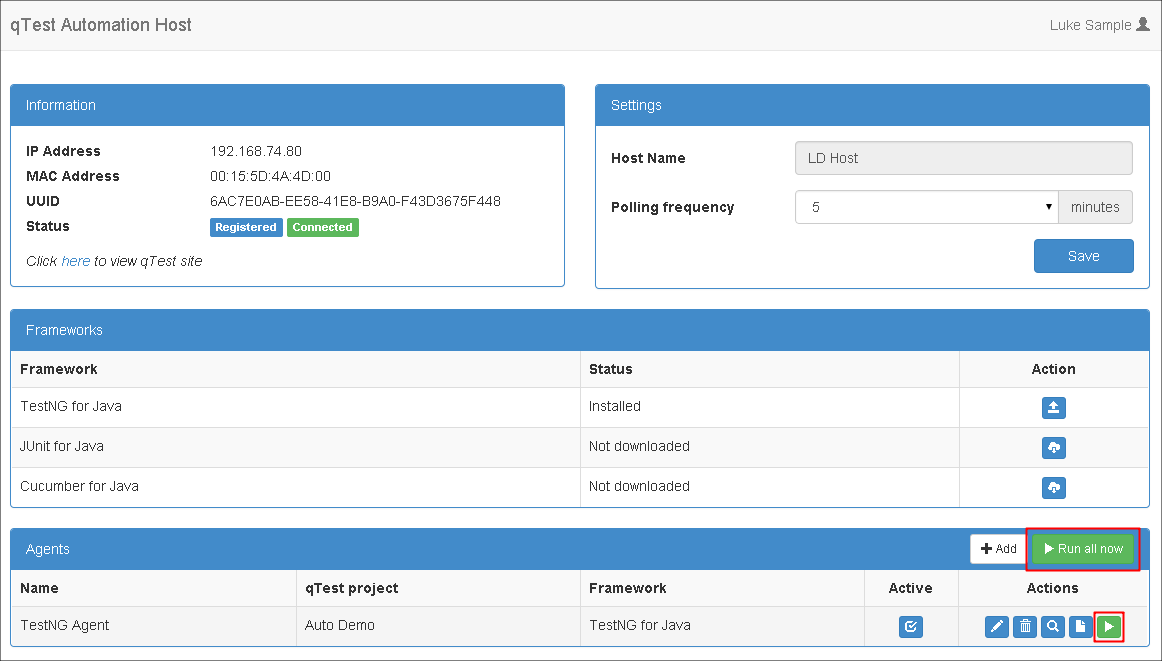
Even if you selected to start schedules immediately, tests will be triggered after the agent polls the schedule to qTest. In order to trigger tests to be executed immediately, you must force agents to poll for qTest schedules with either of these options:
-
Click on Run all now button. All active agents will retrieve schedules from qTest and execute tests immediately.
-
OR On each active agent, click on its Run now icon. It will retrieve schedules from qTest and execute tests immediately.
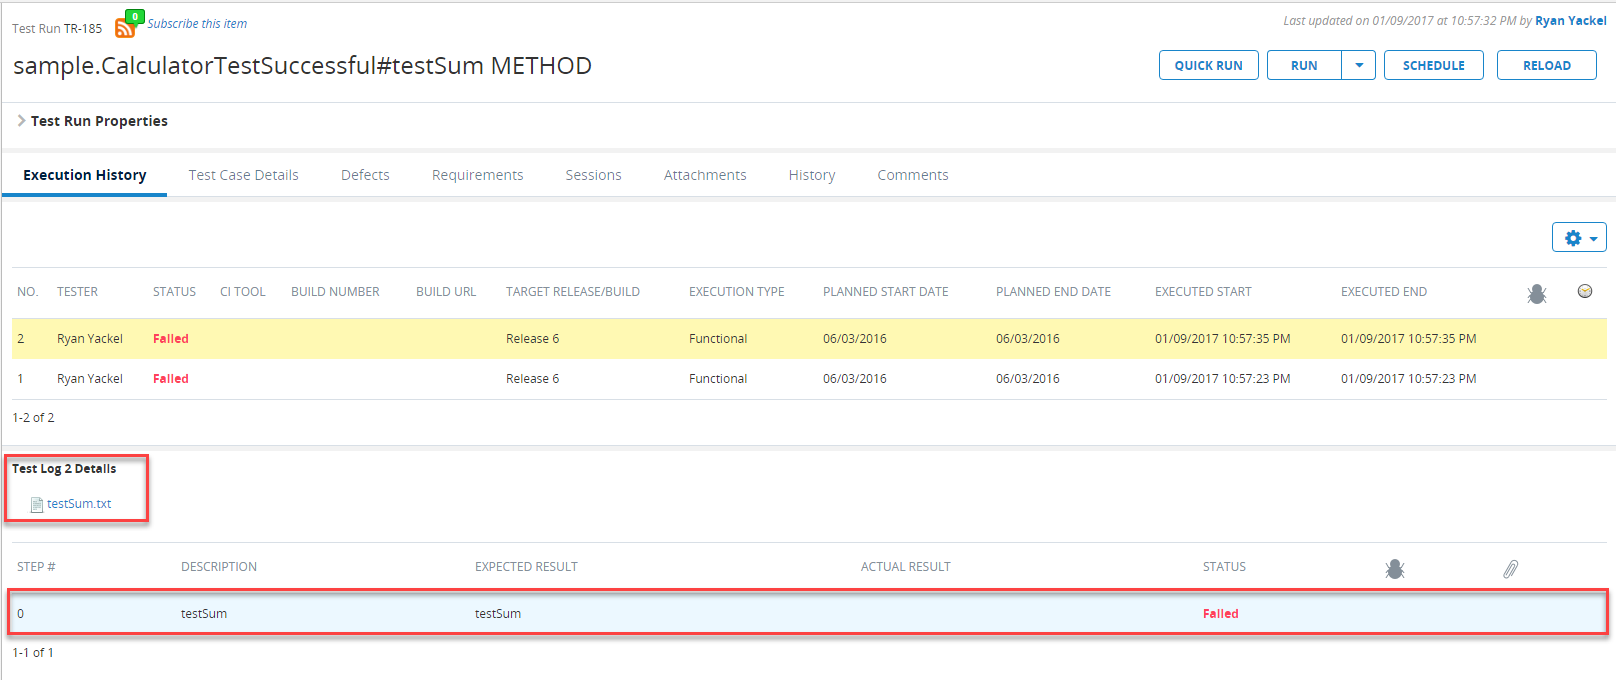
Test Step Execution
The Test Step Description in qTest needs to match the method name in the associated test class or the scenario of the associated feature. Otherwise, it will not be executed. After the execution is done, if there are any failed steps, you can find their error logs attached to the corresponding Test Log. The log files have the same names as the failed steps. If there are more than 3 failed steps, the log files are archived to a zip file.