Selenium Automation
This article illustrates how to use the Shell Script Automation Host Feature to build a .csproj with msbuild, run NUnit tests with nunit3-console runner and automatically upload the test results to qTest Manager.
Currently, this example illustrates how to run the script on Windows, but a .sh file is included for Mac users to configure.
DISCLAIMER
The directions below are only samples but have been tested for accuracy. Use at your own risk. If there is a problem with an end result, make sure that the configuration has been established correctly. Issues with sample exercises are not covered by support.
Prerequisites
You will need to install the following applications to use the TestNG with Maven Build Automation Feature:
-
Python 3.6 from https://www.python.org/downloads/
PIP (package manager for Python)
-
Build Tools for Visual Studio from https://www.visualstudio.com/downloads/
-
NUnit Console from https://github.com/nunit/nunit-console/releases/
-
Firefox from https://www.mozilla.org/en-US/firefox/new/
-
Git for the Command Line from https://git-scm.com/download/
Tips for Prerequisite Set Up
Check PIP Installation
These instructions are for Command Prompt (Windows.):
-
Run this command to ensure the PIP install with Python was successful. It should output the pip version:
pip --versionpip3 will work as well, example: pip3--version -
If PIP did not install, run the command below:
python -m -ensurepip --default-pipFor more information on PIP installation, refer to https://packaging.python.org/tutorials/installing-packages/
-
Once the PIP install is successful, run the following commands individually:
pip install requests pip install urllib3 pip install beautifulsoup4 pip install lxml pip install pybase64
Windows
Ensure that all environment variables are set up correctly before running the Automation Host script, specifically that the PATH variable is updated for Python, NUnit3-console, and MSBuild.
Selenium Automation Host Example from GitHub
Update Configuration File
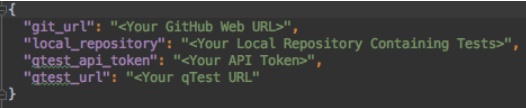
Open the conf.json file and update with your personal information. Enter your own qTest URL and API Token found in your qTest Manager Environment.
-
git_url: The shell script uses the URL to clone a repository and send pull requests every time it runs if -git input is used.
-
local_repository: The folder containing the Selenium C Sharp. The shell script will use this to know where to run the NUnit test. To run the NUnit tests, the shell script looks for .dll file located in bin/Debug. Make sure the local repository folder name is the same as the .dll file that will create when the project gets built.
-
qTest_api_token: The token used to authorize the connection to qTest Manager.
-
qTest_url: The personal URL that is used to access QASymphony API.
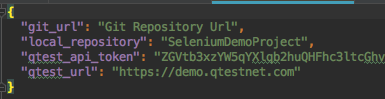
For this example, we will be NOT be using a GitHub sample, but instead the Selenium C Sharp project which is located in the repository, as documented in the conf.json sample file below. For the git URL and local repository use the information shown below in the example configuration file. Make sure to use your own API Token and URL, or the demo will not work.
Setup Automation
Follow these steps to set up your automated testing.
-
Access qTest Automation Host.
For information on accessing qTest Automation Host, refer to Access qTest Automation Host for Windows, Access qTest Automation Host for Mac, or Access qTest Automation Host for Linux. -
Click the Add button in the Agents section to add a new agent.
-
In the New Agent window, enter the appropriate information for the following fields:
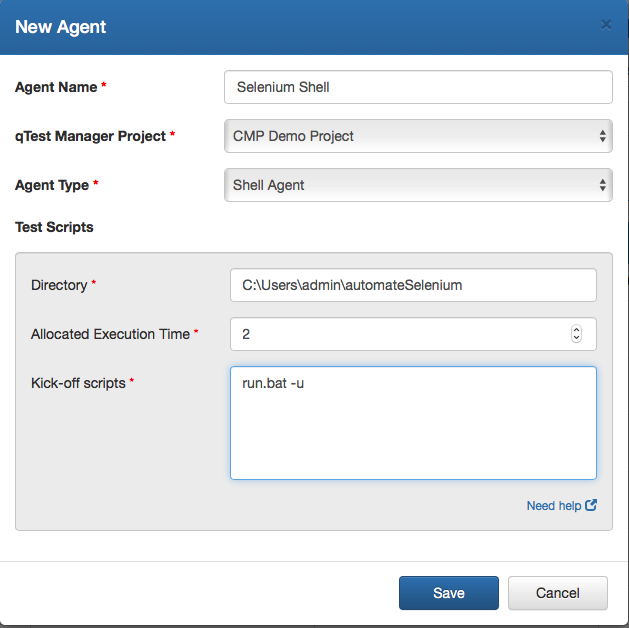
General Agent Information
Agent Name: Name
qTest Manager Project: Select your project
Agent Type: Choose Shell Agent
Test Scripts Information
Directory: The directory containing your scripts and shell agent (Directory where the scripts clone.)
Allocated Execution Time: Amount of time you expect the script to take to execute in minutes.
Kick-off Scripts: The file path to your shell script. This shell script takes in two inputs, one for using git and the second for updating your current test cycle.
To give the shell script permission to run, use the following command: Windows: run.bat Linux: chmod +x run.sh
Shell Script Inputs:
-g Uses GitHub to clone a test case repository, and send pull requests every time the shell script runs.
-u Updates an existing test cycle or create a new test cycle if the first test run. (To create a new test cycle every time the script runs, do not use this argument.)
-b <'branch name'> If the GitHub parameter is used, this input allows the user to clone the repository and make a branch that they specify with the input. An example of using -b is shown in automateJunit.
To run the shell agent, without using GitHub or updating the existing test cycle, do not include the parameters above in the Kick-off Scripts section.
-
Save to close.
Run the Shell Script
To start the shell script, select the yellow icon in the action field which will upload all of the test cases to qTest Manager.

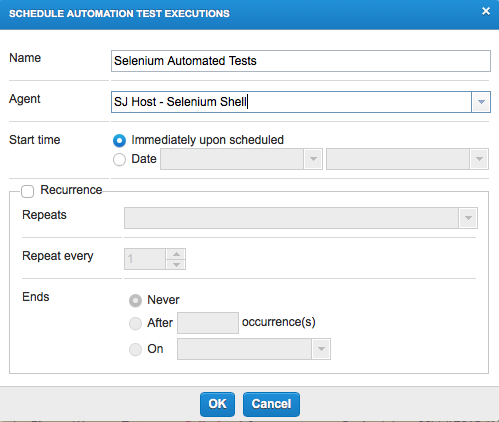
Schedule your Tests
-
In Manager, select the Test Execution tab.
-
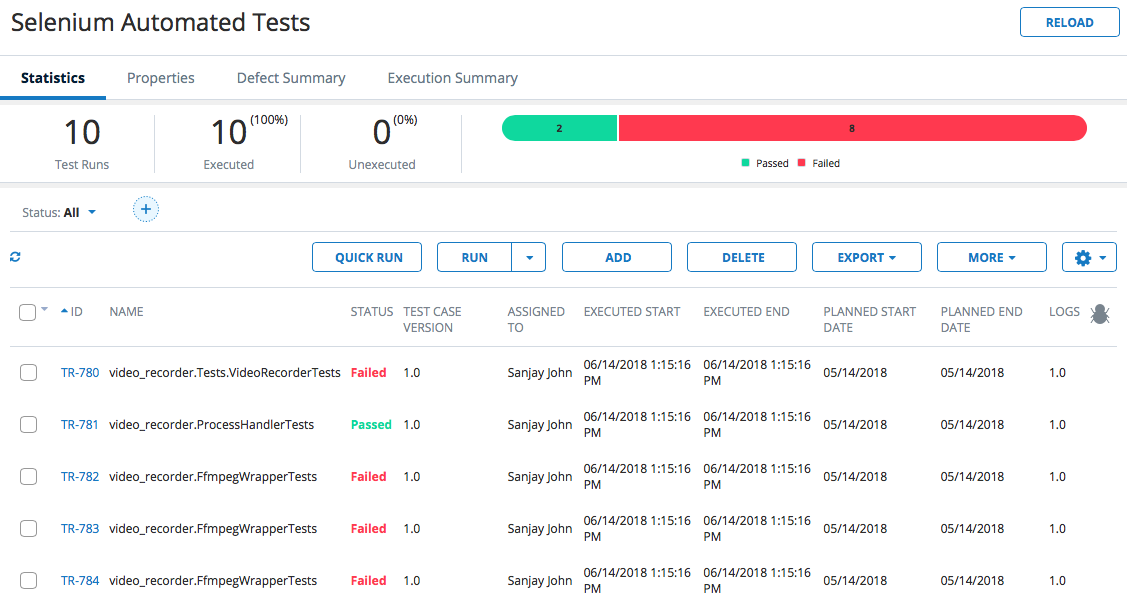
Locate the Test Cycle in your project named "Selenium Automated Tests."

-
Select the Test Cycle, and it will display all of the tests that had been run through the Robot Build along with their statuses.
-
Click the check boxes for the specific tests you would like to schedule and select 'Schedule' from the 'More' drop-down menu.

-
In the Agent drop-down menu, select the Shell Agent and select OK.
-
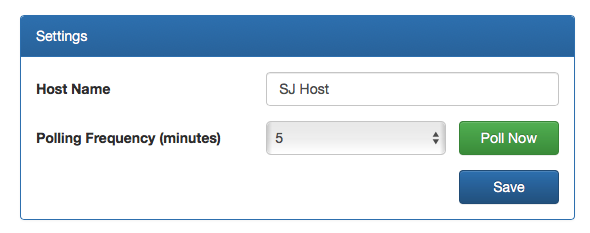
Once the tests are scheduled, you will need to go back to the Automation Host and select Poll Now to kick the Shell Agent off.
Tips for NUnit Parser
The NUnit parser reads from TestResult.xml file, which is located in the bin/Debug directory. Ensure that the .dll file is located in this directory before running the shell script. Also, make sure the name of the directory where the project is located has the same name as the .csproj being built.
In the example shown below, "SeleniumDemoProject" is the name of the local directory, and it is the same name as the .csproj called "SeleniumDemoProject.csproj."
