Automated Script Generator
The automated script generator is a popular feature used by teams accelerating their move to test automation from exploratory and manual test cases. Teams can use the Sessions module to automatically generate web automation test scripts after their qTest Web Explorer or Desktop Explorer sessions have been completed.
Automate with Web Explorer
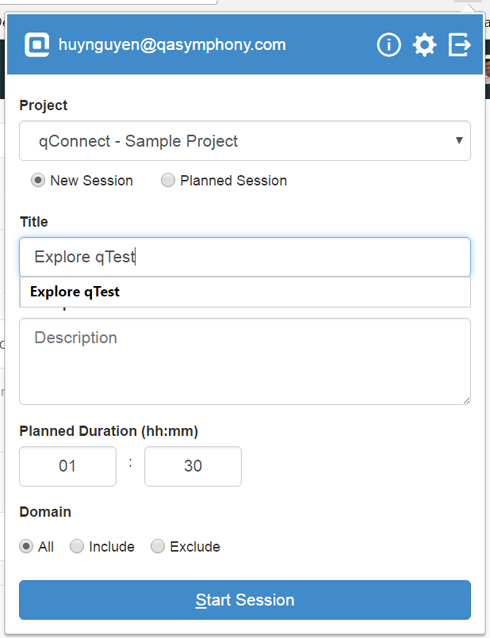
After installing Web Explorer, you can start a new recording session on its supported browser. The below screenshot shows the Start Session screen from Web Explorer for Google Chrome.
Automate with Desktop Explorer
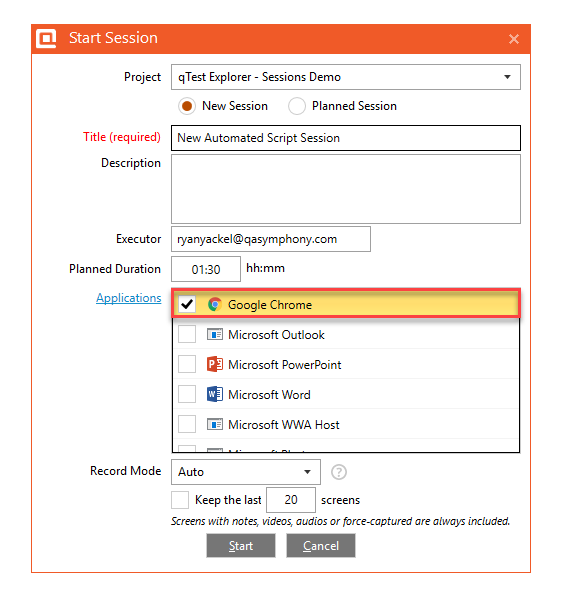
After installing the Integrated Desktop Explorer and the qTest Explorer Extension for Google Chrome, you can create an automated test script. ONLY select Google Chrome in the Applications list.
Generate Automated Test Script
When the recording is completed you will be navigated to qTest Sessions Module editor to review the recorded test session data.
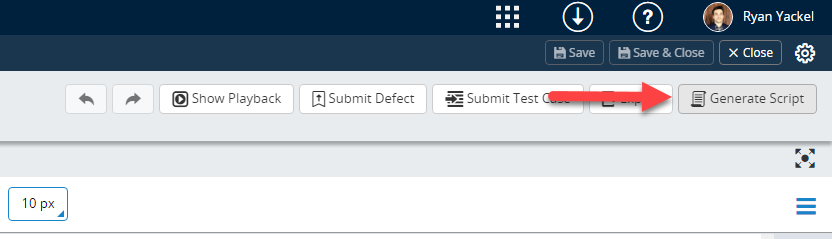
In order to generate an automated script for a web session, click on the Generate Script button in editor toolbar, as below:
You will be presented with a Script generator dialog, as below:
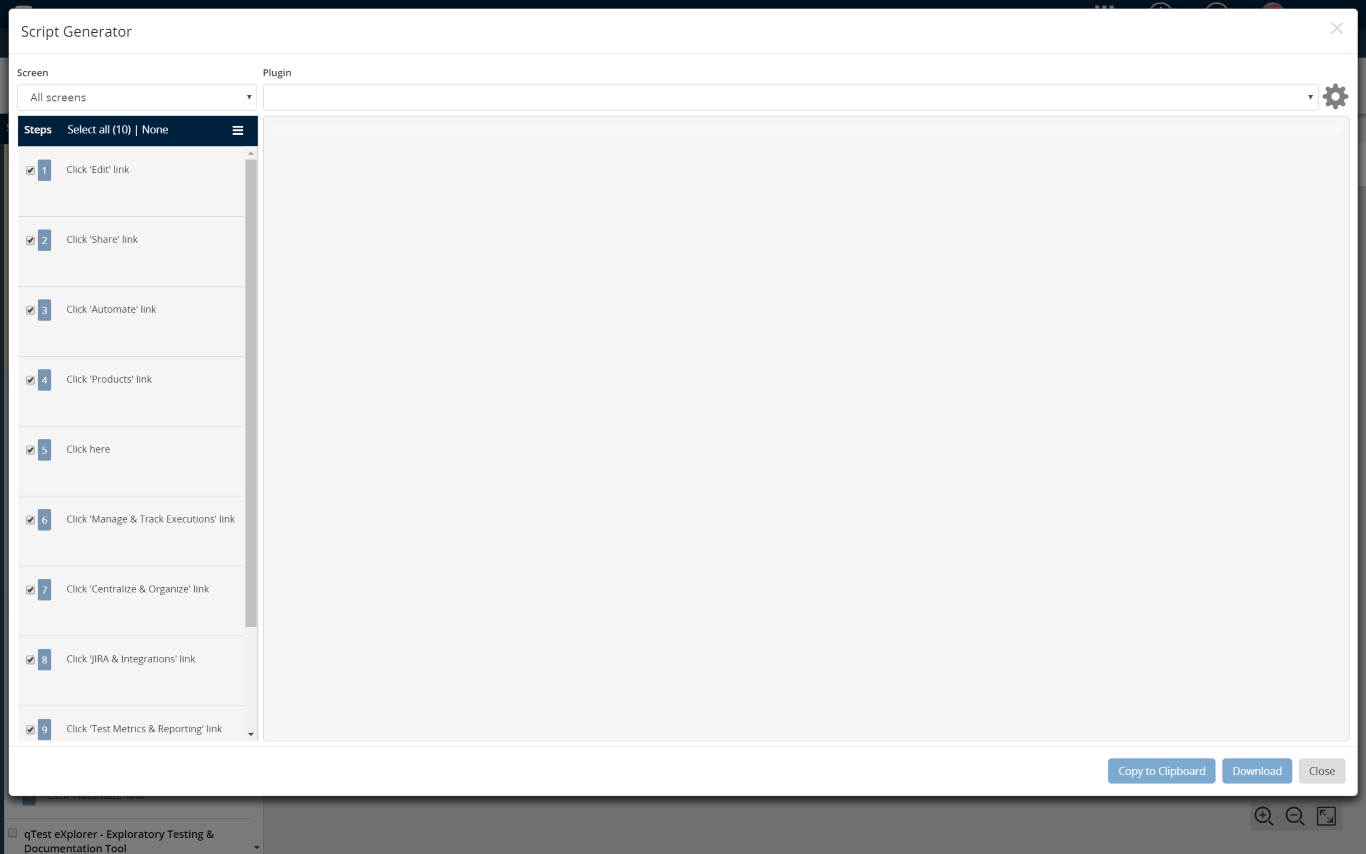
Next, follow the below steps to generate an automated script:
-
Select screen option in the Screen list to narrow down the actions to be generated. By default, the selected value is All screens, which means all the actions of all captured screens will be used to generate a script
-
Select a script generator from Plugin list:
-
Java Selenium: Generate script in Java language that can be executed against the Selenium framework
-
C# Selenium: Generate script in C# language that can be executed against the Selenium framework
-
Python Selenium: Generate script in Python language that can be executed against the Selenium framework
-
Protractor: Generate script in JavaScript language that can be executed against the Protractor framework
-
-
Configure settings for the selected plugin by click on the gear icon next to the plugin list. For example, if your selected plugin is Java Selenium. you will be presented with default settings for this plugin as shown in below screenshot:

-
Below is the description of Java Selenium settings:
-
Package Name: Select a name for the package, the default value is com.companyname.tests.
-
Class Name: Enter the class name of the generated test case. The default value is TestCase1.
-
Web Driver Path: Specify the web driver path for the script to run, the default value is empty. If you do not enter a value for this field, you will need to enter it in the resulting generated script before executing it.
-
Clear text field before sending key: Select this option to generate addition script to clear text in the input field before sending an actual text to that field. This field is selected by default.
-
Always execute an action in the latest window: When this option is selected, every action will be executed in the last opening browser window. This option is selected by default.
-
Generate action description as code comment: Like the name implied, selecting this option will generate action description as code comment for every script action. This option is not selected by default.
-

Example 1: JAVA Selenium Plugin
From Script Generator screen, input following data:
-
Screen: All screens
-
Plugin: Java Selenium
-
Settings:
Package Name: com.qas.selenium.tests
Class Name: Enter the class name of the generated test case. The default value is ProductsPageTestCase.
Web Driver Path: C:\webdriver\webdriver.exe
Clear text field before sending key: checked
Always execute action in latest window: checked
Generate action description as code comment: checked
-
The generated script will look like the following:
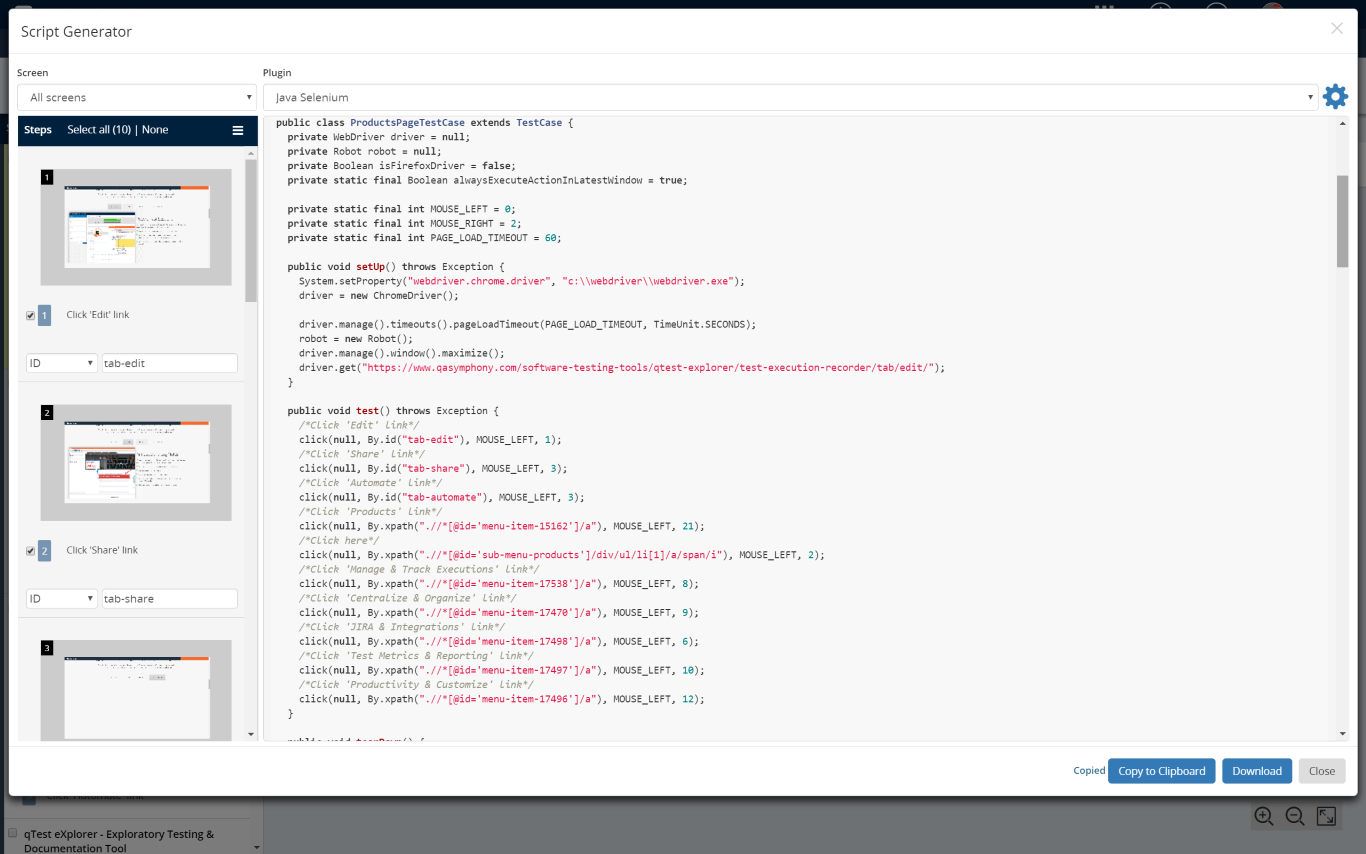
Next, do the following to generate automated script:
-
Exclude specific step(s) to not generate script for it in the left panel by unchecking the check box associated with it.
-
With each selected step, you can also choose one of the selectors behind it which, when being generated to script, will be used by Selenium to locate the UI element when the script is executed.
-
Copy the generated script to clipboard by clicking the Copy to Clipboard button.
-
Download the generated script and save it as a text file by clicking the Download button.
-
Or close the Script Generator dialog using the Close button.
Assume you chose to download the generated script as save it as ProductsPageTestCase.java. Next step is to use that script in your automation project. Below is the screenshot showing a Selenium project in Eclipse IDE including the downloaded ProductsPageTestCase.java
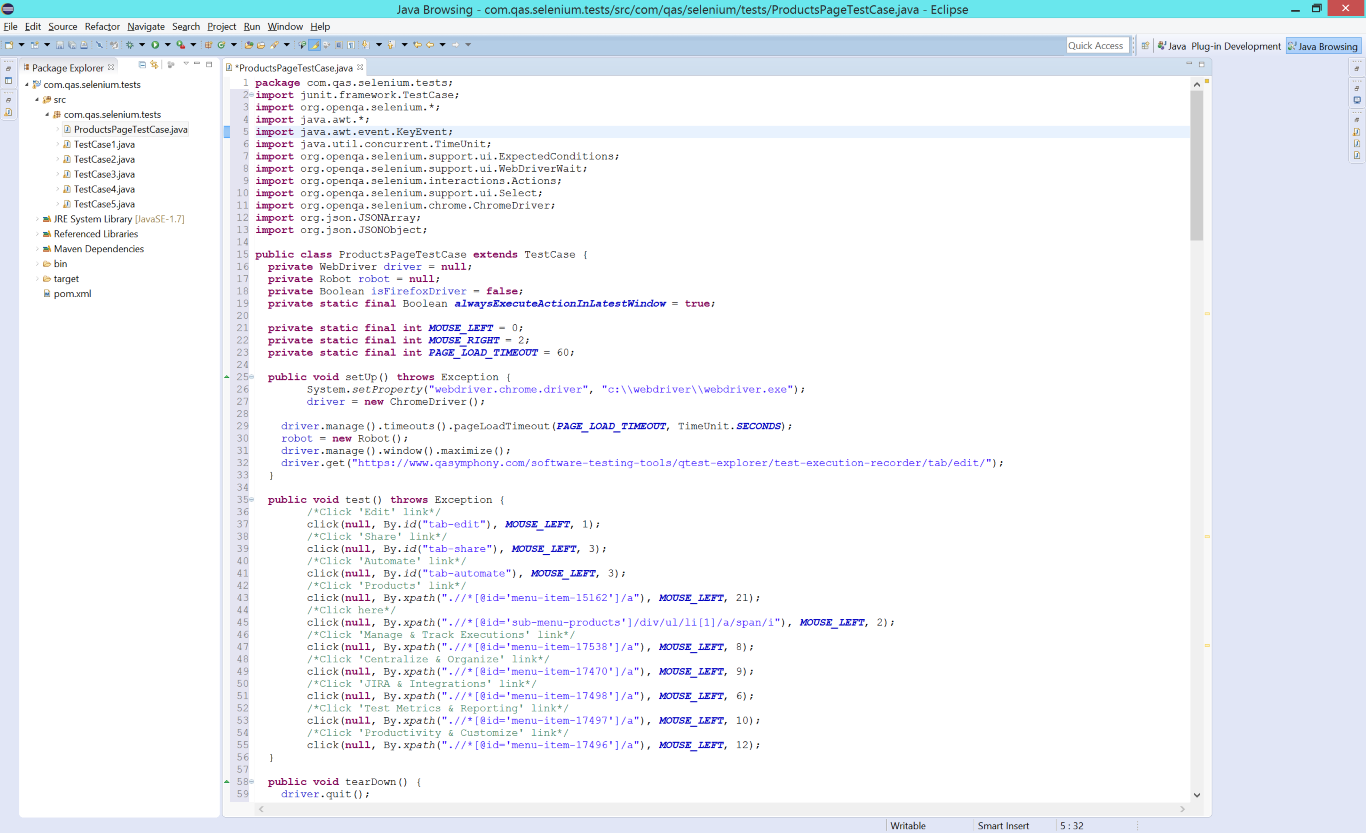
To execute the script, right click on ProductsPageTestCase.java in the Package Explorer and choose Run As > JUnit Test, as in the following screenshot:

Example 2: Protractor Plugin
From the Script generator screen, enter the following data:
-
Screen: All screens
-
Plugin: Protractor
-
Settings:
-
Clear text field before sending key: checked
-
Always execute action in latest window: checked
-
Generate action description as code comment: keep it unhecked
-
-
The generated script will look like the following:
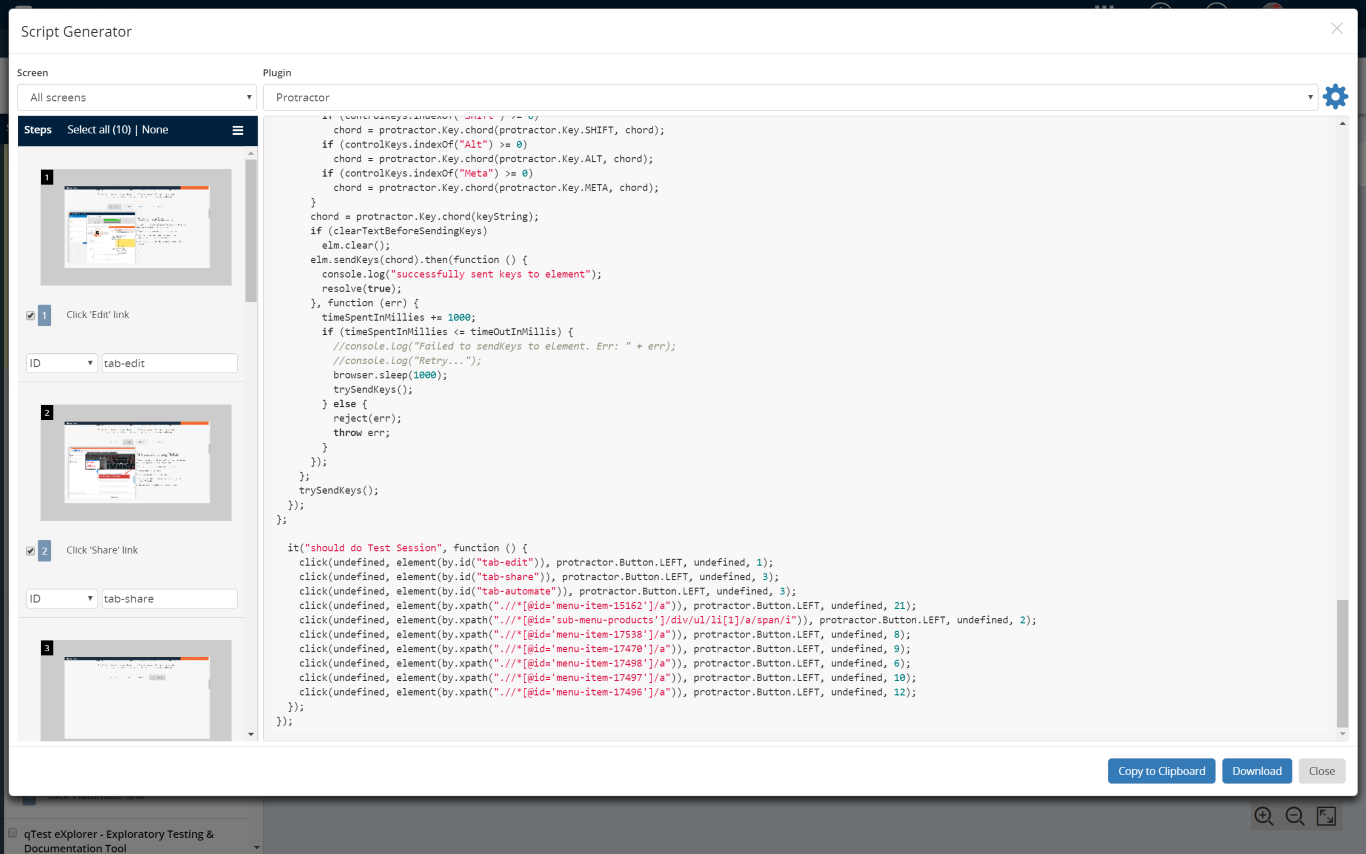
Next, you can do the following to generate an automated script:
-
Exclude specific step(s) to not generate a script for it in the left panel by unchecking the check box associated with it.
-
With each selected step, you can also choose one of the selectors in the bottom left which, when being generated to script, will be used by Protractor to locate the UI element when the script is executed.
-
Copy the generated script to the clipboard by clicking the Copy to Clipboard button.
-
Download the generated script and save it as a text file by clicking the Download button.
-
Or close the Script Generator using the Close button.
Assume you chose to download the generated script as save it as TestCase1.js (in Protractor, this file is called a spec). Next step is to follow the instruction on the Protractor website at http://www.protractortest.org/ to learn how to execute the script yourself.