Session Module Settings
Settings page can be accessed by clicking on Settings icons in the top right corner of qTest Sessions home page

The Settings page will be shown as below screenshot.

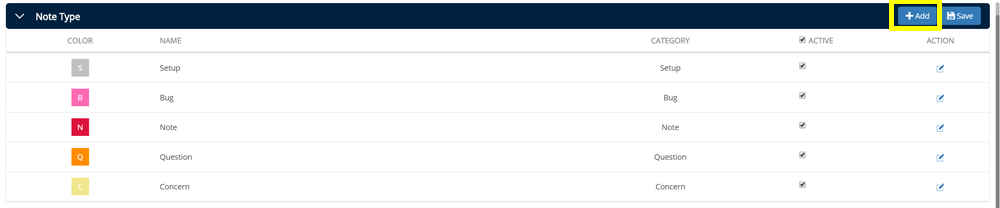
Note Type Settings
Note types are used by qTest Explorer when you execute a session and want to add notes in order to make your session more descriptive. In Settings, you can create additional note types that fit your need and they will be available in qTest Explorer applications when you execute a new recording session. You can also deactivate specific note types if you find they are not relevant.
Add New Note Type
To add a new Note Type, go to Note Type section and click on Add button.
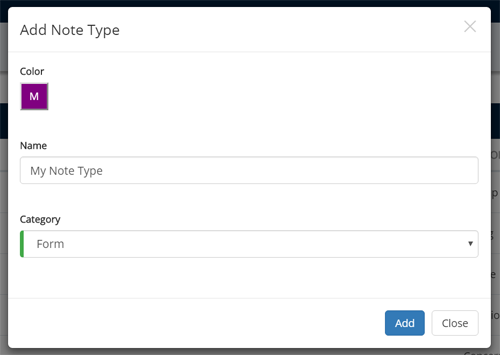
The Add Note Type dialog will be shown for you to input information for the new note type. When you are done, click Add button to add the new note type to the note type list.
Update Existing Note Types
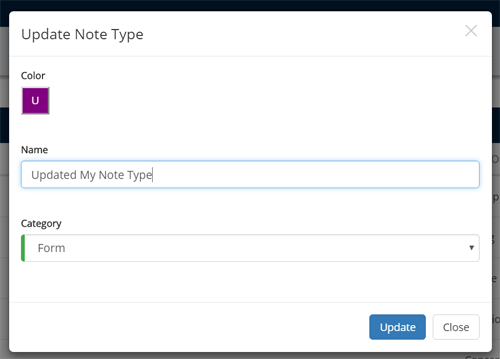
To update an existing note type, click on the Edit icon in the last column of a specific note type.
![]()
The Update Note Type dialog will be shown for you to edit information of the chosen note type. When you are done with the editing, click Update button to update your changes.
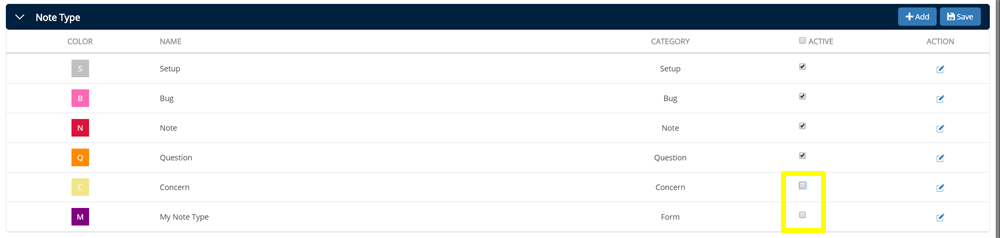
Activate Note Types
You can activate/deactivate existing note types by toggling the check box associated with those note types.

Time Type Settings
Time types are used to break down your tasks when you execute a session with qTest Explorer applications. In Settings, besides default added time types, you can create additional time types that fit your need and they will be available in qTest Explorer applications when you execute a new recording session. You can also deactivate specific time types if you find they are not relevant.
Add New Time Type
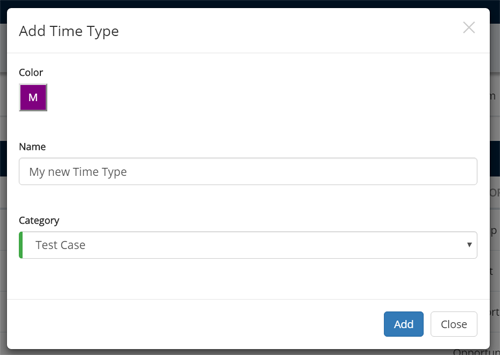
To add a new Time Type, go to Time Type section and click on Add button.

The Add Time Type dialog will be shown for you to input information for the new time type. When you are done, click Add button to add the new time type to the time type list.
Update Time Type
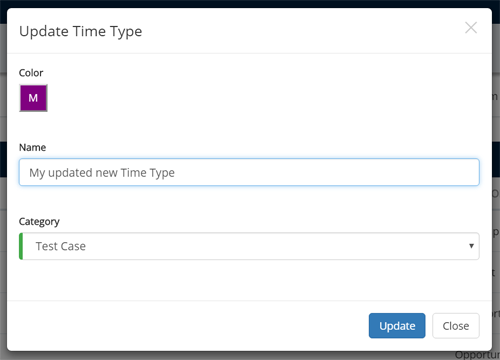
To update an existing time type, click on the Edit icon in the last column of a specific time type
![]()
The Update Time Type dialog will be shown for you to edit information of the chosen time type. When you are done with the editing, click the Update button to update your changes.
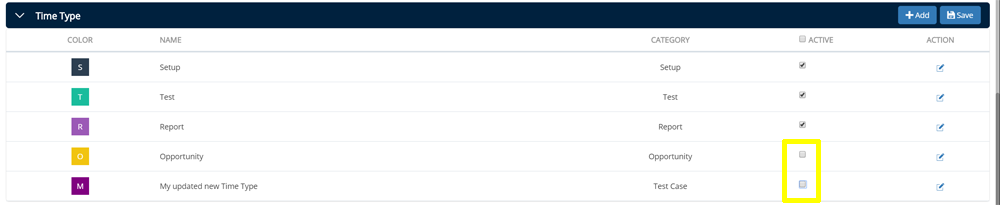
Activate Existing Time Types
You can activate/deactivate existing time types by toggling the check box associated with those time types.

Web Explorer Quick Start Settings
Web Explorer Quick Start section allows you to configure web domains which, when you navigate to a web page whose URL contains any of these domains, Web Explorer will prompt you to start a new recording session.
To configure the domains, enter the domains in the text box, separate each of them with a space, then click Save button.

Script Generator Plugin Settings
Script generator plugins are JavaScript code that can be used by Session Editor to generate automated scripts from sessions recorded by Explorer applications.
This setting allows you to manage script generator plugins. By default, there are some built-in plugins provided by qTest platform and you cannot remove them. You can use this section to add/remove your own customed plugins.
View Source Code of Existing Plugin
To view the source code of an existing plugin, click on the file name of that plugin.

The system shows a dialog for you to view the plugin source code. You can also click Download button to download the plugin to your local machine.

Submit Your Own Plugin
If built-in plugins provided by qTest platform do not fit your need, for examples: you need a plugin to generate automated script that can be run against an automation framework of your choice, or you want to generate automated script under specific programming language that you prefer, you can build your own custom plugin and submit it through this Script Generator Plugin section.
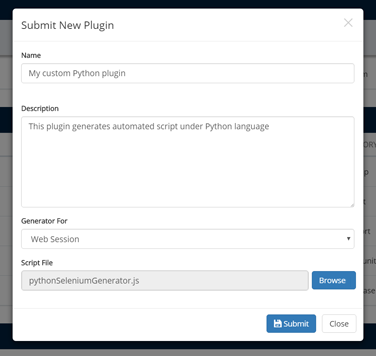
To submit custom plugin, click on + Submit Plugin button in the top right corner of Script Generator Plugin section.

The Submit New Plugin dialog will be shown for you to input the new plugin information. When all the required information of the new plugin are filled, click Submit button to submit your custom plugin.
Remove a Custom Plugin
To remove a custom plugin, click on the X icon in the Action column of that plugin.

The system shows a dialog to confirm whether you want to delete that plugin. Click OK to delete the plugin or Cancel to cancel your action.
