Create Unified Functional Testing (UFT) Agent from Launch
In this article, we will walk you through how to add a new Unified Functional Testing (UFT. Agent to a specific agent host from qTest Launch.
IMPORTANT
-
The qTest Automation Agent Host and UFT.Integration tool must be installed on the same machine in order for the UFT.agent type to kick off UFT.scripts.
-
The integration tool works with UFT.version less than or equal to 14.
Updated May 07, 2018: with the Release of Automation Host 2.0.4, you can integrate Automation Host with UFT.up to 14.03
-
UFT.agent can only be executed on Windows.
Prerequisites
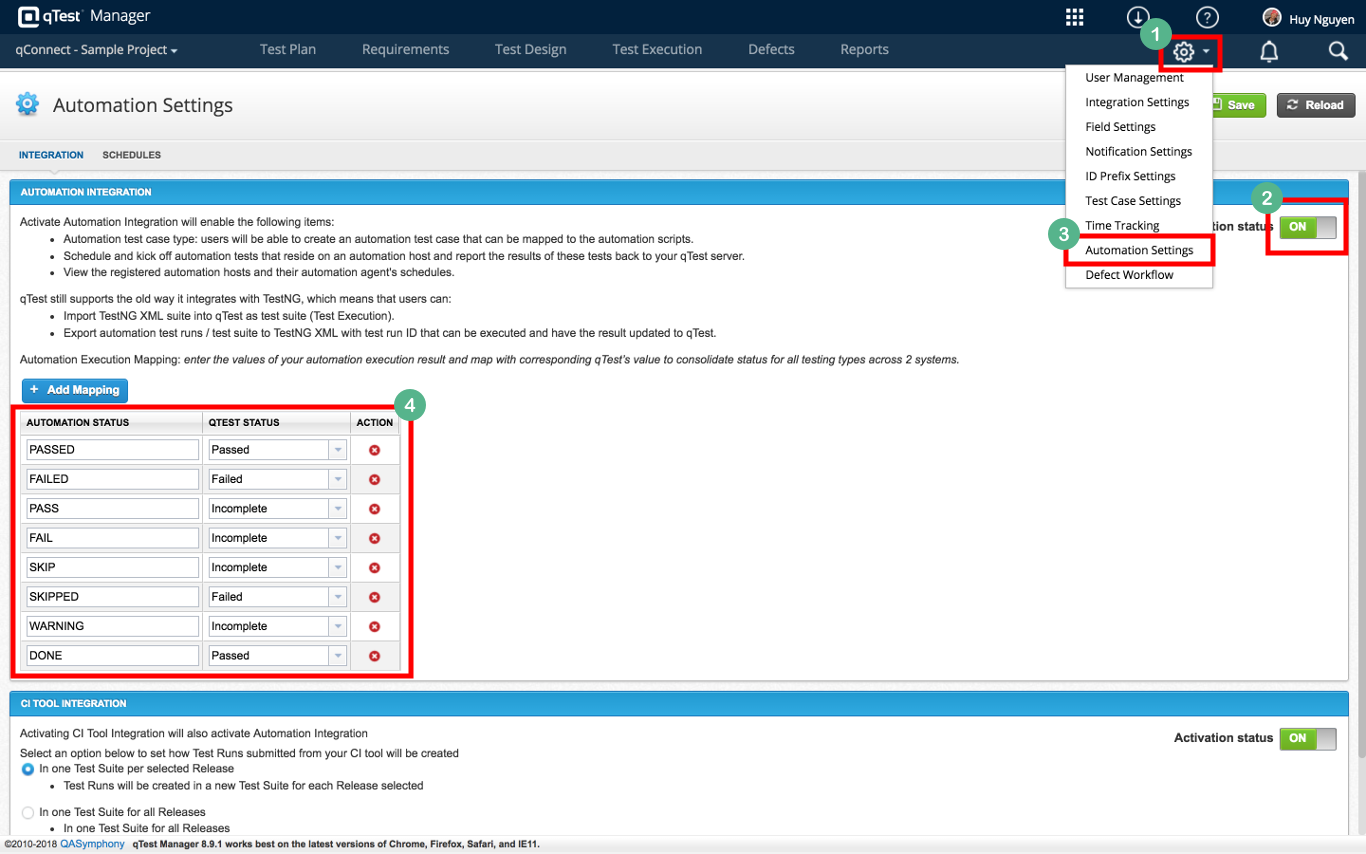
In addition, make sure you map UFT execution status to qTest test automation execution status. The table below shows which UFT execution status is mapped to qTest automation execution status:
| UFT Execution Status | qTest Execution Status |
|---|---|
| PASSED | Passed |
| FAILED | Failed |
| PASS | Passed |
| FAIL | Failed |
| SKIPPED | Incomplete |
| SKIP | Incomplete |
| WARNING | Incomplete |
| DONE | Passed |
Screenshot below shows how you do the mapping in Automation Settings of qTest Manager:
Step 1
Download the sample UFT.automation project at https://github.com/QASymphony/uft-sample and save it to your local machine, e.g. D:\uft-sample
Step 2
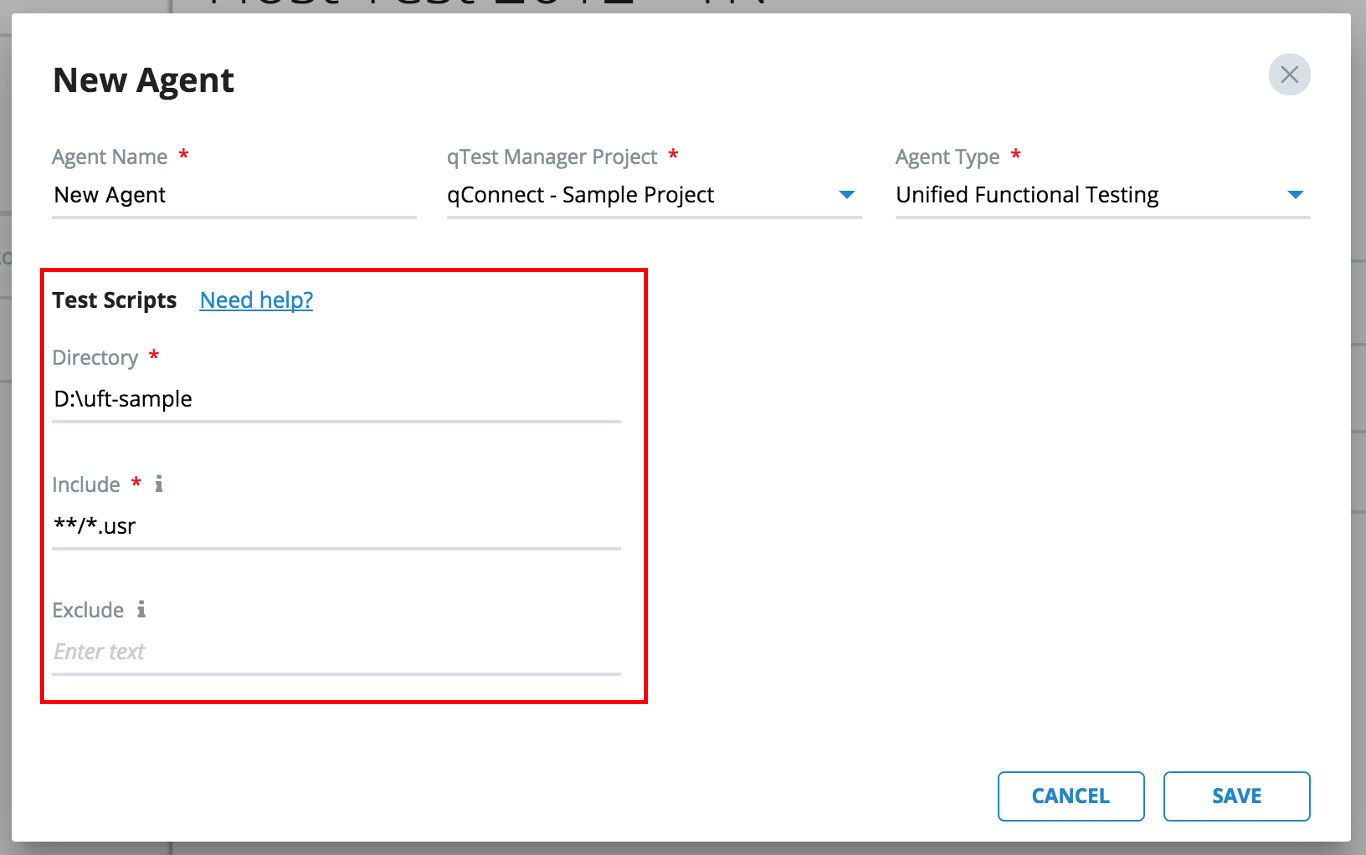
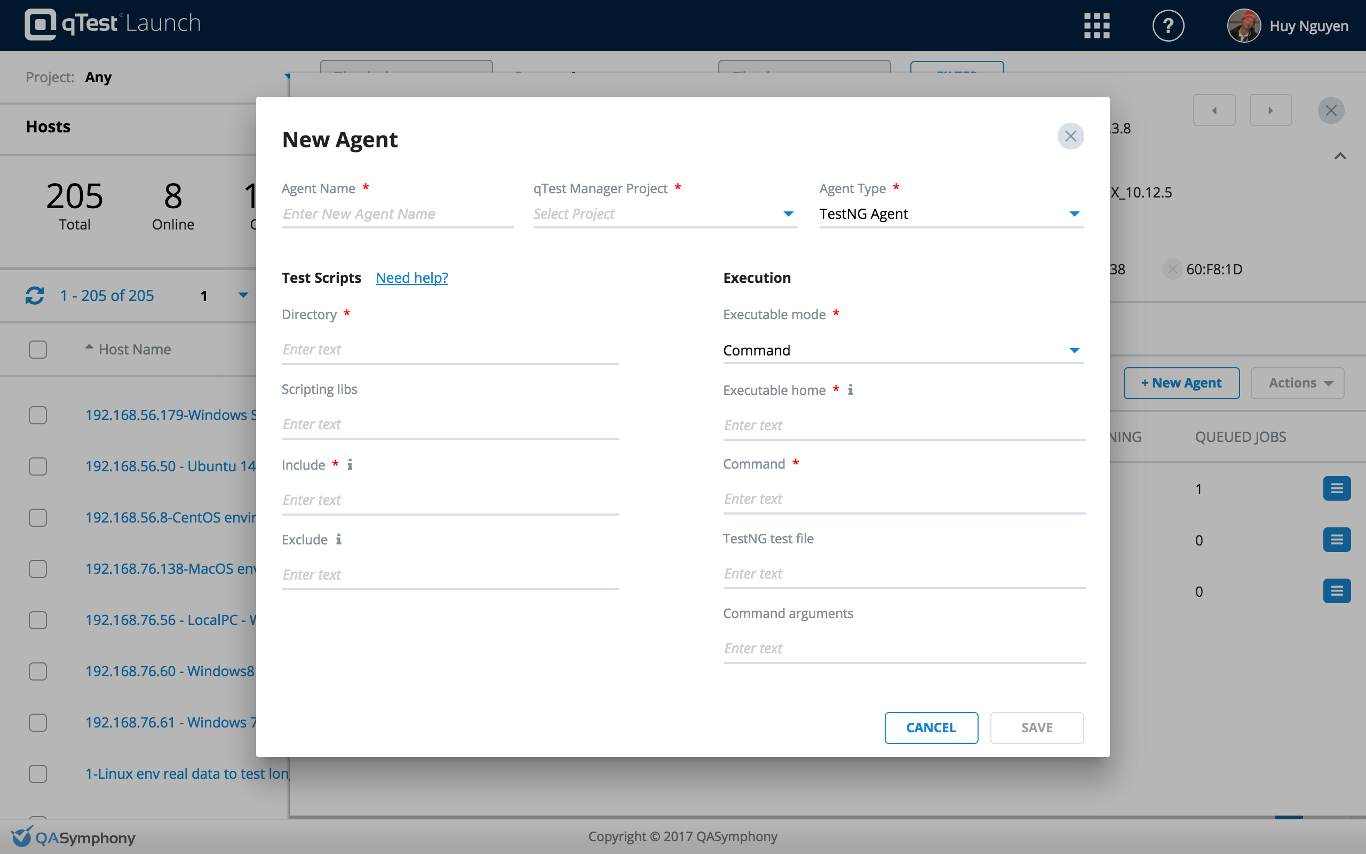
Access to qTest Launch then locate a host that you want to create a new agent and open its detail dialog. On the host detail dialog, click on Agents tab then Click on + New Agent button. You will be presented with the New Agent dialog, as shown below:
General Information
-
Agent Name: name of the new agent, e.g. New Agent. This is the agent name that will be selected in qTest Manager Test Execution when scheduling Test Runs
-
qTest Manager Project: select a project that the new agent will be associated with, e.g. qConnect - Sample Project
-
Agent Type: Unified Functional Testing

Test Scripts
-
Directory (required): specify the path to your UFT.automation project in the source code that you have downloaded in step 1
IMPORTANT NOTES: your UFT.project is located in the machine at <path to working directory>\<project name>\<file name>.usr. Conventionally, <project name> and <file name> must be the same. And you should put <path to working directory> to the Directory field, NOT <path to working directory>\<project name>
EXAMPLE: if you downloaded our sample at https://github.com/QASymphony/uft-sample and saved it to your working directory at D:\uft-sample so your project structure will be as below:
D:\uft-sample: this is your working directory
D:\uft-sample\LoginFlights: this is your project folder
D:\uft-sample\LoginFlights\LoginFlights.usr: this is the path to your uft script file
Then your must put D:\uft-sample to Directory field
-
Include (required): define patterns to scan for tests in the UFT.automation project using ANT Style Pattern Matcher. Use a comma as a separator between patterns.
-
Exclude: define patterns to ignore tests when scanning for tests, again you can use ANT Style Pattern Matcher
HINT: ANT Style Pattern Matcher uses the following rules:
-
? matches one character.
-
* matches zero or more characters.
-
** matches zero or more 'directories' in a path.
Test Scripts example on Windows