Update qTest Manager SSO Service Provider Certificate on SSO IdP
qTest Manager SSO Service Provider (SP) uses an x509 certificate to sign authentication requests and decrypt SAML assertions. As part of qTest Manager's security process, we update our SP certificate every 3 years in August. qTest Manager will contact you when the certificate is due to expire.
If you are using SAML with an Identity Provider (IdP) that is not configured to refresh the SP metadata automatically, you must follow the instructions below, otherwise, you will not be able to access qTest Manager using SSO Login until you update the certificate in your IdP.
Additionally, in the event, you are unable to update your IdP before September 9, 2019, follow these instructions to bulk update your users to authenticate via qTest internal (username/password) from your current SSO authentication.
Prerequisites
OnPremise customers must complete this step prior to performing these instructions.
-
From Administration, select the Licenses tab.
-
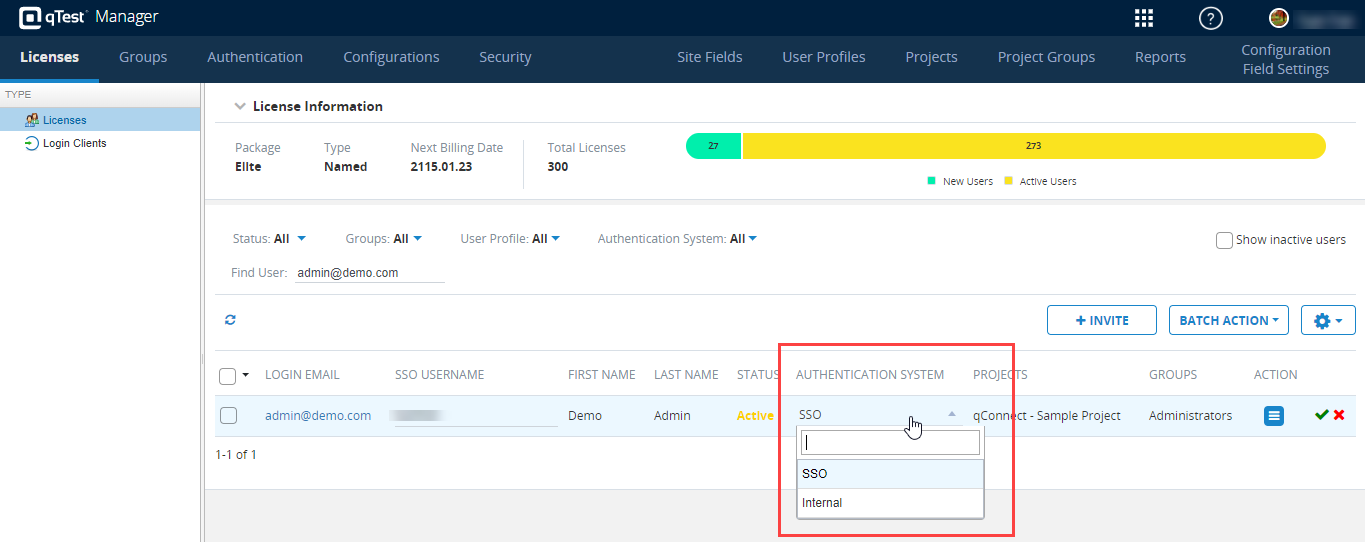
Locate the Administrator username you want to transition to internal login.
-
In the Authentication column, change the selection from SSO to Internal.
-
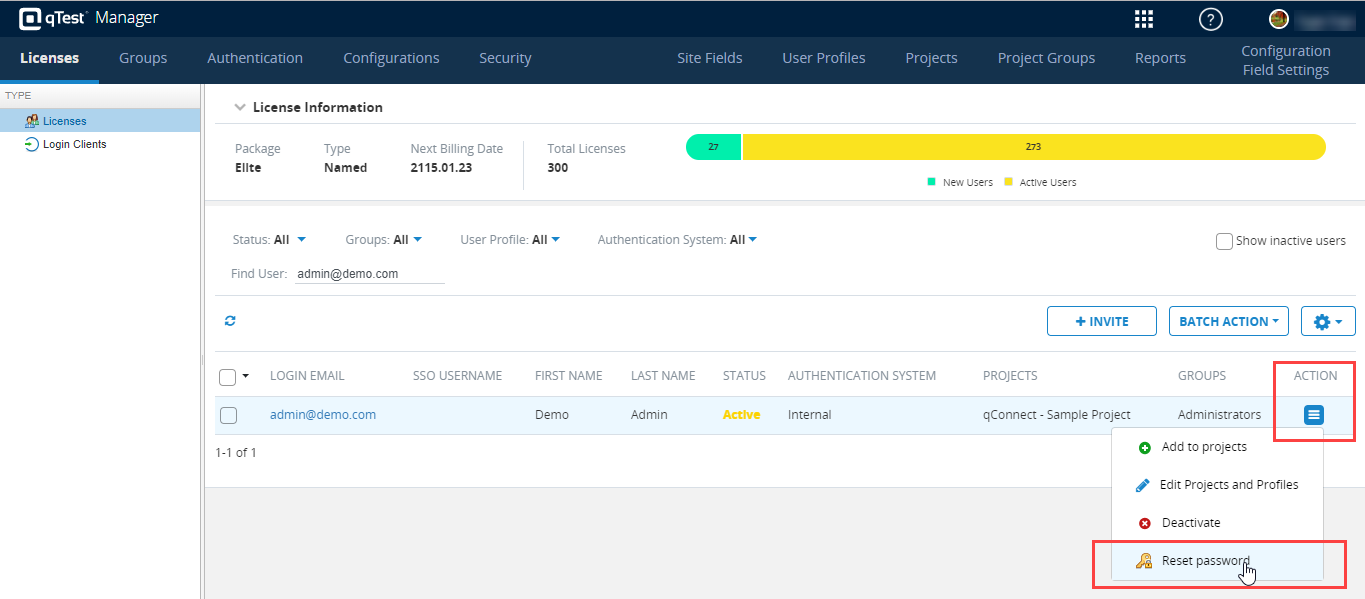
Select the Action icon, and Reset password.
-
Reset the password. This step will ensure the Administrator user has a current username/password combination, in the event the previous password used can not be remembered. Now, this user is converted from SSO to Internal authentication with fresh login credentials.
How to Begin
There are 3 possible scenarios for how your organization configured the IdP when not using the 'refresh the SP metadata automatically' option. If you configured your SAML IdP by:
-
Scenario 1: manually inputted SP information and uploading the certificate from a static file (.crt), or
-
Scenario 2: manually added SP metadata file (.xml) containing the certificate, or
-
Scenario 3: (most common) added SP metadata URL (Audience URL) but did not enable 'refresh the SP metadata automatically' option.
Follow the instructions below to locate your metadata certificate, that is associated with your current configuration.
Locate the Updated SP Metadata File
Scenario 1:
When using the Certificate from a static file (.crt) you must download the latest certificate and replace it on the IDP. Download the new certificate file from here.
Scenarios 2 and 3:
-
In qTest, hover over your username and select Administration.
-
The Site Administration page loads. Select the Authentication tab.
-
Select SSO from the left Authentication Systems panel.
-
Copy the latest SP metadata URL (Audience URL).
Scenario 2 ONLY: If your organization chose to manually add SP metadata file (.xml) to your IdP, you will follow the same instructions above to locate the latest SP metadata file. However, you would open the metadata URL in another browser window to download SP metadata file in XML format and replace it on the IDP.
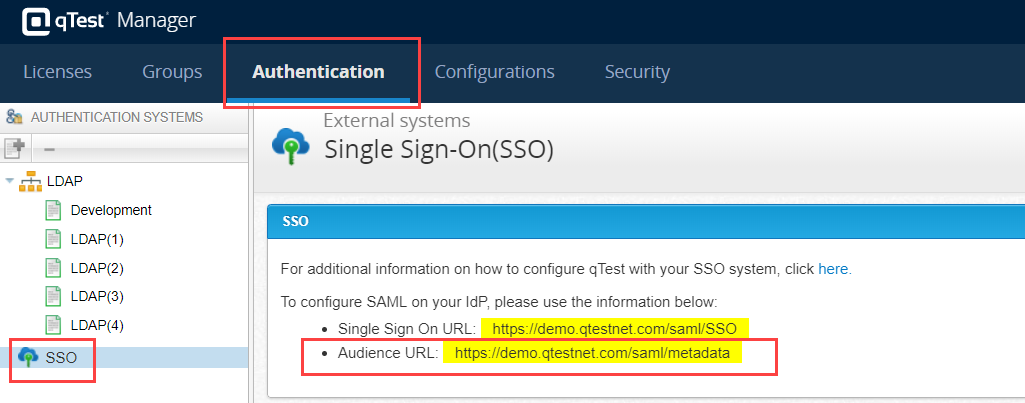
This is where the qTest Manager corresponds to the latest SP metadata file.
OnDemand Example:
-
If your qTest Manager site name is "https://qasymphony.qtestnet.com" then the latest SP metadata URL would be:
https://qasymphony.qtestnet.com/saml/metadata
OnPremise Examples:
-
if your qTest Manager site name is "https://myqtestonpremise.mycompany.com" then the latest SP metadata URL would be:
https://myqtestonpremise.mycompany.com/saml/metadata
-
if your qTest Manager site name is "http://192.168.9.9:8080" then the latest SP metadata URL would be:
http://192.168.9.9:8080/saml/metadata
Update the SP Metadata on SSO IdP
Microsoft Active Directory Federation Services (ADFS)
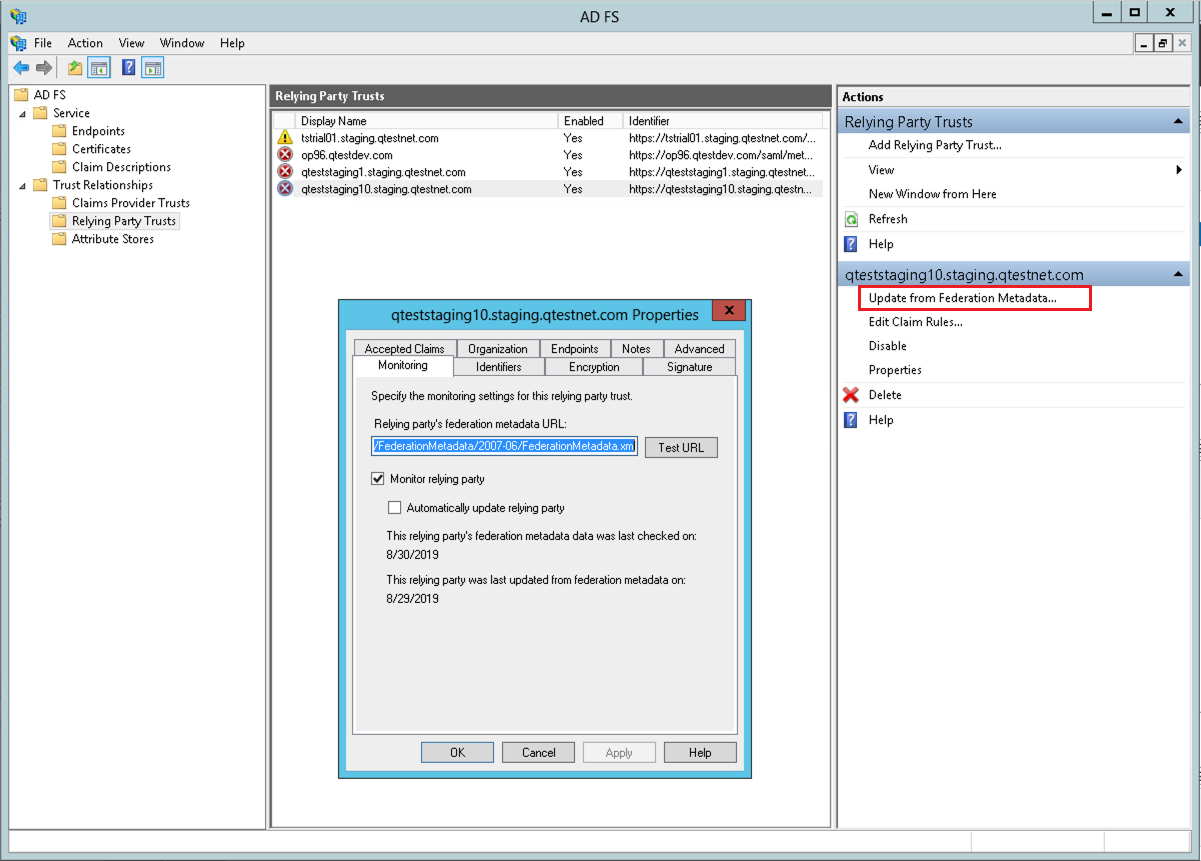
This section describes how to manually update the SP metadata for Microsoft Active Directory Federation Services (ADFS) that have already added SP metadata URL (Audience URL) but did not enable 'Automatically update relying party' option (Scenario 3).
Update the Certificate Metadata when using Monitor Relying Party
If you have set up your ADFS instance to monitor relying party (qTest Manager), then refresh the metadata by clicking the option Update from Federation Metadata available within the ADFS management tool.
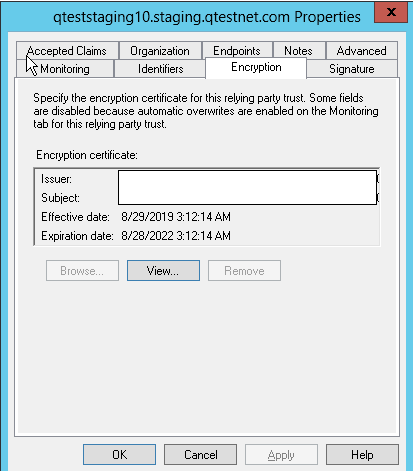
Validate the Updated Certificate
Verify Effective date and Expiration date are updated in the Encryption tab on associated Relying Party Trust configuration as following:
All Other IdPs
For all other IDPs, please see the appropriate IDP documentation below. You will need to update (refresh) your metadata or certificate file replacement.