Integrate Tricentis Tosca with Universal Agent
In this article, you will learn how to integrate Tricentis Tosca version 14.2 with Universal Agent.
This article will create a Universal Agent to execute a sample Tricentis Tosca project created with Tosca Commander.
Prerequisites
-
Tricentis Tosca must be installed in the same machine with Automation Host version 2.1.0 or later
-
You must create the following properties in Tosca Commander prior to being able to use this feature:
-
ContinuousIntegration property in your ExecutionList
-
ContinuousIntegrationBuildRootFolder property for your execution results If you are not familiar with Tricentis Tosca, refer to the Tricentis Tosca documentation to create the properties above.
-
Set up Tricentis Tosca Project with Tosca Commander
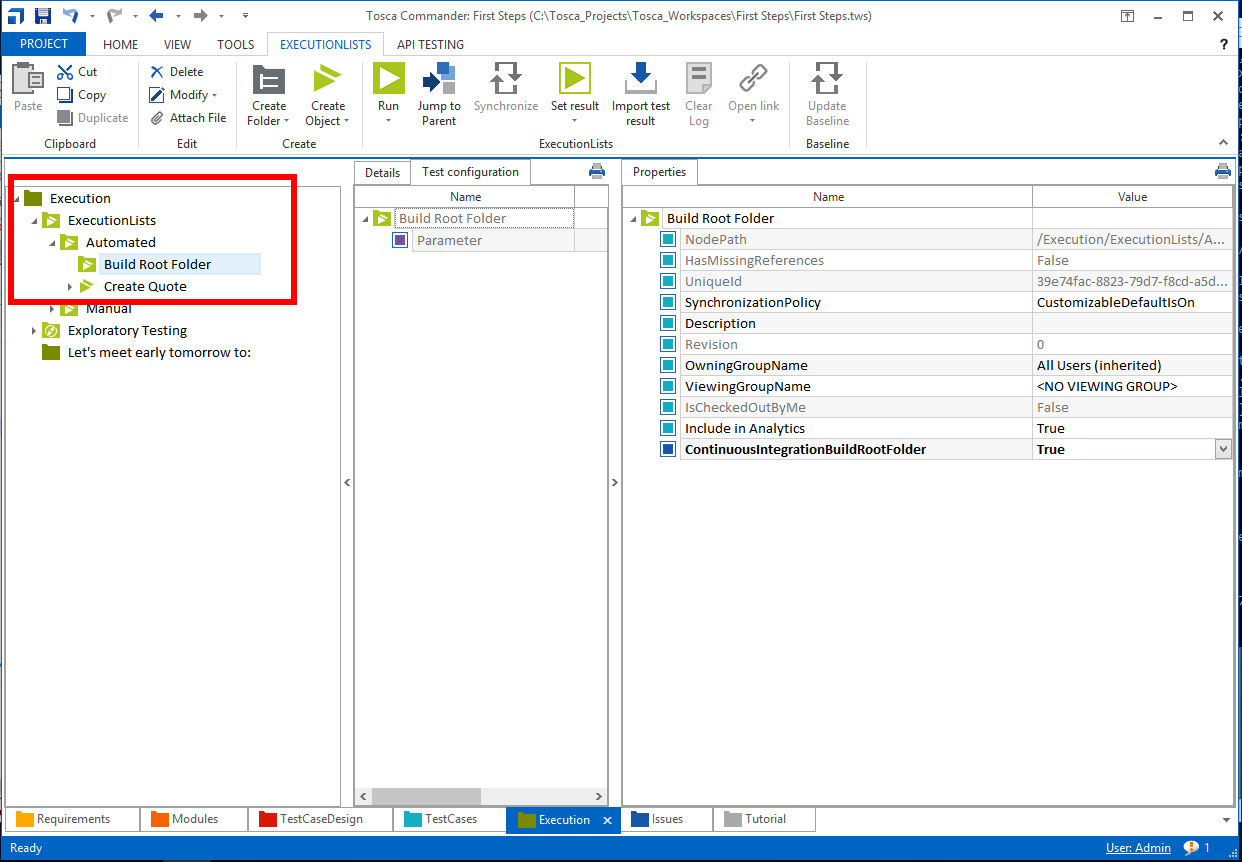
In this article you will configure the Universal Agent to execute a sample Tricentis Tosca project, named First Steps.
The screenshot below shows how this project looks in Tosca Commander.
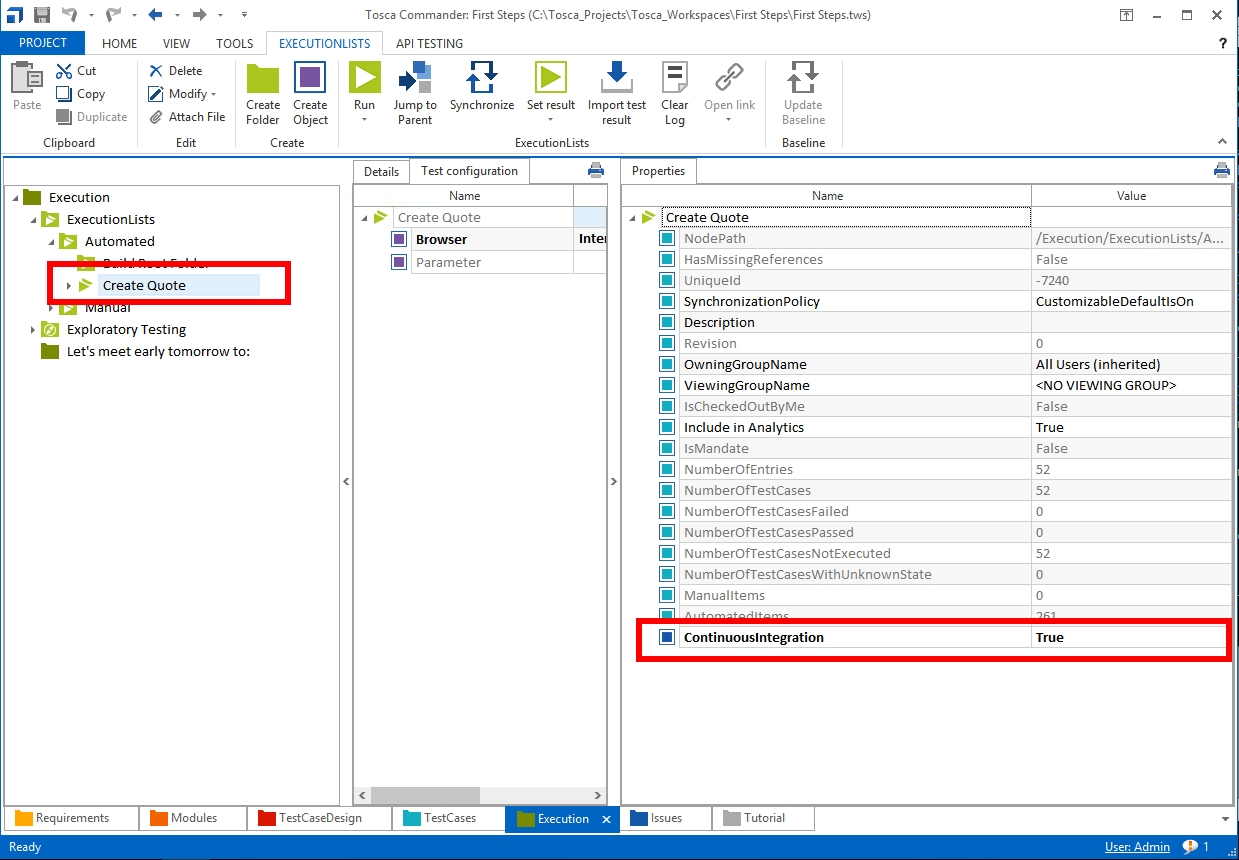
Please note that the property ContinuousIntegration of the Create Quote test case must be set to true, as shown below.
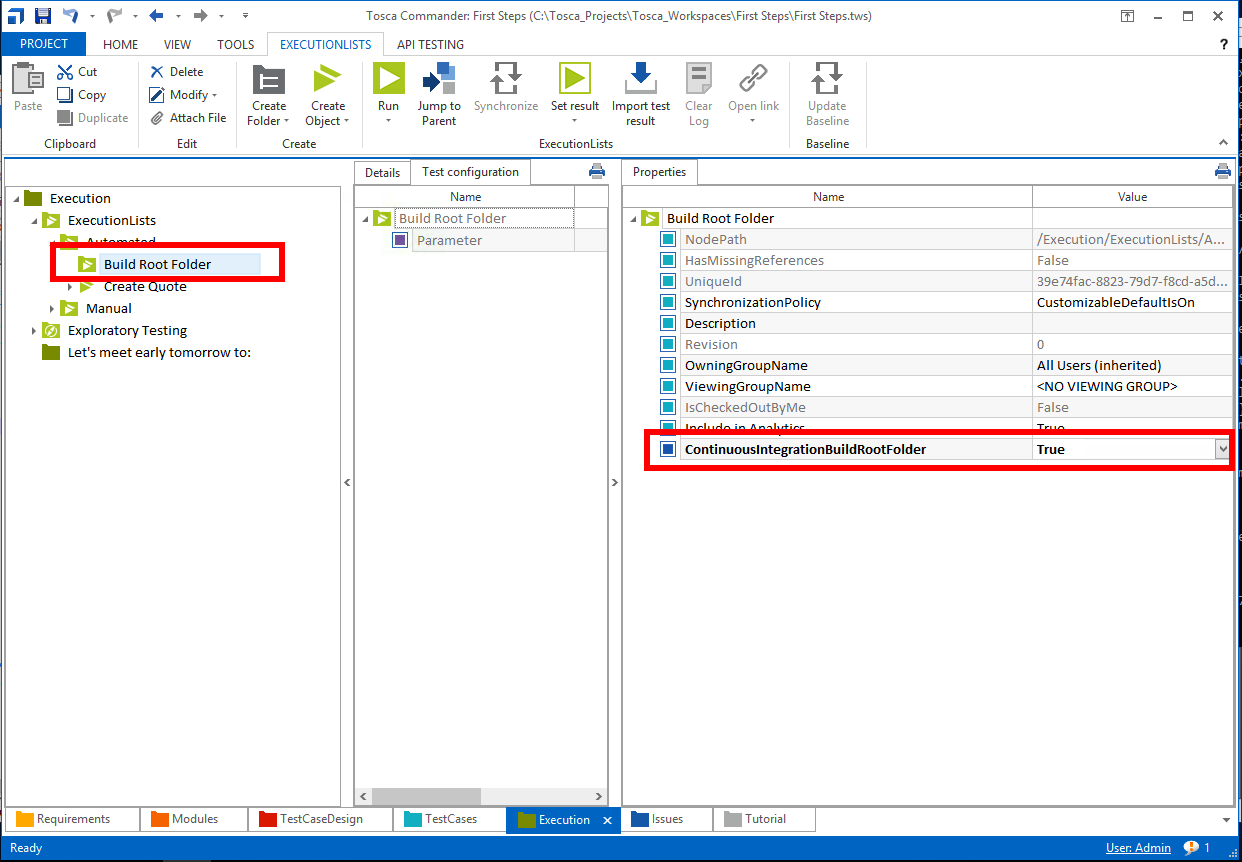
You will also need to create a folder for the 'Build result.' That folder must also have a property, named ContinuousIntegrationBuildRootFolder, being set to true.
Configure ToscaCI Client Tool
The next step is to configure ToscaCI Client tool for it to execute our First Steps project.
-
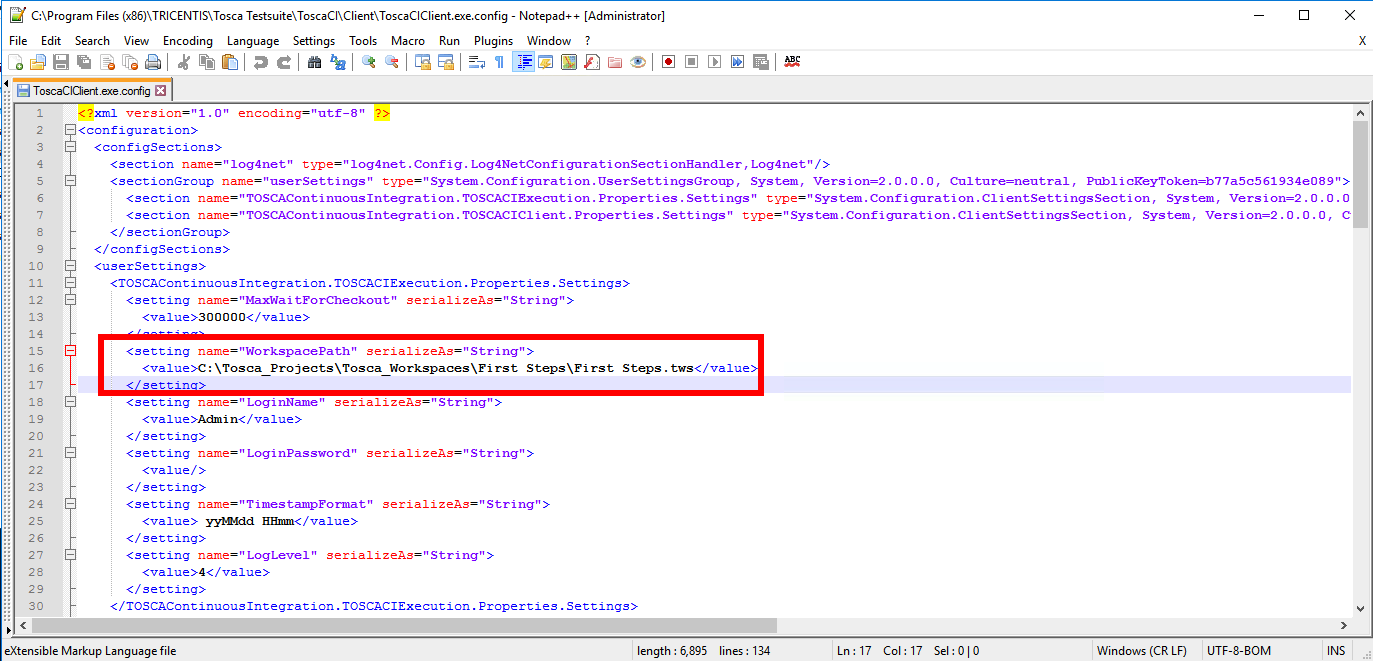
Open config file at C:\Program Files (x86)\TRICENTIS\Tosca Testsuite\ToscaCI\Client\ToscaCIClient.exe.config in a text editor.
-
Look for the WorkspacePath user settings and change its value to the path of our First Steps project. Example: C:\Tosca_Projects\Tosca_Workspaces\First Steps\First Steps.tws
Make sure you update the WorkspacePath to the actual path of your Tosca project. Conventionally, your Tosca project is located at: path\to\your\workspace\<project name>\<project name>.tws
The screenshot below shows how the ToscaCIClient.exe.config file will appear.
Create Tosca Universal Agent
-
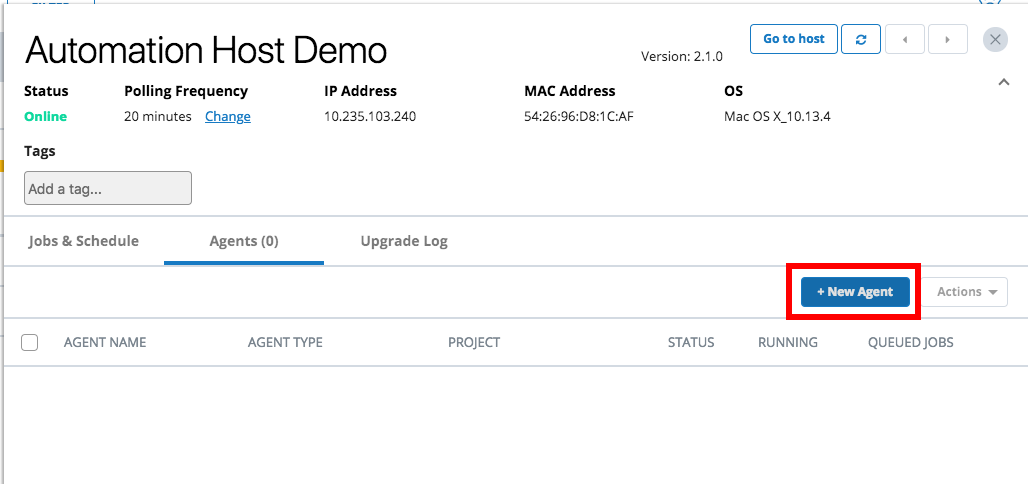
From Launch, open the host machine where you want to create the new agent.
-
Select the + New Agent button.
-
The New Agent dialog will display.
-
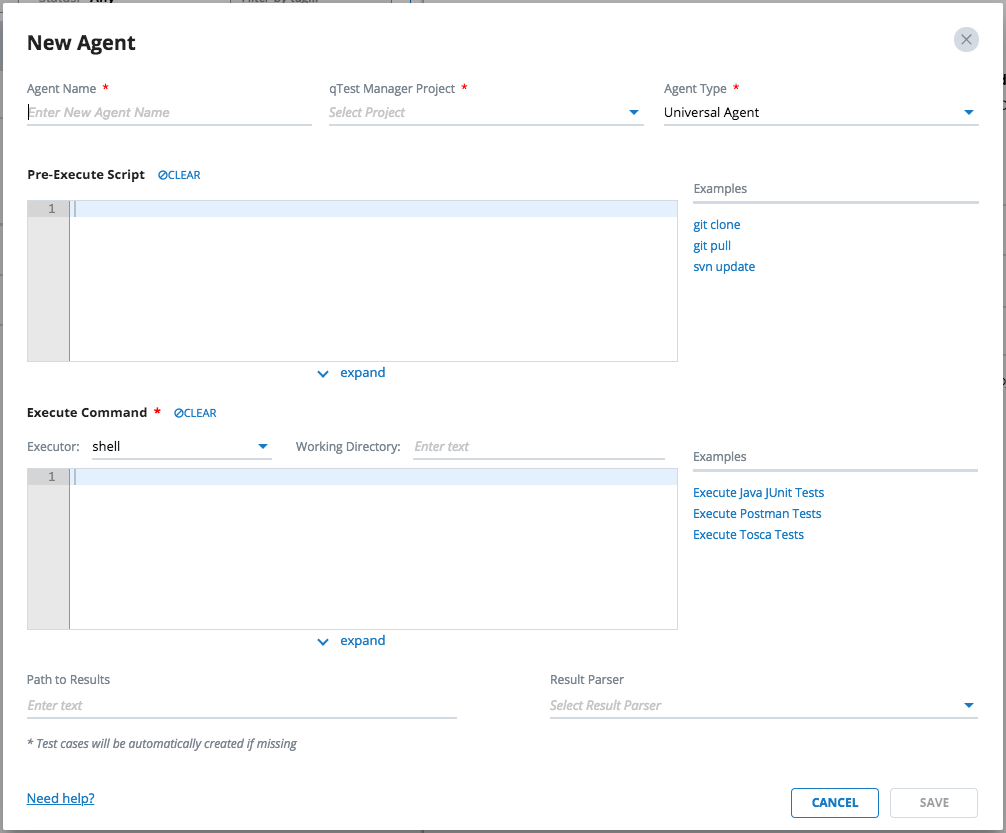
Enter the information below for the new agent.
General Agent Information

-
Agent Name: Name of the agent, such as Tosca Universal Agent
-
qTest Manager Project: Select a qTest Manager project from which the agent is going to execute scheduled tests, such as qConnect Sample Project
-
Agent Type: Universal Agent
Pre-Execute Script
Leave this field empty.
Execute Command
Executor
-
Select batch as the executor.
Working Directory
-
Enter path to ToscaCI Client folder: C:\Program Files (x86)\TRICENTIS\Tosca Testsuite\ToscaCI\Client\
Execute Command
Enter the command below in the Execute Command editor.
ToscaCIClient.exe -m local -t junit -r "C:\Tosca_Projects\Tosca_Workspaces\First Steps\Test Results\result.xml"Path to Results
Optional field. Enter this value to specify path to the test result generated by Tosca: C:\Tosca_Projects\Tosca_Workspaces\First Steps\Test Results\result.xml
Result Parser
(Optional) Select Tosca JUnit as the Result Parser.
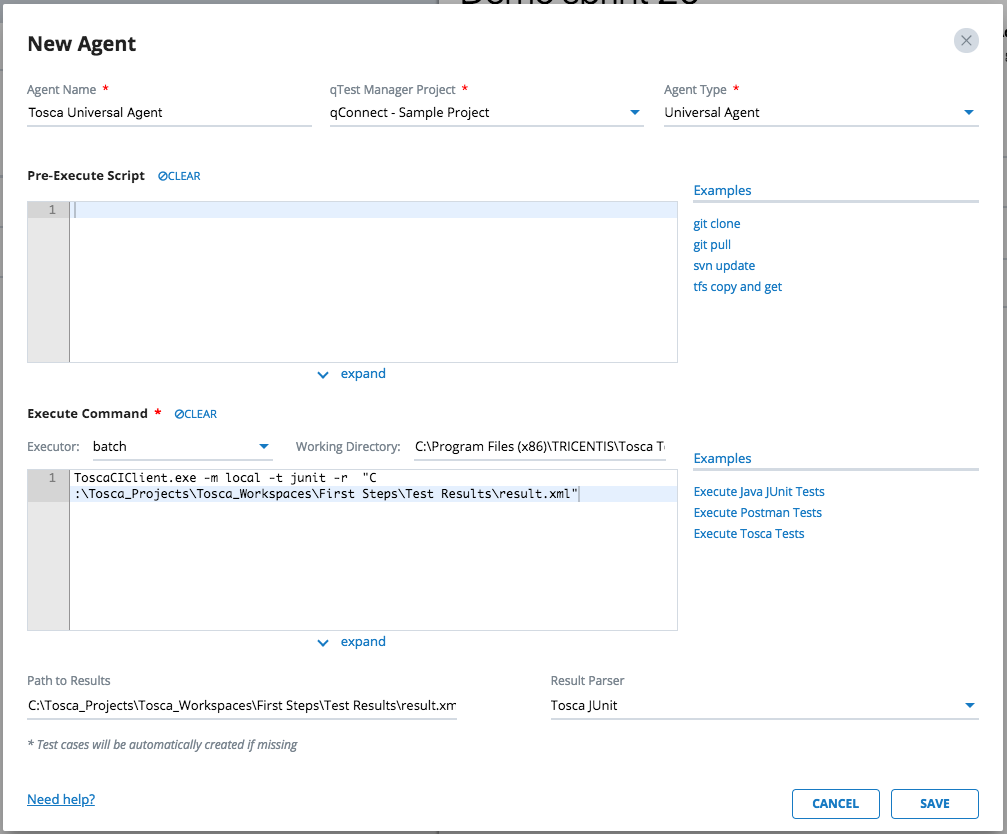
The screenshot below shows how the new Tosca Universal Agent is now configured.
You have finished creating Universal Agent for your Tosca project. The agent will be available the next time the host machine polls to qTest Launch.
Execute Tosca Universal Agent
-
Access the host machine where the Tosca Universal Agent was created.
-
Locate the agent in the Agents list. Then click the Action icon
 . Then select Run now.
 -
The Universal Agent execution dialog will display.
-
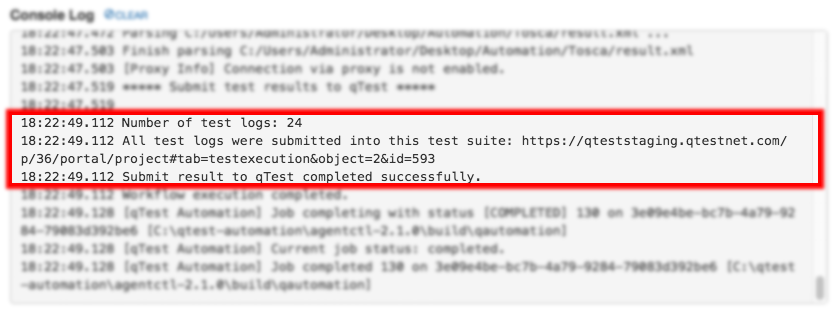
Select the Execute button to kick off the agent execution and you will see the logs shown in the Console Log section. If the execution is successful, you'll see the test run logs being submitted to qTest Manager.
From now on you can access qTest Manager and schedule Test Execution for the newly created test runs with Tosca Universal Agent.