Test Plan for Releases and Builds
Each project within qTest Manager has its own Test Plan in which you can define the high-level milestones and testing objectives. Inside the Test Plan, you can both define the start and end dates for each Release and Build and specify any testing goals that may be involved. Once you create Releases and Builds, you can add a specific Requirement to the Release and/or Build scope.
How to Create a Test Plan
Create a Release
Creating Releases in the Test Plan allows you to show high-level milestones and incorporate Release notes. Releases created in the Test Plan module will also automatically display in the Test Execution area; this allows you to build a granular hierarchy to organize Test Execution activities.
Follow these steps to create a Release:
-
Select the Test Plan module, then click the New Release icon in the left panel.
-
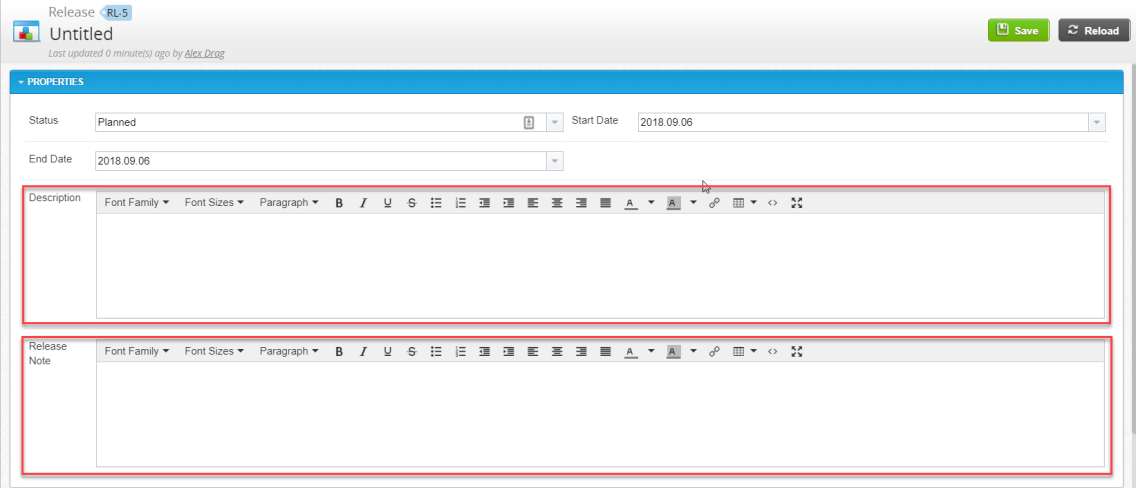
Enter a Release Name in the text field currently occupied by the word "Untitled".
-
In the Status field, a status of Planned is automatically displayed. To create custom fields or modify any existing system fields, refer to Field Settings.
-
Enter the Start Date and the End Date for the Release.
-
In the Description text field, enter a description of the Release.
-
Select Save. The new Release displays in the navigation panel.
In the Release Note text field, you can also enter information about what the Release includes (such as, new features for development).
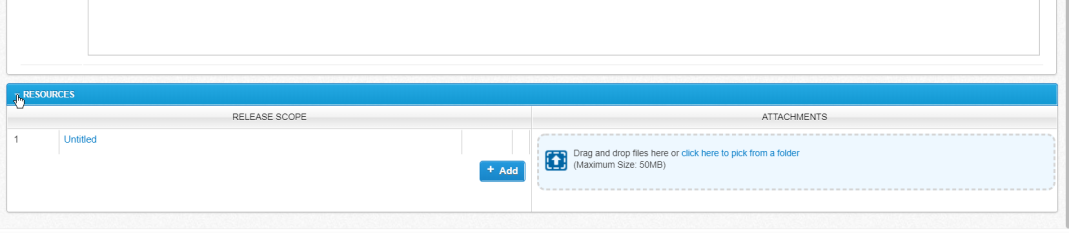
Add an Attachment to a Release
-
In the Test Plan, select your Release in the navigation panel.
-
Expand the Resources drop-down menu near the bottom of the page.
-
In the Attachments section, you can add attachments, such as a Word document or PowerPoint presentation, either by dragging and dropping a file or by selecting click here to pick from a folder and then select a file from your computer.
-
Select Save.
Add a Requirement to a Release
-
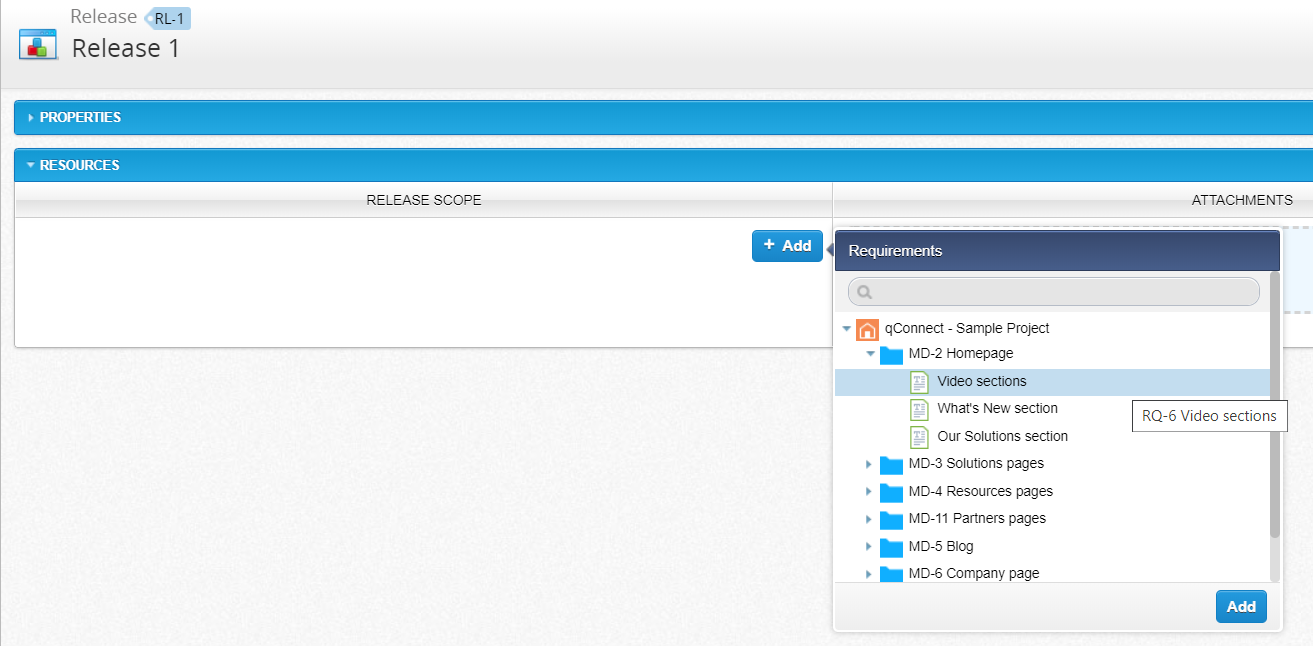
From the Test Plan tab tree panel, select the Release in which you want to add a Requirement.
-
At the bottom of the Release page, expand the Resources section.
-
Select Add under the Release Scope section.
-
The Requirements list displays. Select the proper Requirement from the proper module.
-
Once you have added your desired Requirement, select Save.
Create a Build
A Build is another milestone within the Test Plan, nested within a Release. A Release can consist of multiple Builds.
-
Click the Test Plan tab.
-
Select the Release in which to create your new Build.
-
Select the New Build icon
 on the toolbar.
 -
Name your new Build in the text field currently occupied by "Untitled".
-
Add any Build Notes necessary in the text field in the Build Note section.
-
You can add any Requirements in the Build Scope section in the Resources drop-down menu. Expand the menu, and select Add.
Try this: Add an attachment to a Build
To add an attachment to a Build:
-
Click the Test Plan tab.
-
In the tree panel, select the Build.
The Build screen appears.
-
In the Resources section, drag and drop a file into the blue area in the Attachments column.
or
Click the click here to pick from a folder link to browse for and select a file to upload from your computer.
-
Once the file is uploaded, click Save.