Configure an ActiveMQ connection
You can configure an ActiveMQ connection in the API Connection Manager.
This allows you to connect to an ActiveMQ queue or topic and to push and pull messages. For detailed information on ActiveMQ, see the ActiveMQ documentation.
Configure your connection
To configure an ActiveMQ connection, follow the steps below:
-
Go to the Edit section.
-
Specify a Name for your connection.
-
From the Type drop-down menu, select ActiveMQ.
-
Enter the Queue/Topic Name. This is the name of the ActiveMQ queue or topic you want to connect to.
-
Specify the Host. This is the name or IP address of the ActiveMQ server host.
-
Enter the Port to listen to.
-
Select a Type from the drop-down menu:
-
Select Queue for a one-to-one messaging pattern.
-
Select Topic for one-to-many messaging.
-
-
Select a Message Type from the drop-down menu:
-
Select JmsTextMessage for messages with a single text string.
-
Select JmsBytesMessage for messages that contain multiple types.
-
-
Optionally, enable Peeking to retrieve messages from queues without consuming them.
-
Optionally, enable Secure connection to establish a connection with a secure protocol.
-
If your connection requires authentication, enter your Username and Password.
-
If your connection requires it, enter the Certificate and Passphrase to authenticate the client.
-
Optionally, configure XML and web service security.
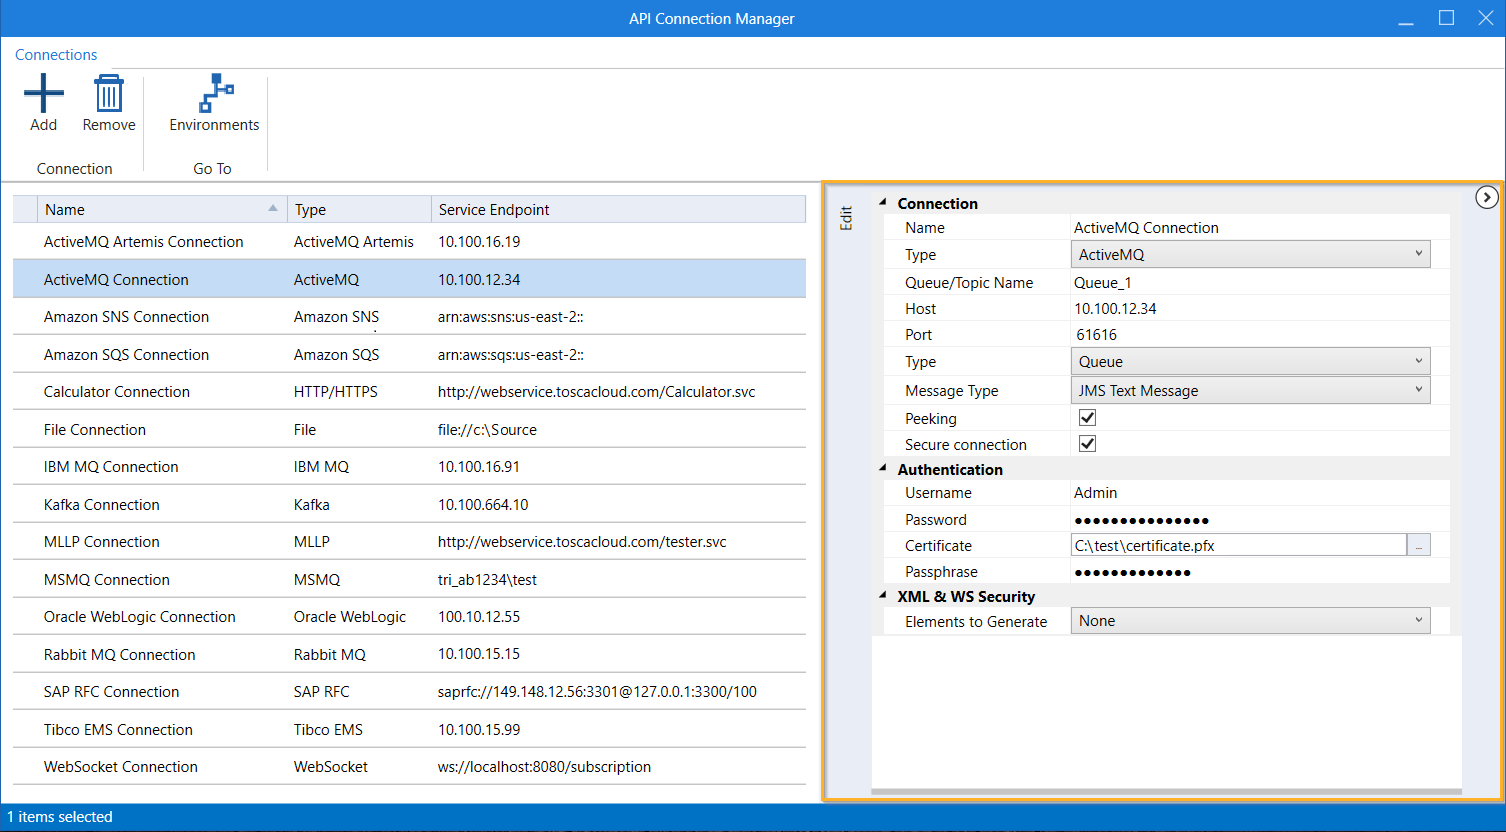
Configure an Active MQ connection
You can now use your ActiveMQ Artemis connection for testing. For information on how to push and pull messages in API Scan, see chapter "Run JMS messages".