Configure a Rabbit MQ connection
You can configure a Rabbit MQ connection in the API Connection Manager.
This allows you to connect to a Rabbit MQ queue or topic and to push and pull messages. For detailed information on Rabbit MQ, see the Rabbit MQ documentation.
Configure your connection
To configure a Rabbit MQ connection, follow the steps below:
-
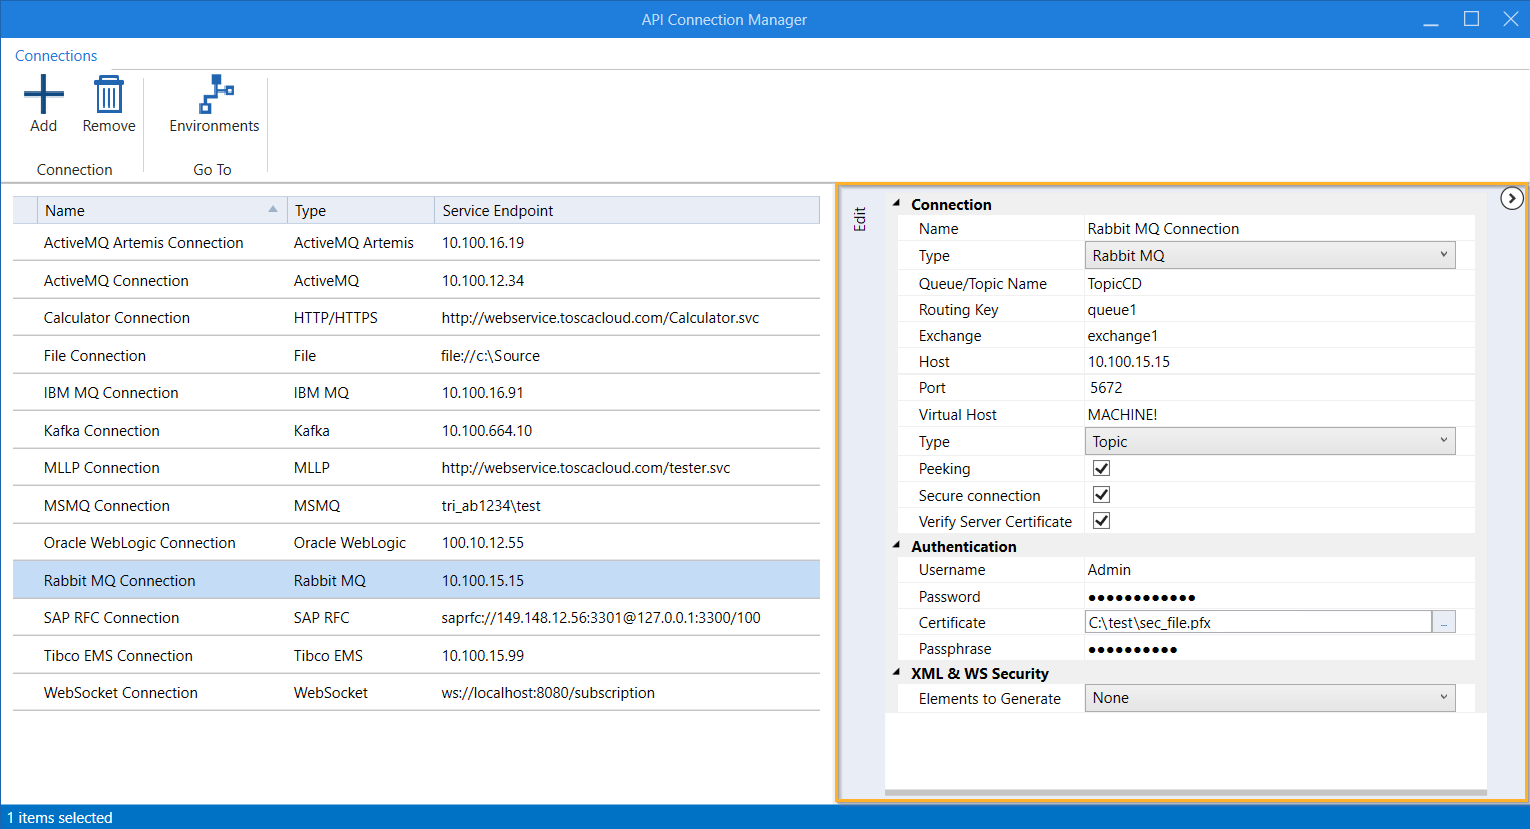
Go to the Edit section.
-
Specify a Name for your connection.
-
Enter the Queue/Topic Name. This is the name of the queue or topic you want to connect to.
-
Enter the Routing Key that specifies which queue receives a message.
-
Specify the Exchange. This is the name of the exchange that receives your messages and routes them to queues.
If you don't specify one, the system uses the default exchange.
-
Specify the Host. This is the name or IP address of the Rabbit MQ server host.
-
Enter the Port to listen to.
-
Optionally, enter the name of the Virtual Host you want to use.
-
Select a Type from the drop-down menu:
-
Select Queue for a one-to-one messaging pattern.
-
Select Topic for one-to-many messaging.
-
-
Optionally, enable Peeking to retrieve messages from topics or queues without consuming them.
-
Optionally, enable Secure connection to establish a connection with a secure protocol.
-
Enable Verify Server Certificate if you want the client to verify the server certificate.
-
If your connection requires authentication, enter your Username and Password.
-
If your connection requires client authentication, enter the Certificate and Passphrase.
-
Optionally, configure XML and web service security.
Configure a Rabbit MQ connection
You can now use your Rabbit MQ connection for testing. For information on how to push and pull messages in API Scan, see chapter "Run JMS messages".