Customize the OSV Monitor
You can use context menus to customize the Tosca OSV Monitor main window according to your needs. Which options are available in the context menus, depends on which tab or log you are using.
For instance, you can use the Group by this column option to group your completed Scenarios in the column Result and filter for the result Successful. In this case, the Tosca OSV Monitor only displays completed, successful Scenarios.
The context menus offer the following options:
|
Option |
Description |
|---|---|
|
Sort Ascending/ Sort Descending
|
Sort table rows alphabetically in ascending or descending order, starting from the selected column. Alternatively, you can left-click the column header to sort table rows. |
|
Clear Sorting |
Reset sorted columns to their original state. |
|
Group By This Column |
Group the table values according to the selected column. You can use several columns to define your grouping criteria. Alternatively, you can drag and drop columns you want to use for grouping into the Group By Box above the column header. |
|
Clear Grouping |
Remove all groupings. |
|
UnGroup |
Remove a specific grouping. |
|
Full Expand/ Full Collapse |
Expand or collapse all grouped rows in the table. |
|
Show or hide the Group By Box above the column header. |
|
|
Remove This Column |
Remove the selected column. Alternatively, you can drag a column downwards until the mouse pointer displays an X and release the mouse button. |
|
Open the Column Chooser. |
|
|
Best Fit |
Adapt the column width of the current column to its content. |
|
Best Fit (all columns) |
Adapt the column width of all columns to their content. |
|
Open the Filter Editor to filter Scenarios on the server and display the filter result in the OSV Monitor. You can choose from the available filter operations, e.g. And, Or, Equals, Contains etc. |
|
|
Clear Filter |
Remove all filters. |
|
Show or hide the Find Panel. To use the search function, enter a search term and click Find, or press the Enter key. All rows which contain the specified search term are displayed in the table. Search terms that include spaces must be specified between quotation marks. You can link spaces between search terms with a logical OR. If you want to link them with a logical AND, add a plus sign + in front of the search term. |
|
|
Show Auto Filter Row/ Hide Auto Filter Row |
Show or hide the Auto Filter Row below the column header. You can use the Auto Filter Row to filter a column by a term that you enter. You can also use * or ? as wildcards. |
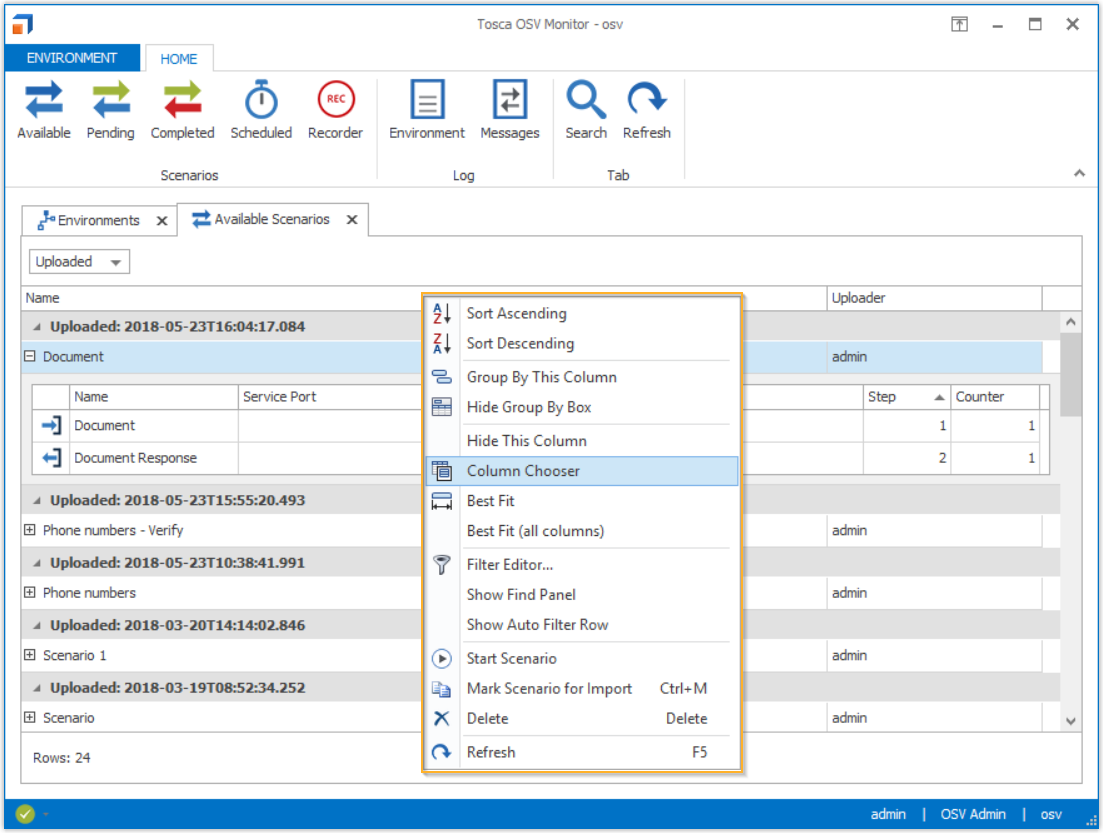
Context menu of a column header
Filter columns and groupings
You can use filters on columns and groupings. This allows you to filter for available values and to create numeric and text filters. Available filter options depend on which column or grouping you are using.
For instance, the column Completed contains date and time of the Scenario completion, i.e. numbers. Therefore, you can filter for available values or numeric values. The column Work State indicates the state of the Scenario, such as Completed, i.e. text. Therefore, you can filter for available values or text.
To set a filter, click the filter icon in the upper-right corner of a column header or a grouping.
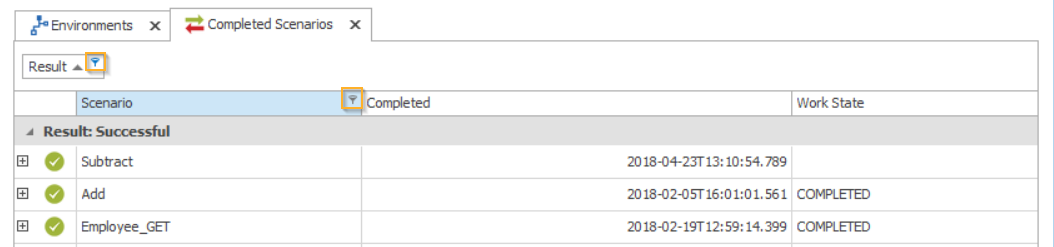
Filter icon of a grouping and a column header
Your active filters are displayed in a bar at the bottom of the tab or log you are using.
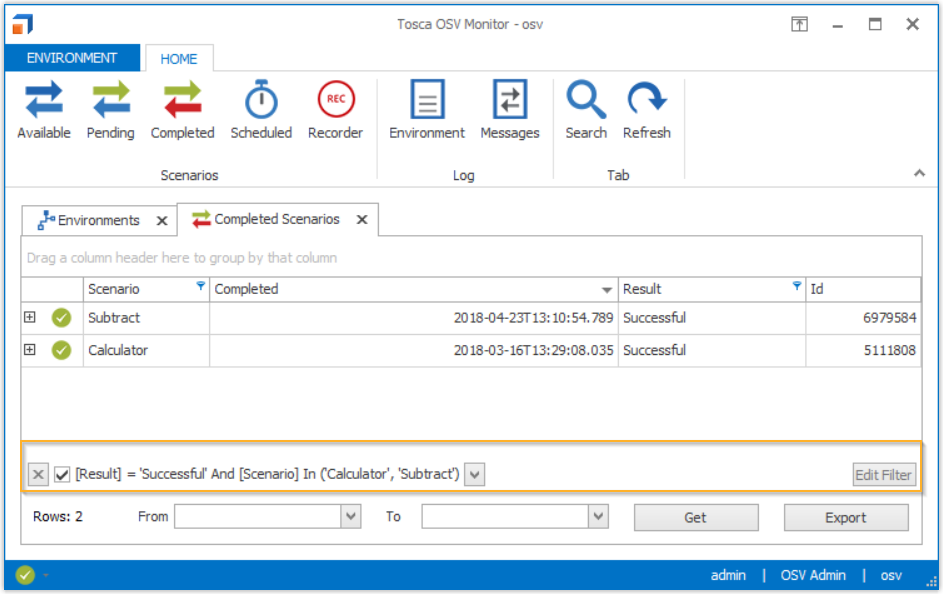
Filter the columns Result and Scenario
It offers the following options:
-
To remove a filter, click the
 icon.
icon. -
To disable a filter, disable the checkbox next to the filter name.
-
To choose a different filter, click the
 arrow icon and select a filter from the dropdown menu.
 -
To edit a filter, click Edit Filter on the right side of the active filter.