Work with Environments
An OSV Environment is a logical grouping for your test activities. For instance, you can group different applications, systems, or test environments that you want to virtualize. For more information on OSV Environments, see chapter "OSV Environment overview".
Get started
-
If you have not created any Environments yet, start off by creating your first Environment right away.
-
If you have already created Environments in OSV, you can just continue to work with them in the OSV Web Monitor.
Create an Environment
In the OSV Web Monitor, you can create simple or advanced Environments. Which kind of Environment you create is up to you and depends on your time and test requirements.
-
Simple Environment: just enter a name and your Environment is ready to use. OSV creates a default SQLite database for you.
-
Advanced Environment: take the time to configure all details according to your needs, such as your database connection or a proxy.
Access an Environment
You can access your OSV Environments in the Environments view of the OSV Web Monitor. It displays each Environment as a tile.
Environments that you created in Tosca OSV Monitor are automatically available in the OSV Web Monitor.
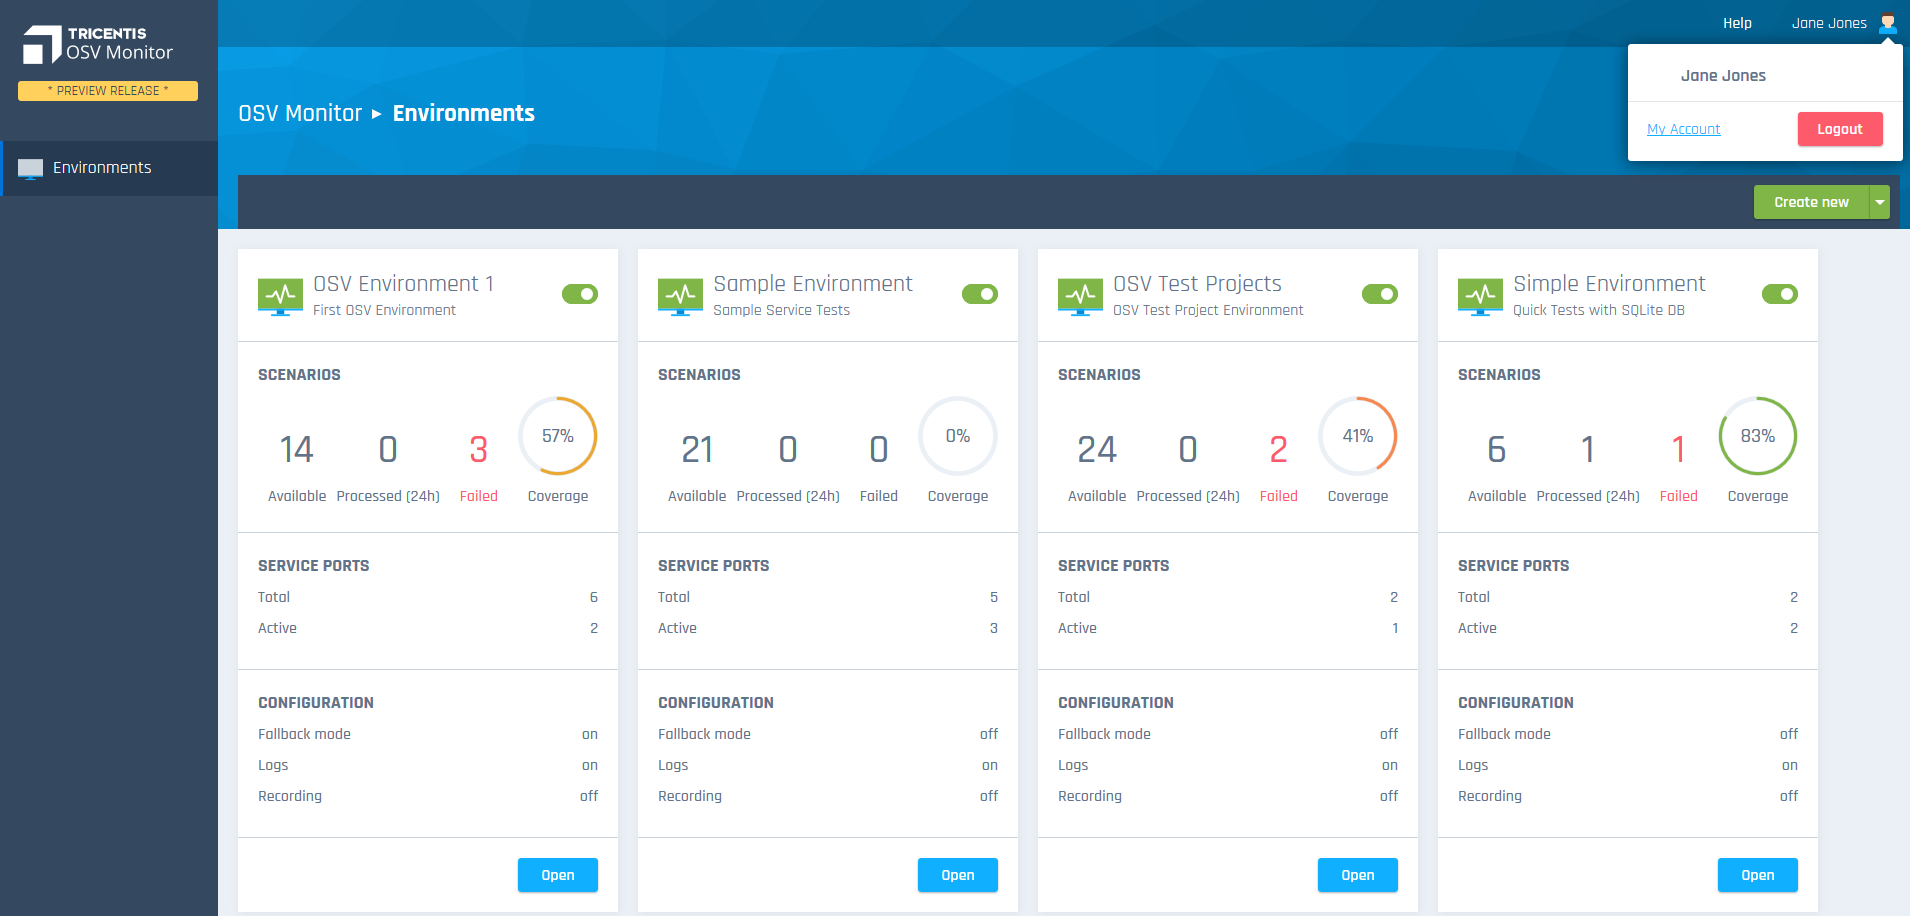
Environments view of the OSV Web Monitor
Use Environment tiles
In the top left corner of each Environment tile, you can see the Environment's name.
The tile also provides you with the most important information about the respective Environment at a glance, such as how many it contains and whether any of them failed.

Environment tile
For quick access to specific details of your Environment, click on the headers and buttons like Service Ports or Scenarios.
You can also use an Environment tile to do the following:
Start and stop your Environment
The color of an Environment tile indicates whether an Environment has been started or not. If it's grayed out, the Environment has not been started. This means that you cannot run any tests.
To start your Environment, click the ![]() toggle button in the top right corner of the Environment tile. To stop your Environment, click it again.
toggle button in the top right corner of the Environment tile. To stop your Environment, click it again.
Edit your Environment
You can always edit your Environment's settings, details, and the Scenarios and Service Ports it contains.
To do so, access the Environment in one of the following ways:
-
Hover over the Environment tile and click on the
 ellipsis button that appears in the top right corner. In the subsequent menu, select
  Edit.
Edit. -
Click Open at the bottom of the tile and switch to the Details view from there.
For detailed information on how to edit your Environment, see chapter "Edit Environment details".

|
For quick access, just click on the name, Scenarios, Service Ports, or Configuration directly on the Environment tile. |
Duplicate your Environment
You can duplicate an existing Environment, for example if you want to use this particular logical grouping for different test activities.
To duplicate an Environment, follow the steps below:
-
Hover over the Environment tile.
-
Click on the
ellipsis button that appears in the top right corner. -
In the subsequent menu, click
 Duplicate.
 -
In the subsequent dialog, click Confirm.
Delete your Environment
You can delete your Environments. If you do so, you remove the entire Environment including configuration, Service Ports, and active Scenarios.
However, deleting an Environment doesn't delete the database schema. If you want to delete the schema, you have to contact your database administrator.
To delete an Environment, follow the steps below:
-
Hover over the Environment tile.
-
Click on the
ellipsis button that appears in the top right corner. -
In the subsequent menu, click
 Delete.
 -
In the subsequent dialog, click Confirm.
What's next?
Start working on your Service Ports to define connections between your OSV Environment, the system under test, and a real service.
If your Environment and Service Ports are set up already, you can work on your OSV Scenarios.