Step 4 - Template Selection
Step 4 - Template Selection allows you to automate actions you would otherwise have to do manually before you can run your tests.
In Step 4, you can perform the following steps:
-
Select the TestCase templates you intend to use for your tests
-
Create an ExecutionList, i.e. a list of TestCases to be run
-
Create a RequirementSet, i.e. a set of functional or non-functional criteria for weighing the business risk of a test project

|
Step 4 is optional. You can click Finish without selecting any TestCase templates, or creating an ExecutionList or a RequirementSet. If you skip all or parts of Step 4, you must take additional steps before you can execute your TestCases. Tricentis therefore recommends performing Step 4 in its entirety. |
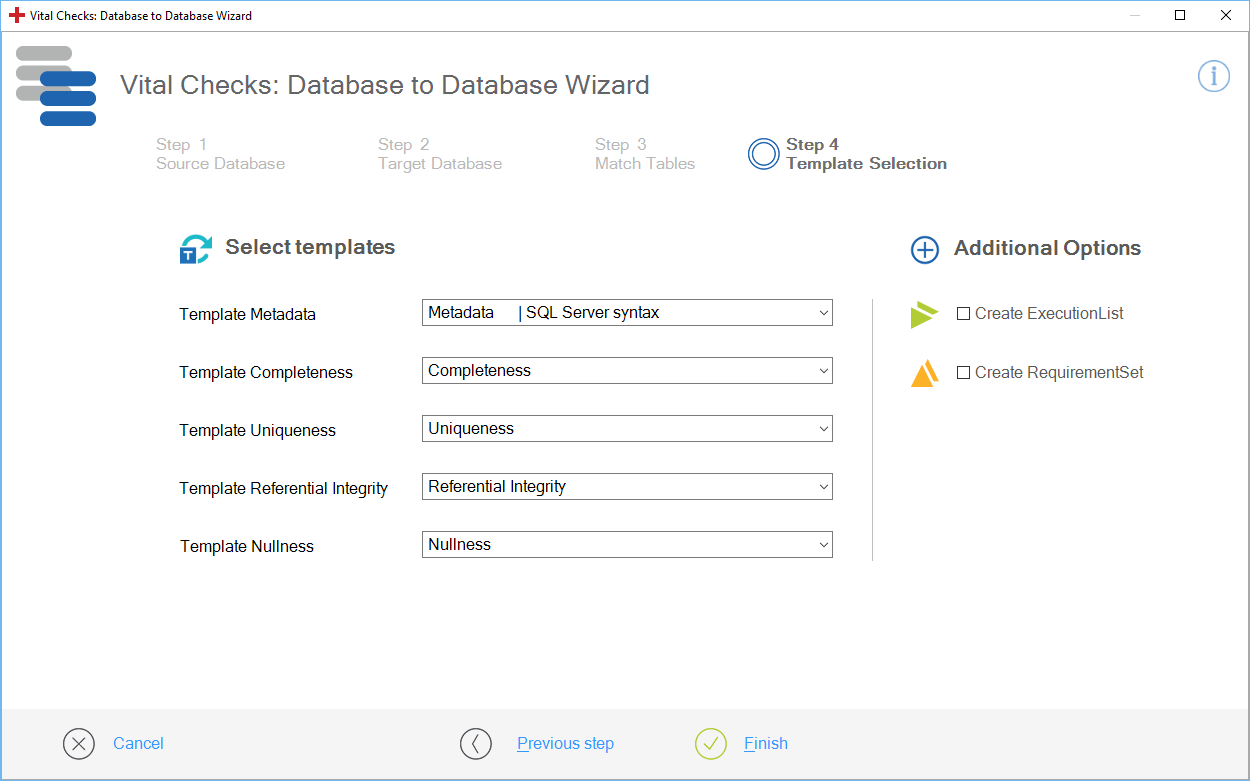
Step 4 of the Vital Checks: Database to Database Wizard
If you have performed all of Step 4 and clicked Finish, the Wizard creates the following folders:
-
TestCase-Design TestSheet folder
-
TestCase folder
-
ExecutionList folder
-
Requirements folder
The Wizard saves these objects to the Data Integrity folder you used to run the Vital Checks: Database to Database Wizard.
Tricentis recommends that you organize your tests within multiple, separate Data Integrity folders and group them by test layer and test intent.
Select TestCase Templates
|
|
To be able to select your TestCase templates in Step 4, you must first copy the respective TestCase templates to the folder _DI Templates as described in chapter "Run Vital Checks: Database to Database tests". |
Select your templates from the drop-down menus in the Select templates section.
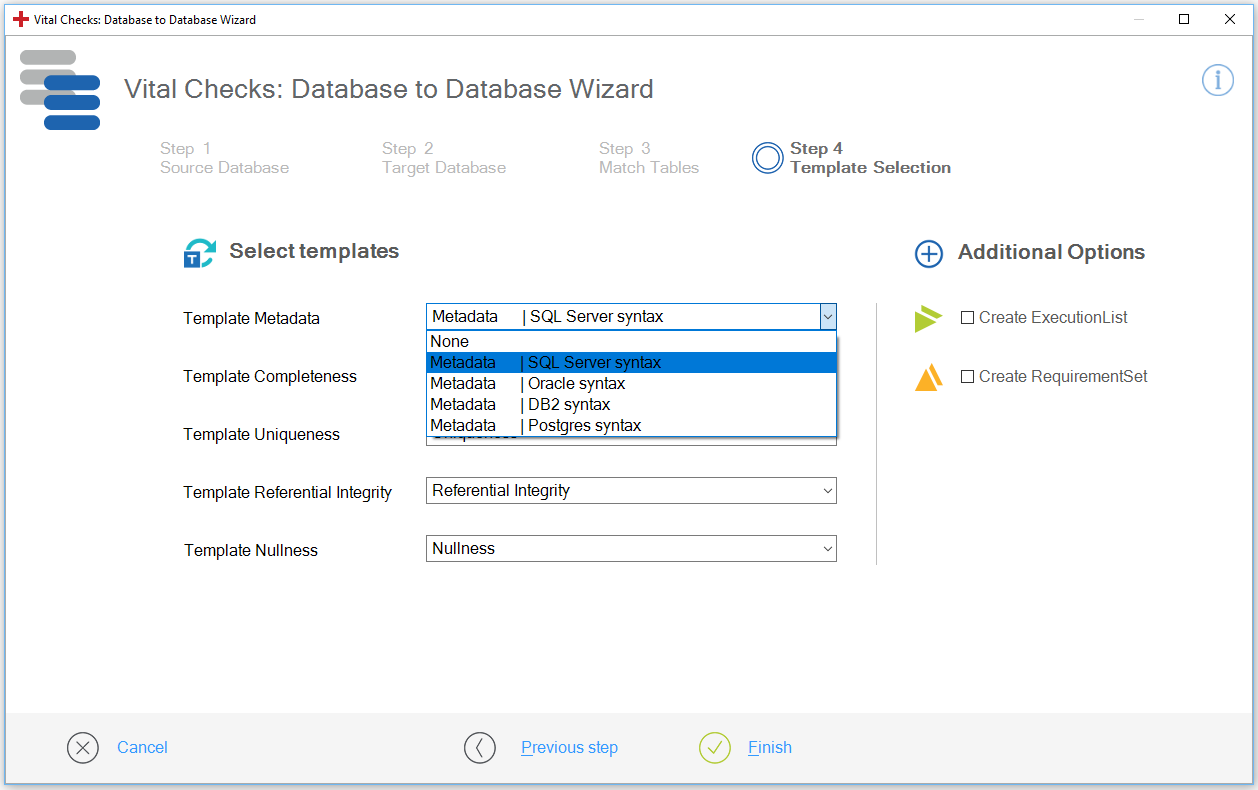
Select a template
If you select TestCase Templates, the Wizard performs the following tasks once you click Finish:
-
It creates TestCase-Design TestSheets based on your selection.
-
It creates auto-instantiated TestCases based on your TestCase Templates.
-
It links the TestCase-Design TestSheets to your TestCases.
If you do not select your TestCase templates in Step 4, the Wizard only creates TestCase-Design TestSheets based on your selection.
In this case, you must perform the following steps manually before you can run your tests:
-
Link your TestCase-Design TestSheets to your TestCase template by using drag and drop.
-
Instantiate those TestCases by clicking the
 Instantiate icon in the dynamic menu TestCases.
Create an ExecutionList
To create an ExecutionList, enable the check box Create ExecutionList in the Additional Options section.
If you enable the check box, the Wizard automatically creates an ExecutionList with your TestCase Instances as ExecutionEntries.
If you do not enable the check box, you must manually organize your TestCases in ExecutionLists as described in chapter "Create an ExecutionList".
Create RequirementSet
To create a RequirementSet, enable the check box Create RequirementSet in the Additional Options section.
If you enable the check box, the Wizard automatically creates a RequirementSet that is linked to your TestCases.
If you do not enable the check box, you must manually create a Requirement structure in the Tosca Requirements Management section as described in chapter "Create and manage Requirements".