Set up Tosca Distributed Execution without AOS| HTTP
The subsequent chapters describe step by step how to set up Tosca Distributed Execution

|
Tosca Distributed Execution without AOS is the legacy setup. Tricentis recommends that you use Tosca Distributed Execution with AOS instead. It offers the following advantages:
You can install Tosca Distributed Execution with AOS with either an HTTP or HTTPS binding. For information on how to install Tosca Distributed Execution with AOS, see the chapters below: |
Install DEX Server
The Tosca Distribution Server (DEX Server) is part of the standard Tosca Server installation.
To install and configure the DEX Server environment, follow these steps:
-
Perform the Tosca Server installation. To do so, choose one of the following options:
-
Optionally, explore additional configurations:
-
Enable user authorization for the DEX Monitor.
-
Choose different ports for the DEX Server and the DEX Monitor.
-
Deactivate AOS
The default setup for Tosca Distributed Execution is Tosca Distributed Execution with AOS. If you want to use the legacy functionality without AOS, you need to deactivate AOS on the Tosca Server machine.
To do so, follow these steps:
-
Open the file Tricentis.DistributionServerService.exe.config. By default, this file is located at C:\Program Files (x86)\TRICENTIS\Tosca Server\DEXServer.
-
Navigate to the section Tricentis.DistributionServer.Properties.Settings.
-
Change the value of the setting EnableWorkspacelessExecution to False.
<setting name="EnableWorkspacelessExecution" serializeAs="String">
    <value>False</value>
</setting>-
Save and close the file.
-
Restart Tricentis.DistributedExecutionService in the Windows Task Manager.
Install Tosca Commander
You need to install the full Tosca Commander client on
For information on how to install Tosca Commander, see chapter "Install Tricentis Tosca".
Install Agents
The Agent installation is part of the Tricentis Tosca installation. To install an Agent, you need to install Tricentis Tosca on every machine that should act as an Agent.
You need a separate machine for each Agent. Tosca Distributed Execution doesn't support, for instance, containers or Terminal Server setups.
To install an Agent, follow the steps below:
-
Start the installation of Tricentis Tosca.
-
On the Type screen of the Tricentis Tosca installer, select your Agent type:
-
To install an Execution Agent, select Execution Agent. The Execution Agent is a slim version of Tosca, designed to run Engines 3.0 tests.
-
To install the full Tosca client, select Tosca Commander.
-
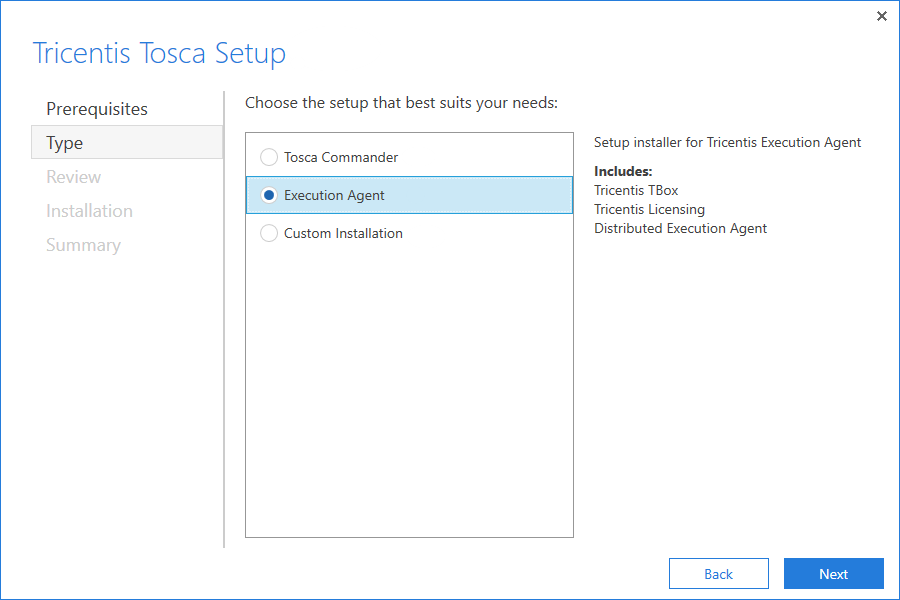
Select an Agent type in the Tricentis Tosca installer
-
Follow the instructions of the Tricentis Tosca installer to complete the installation.
Connect proxy server to Agents
You only need to perform this step if you want to use a proxy server. If you don't, you can skip it.
To set up your Agent for a connection to a proxy server, you need to modify the Agent configuration file. Note that you have to do this on every Agent machine.
To do so, follow these steps:
-
On the Agent machine, open the ToscaDistributionAgent.exe.config file. By default, this file is located at %TRICENTIS_DEX_AGENT_HOME%.
-
To establish the communication between Agent and proxy, go to the userSettings section and modify the settings ProxyAddress, ProxyUsername, and ProxyPassword.
<userSettings>
  <Tricentis.DistributionServer.Properties.Settings>
  ...
    <setting name="ProxyAddress" serializeAs="String">
      <value>http://11.1.11.11:1111</value>
    </setting>
    <setting name="ProxyUsername" serializeAs="String">
      <value>User1</value>
    </setting>
    <setting name="ProxyPassword" serializeAs="String">
      <value >Proxypassword</value>
    </setting>
  </Tricentis.DistributionServer.Properties.Settings>
</userSettings>-
Save and close the file.
Start and connect Agents
To enable communication between the DEX Server and the Agent, start your Agents and specify the DEX Server address on the Agent machine. You need to do this on every Agent machine.
Starting and connecting Agents requires administrator privileges. If you don't have administrator privileges, follow the steps in this Tricentis Knowledge Base article.
You can start
-
Via graphical user interface (GUI).
-
Via command line. In this case, the Agent works in the background. You can still run GUI tests, but the Agent GUI elements are hidden.
|
|
If you use Tosca Server with an HTTPS binding, you must start and connect the Agent via GUI. You need to authenticate your Agent, which is only possible in the Agent configuration GUI. |
Start
To start
-
On the Agent machine, right-click the file ToscaDistributionAgent.exe and select Run as administrator from the context menu.
By default, this file is located at %TRICENTIS_DEX_AGENT_HOME%.
-
If you have started the Agent successfully, you see a green Agent icon in the Windows taskbar.
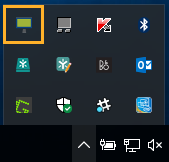
Agent icon in the Windows taskbar
-
Right-click the Agent icon in the Windows taskbar and select Configure Agent from the context menu.
This opens the ToscaDistributionAgent Configuration window.
-
In the ToscaDistributionAgent Configuration window, click the Connect to server tab.
-
In the Connect to server tab, enter the address of the DEX Server:
http://<Tosca Server Gateway IP address or host name>:<Gateway port>/DistributionServerService/CommunicationService.svc
If you use an IPv6 address, the server address has to contain the IP address instead of the host name.
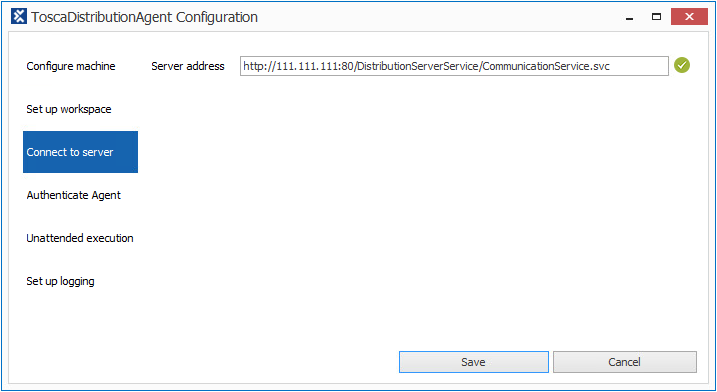
Specify the server address
-
If the connection to the DEX Server is successful, the ToscaDistributionAgent Configuration window displays a green check mark next to the Server address entry field.
If the window displays a red X, double-check the link by copying it into an internet browser.
-
Click Save.
-
If you use Tosca Server with an HTTPS binding, authenticate the Agent. To do so, go to the Authenticate Agent tab and fill out the following settings:
|
Setting |
Description |
|---|---|
|
Token endpoint URL |
Enter the authentication endpoint in the following format: http(s)://<Tosca Server Gateway IP address or host name>:<Gateway port>/connect/token |
|
Credentials Source |
Specify where you keep your Agent credentials. To do so, select one of the following values from the drop-down menu:
|
|
Client ID |
Enter the client ID of your
|
|
Client secret |
Enter the client secret of the API access token. Depending on your Credentials Source, enter the client secret directly or enter the path to the secret in your key vault. |
-
Set up the Agent to allow RDP access for Unattended Execution. To do so, go to the Unattended execution tab and perform the following actions:
-
Select Allow to open remote connections to this agent.
-
Select Use RDP connection.
-
Populate the following fields:
-
|
Field |
Optional? |
Description |
|---|---|---|
|
Credentials Source |
|
Specify where you keep the user credentials of the Windows user who runs the Agent. To do so, select one of the following values from the drop-down menu:
|
|
RDP Mode |
|
Define which RDP mode you want to run. To do so, select one of the following values from the drop-down menu:
|
|
Username |
|
Enter the username of the Windows user:
|
|
Password |
|
Enter the password of the Windows user. Depending on your Credentials Source, enter the password directly or enter the path to the password in your key vault. |
|
Desktop Width |
yes |
Change the default width of the remote desktop in pixels. The default value is 1600. |
|
Desktop Height |
yes |
Change the default height of the remote desktop in pixels. The default value is 1200. |
|
Color Depth |
yes |
Change the default color depth of the remote desktop. The default value is 16. |
-
To verify whether your Agent machine has all necessary configurations and policies for Unattended Execution, select Check RDP Configuration and go through the report.
-
Click Save and close the window.
Start
To start
-
On the Agent machine, open a command prompt with administrator privileges.
-
Navigate to the folder %TRICENTIS_DEX_AGENT_HOME%.
-
Enter the following command line:
ToscaDistributionAgent.exe cmd-only http://<Tosca Server Gateway IP address or host name>:<Tosca Server Gateway port>/DistributionServerService/CommunicationService.svc
If you use an IPv6 address, the server address has to contain the IP address instead of the host name.
-
Set up the Agent to allow RDP access for Unattended Execution. You can do so in the Agent View of the DEX Monitor (see chapter "Monitor, recover, and configure Agents in the Tosca Distributed Execution Monitor").
Connect Tosca Commander
Now you need to specify the connection between Tosca Commander and the DEX Server.
You need to do this on all machines where you want to create tests and trigger executions.
Alternatively, you can create project settings. In this case, the settings apply to all workspaces connected to the repository.
To connect Tosca Commander, follow the steps below:
-
Open Tosca Commander.
-
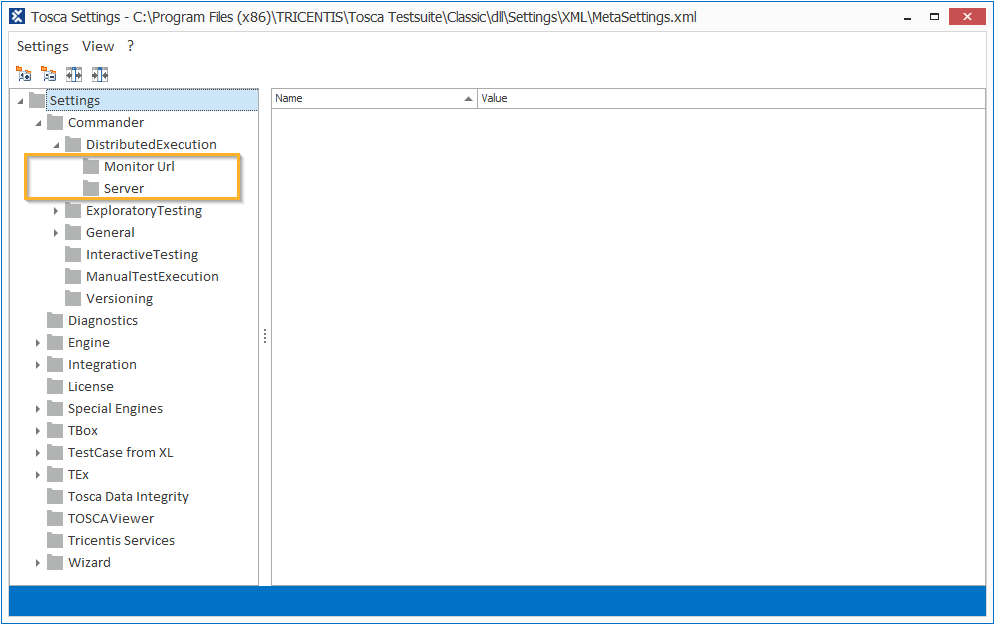
Go to Project->Settings->Commander->DistributedExecution->Server.
-
As the value of the setting EndpointAddress, enter the address of ToscaGateway Service as follows:
http://<Tosca Server Gateway IP address or hostname>:<port>/DistributionServerService/ManagerService.svc
For default ports, see "Ports required by the Tricentis Tosca Server features".
If you use an IPv6 address, the server address has to contain the IP address instead of the hostname.
-
If you want to use a proxy server, populate the value of the setting Proxy with the complete network address of the proxy server:
http://<Proxy server IP address or hostname>:<port>
-
Go to Project->Settings->Commander->DistributedExecution->Monitor Url.
-
As the value of the setting Url, enter the address of ToscaGateway Service as follows:
http://<Tosca Server Gateway IP address or hostname>:<port>/Monitor/
Modify the settings
Administer licenses
You need to have a valid Tosca license on all machines where you install Tricentis Tosca:
-
Each Agent machine requires an ExecutionOnly license.
-
Each machine on which you create tests and trigger their execution needs an appropriate Tosca license. Which license you need depends on the kind of tests you create. For information on licensing options, contact Tricentis Sales.
For information on how to set up licensing on your machines, see chapter "License management".
Set up workspaces
To use Tosca Distributed Execution without AOS, you need to set up separate multi-user workspaces.
These workspaces must have access to one common repository.
-
One multi-user workspace on each machine on which you create and trigger your tests. These are your user workspaces.
-
One multi-user workspace on each Agent machine. This is the workspace the Agent uses to execute your tests.
Create user workspaces
-
If you are already working with
-
If you have not yet set up your repository and workspaces, do so now (see chapter "Create multi-user workspaces"). You need one workspace on every machine where a user should create and execute tests.
The Agent workspace is the workspace that the Agent uses to execute your tests.
To set up an Agent workspace, follow the steps below:
-
On the Agent machine, create a multi-user workspace. Ensure that it's connected to the common repository.
-
Ensure that you have at least one Admin user who has all necessary access and permissions to the applications the Agent should steer during execution.
-
On the DEX Server machine, open the Distributed Execution Monitor.
-
Switch to the Agent View.
-
Click on
 in the row of the respective Agent. This opens the Configuration window.

Open the Configuration dialog in the Distributed Execution Monitor
-
In the Configuration window, click Workspace and populate the following fields:
|
Field |
Description |
|---|---|
|
Tosca Workspace |
Absolute path to the workspace that the Agent should use for execution. |
|
Tosca User |
Name of the user to access the workspace. |
|
Password |
Password of the user. If you use LDAP integration to manage user groups, leave the Tosca user and Password fields empty (see chapter "Synchronize users and user groups with LDAP"). |

Set up a workspace
-
Click Save and close the window.
What's next
Now that you've set up Tosca Distributed Execution, you're ready to start testing! For more information, see chapter "Create and execute TestEvents".
Customize your current setup
You can further customize Tosca Distributed Execution features after the setup. Explore additional configuration options in the following chapters: