Convert Test Cases to Tosca
qTest provides the ability to convert a manual qTest Test Case into a Tosca automated Test Case. Use Tosca Integration to connect your qTest Test Cases to Tosca Automated Test Cases.
Tosca Integration Prerequisites
You must turn on and configure Tosca Integration in Automation Settings prior to converting manual Test Cases to automated Test Cases. For more information about this setting, refer to the Tosca Integration section of the Automation Settings topic.
Tosca Test Case Conversion
To convert an individual Test Case:
-
In the tree panel on the Test Design tab, select the Test Case that you want to convert.
The Test Case page appears.
-
Click the drop-down arrow on the Convert button. Then click To Tosca Commander on the drop-down menu that appears.
A message window appears, confirming that you want to convert the Test Case to a Tosca Test Case.
-
Click Yes.
A message window appears, indicating that the Test Case is being converted to Tosca. Allow sufficient time for the conversion process to run before verifying that the Test Case has been converted.
qTest Information Available in the Converted Test Case
Once you convert a manual qTest Test Case to a Tosca Automation Test Case, you can view the converted Test Case in your Tosca Workspace. In addition, you will see the following information in qTest.
-
The Test Case icon in the tree panel changes from the Manual Test Case icon
 to the Automated Test Case icon
  .
. -
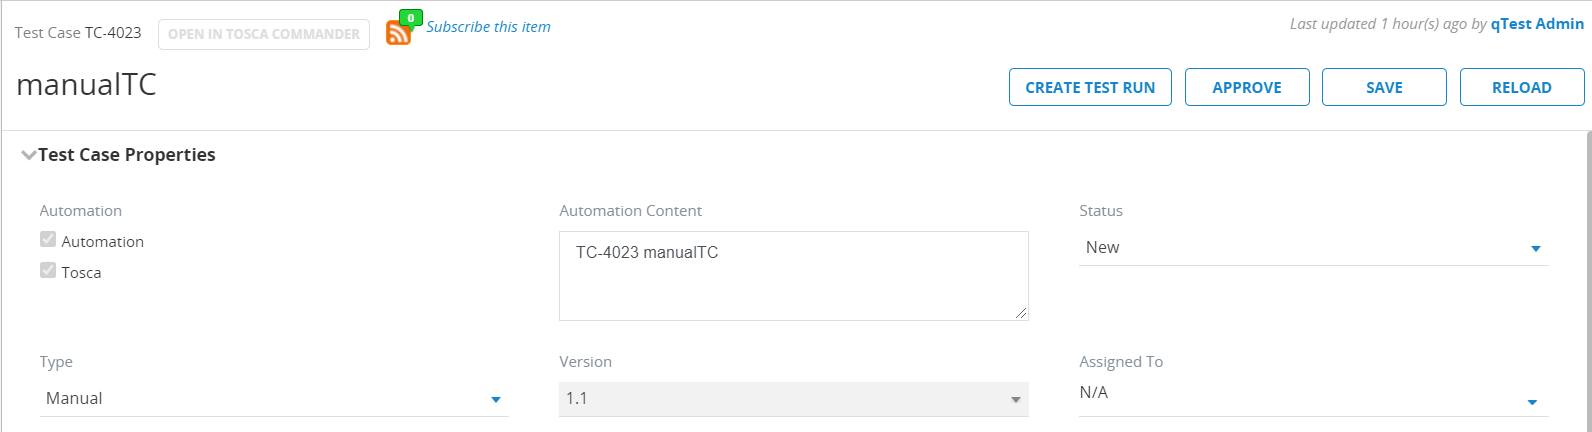
The Automation checkbox and the Tosca checkbox are selected in the Automation field in the Test Case Properties section on the Test Case page.
-
The Test Case ID and the name of the Test Case are automatically entered in the Automation Content field in the Test Case Properties section.
The information entered in the Automation Content field is the identifier that is used to match your automation execution results and should be unique to the Test Case. Automation execution results are matched:
-
To a Test Run that is linked to the Test Case
-
To newly created Test Cases with the corresponding Test Runs
-
When a Test Log is added to an existing Test Run
-
Viewing a Converted qTest Test Case in Tosca Workspace
Initially, an "Imported from qTest" folder will be automatically created within the TestCases folder in your Tosca Workspace. Each additional converted qTest Test Case will be added to the same "Imported from qTest" folder that is initially established. You can rename this folder in your Tosca Workspace without affecting any converted Test Cases.
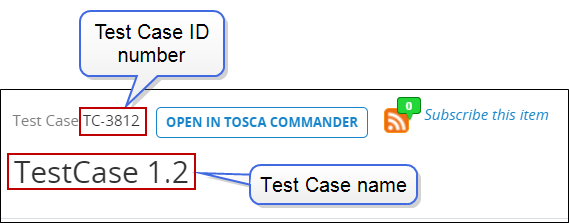
The name of a converted Test Case in Tosca comprises the qTest Test Case name and Test Case ID number.
In addition, the description in Tosca is the same as the description in qTest but will not display any rich-text formatting. Test Steps from qTest will be appended to the description.
Next Steps: Execute Converted qTest Test Cases
To link Test Cases and execute linked TestEvents, use the Native Integration: Tosca Distributed Execution (DEX) option.
-
Native Integration: Tosca Distributed Execution (DEX). Install and configure the Tosca DEX server and agent. For information on how to set up Tosca DEX, refer to Tosca Distributed Execution.
-
qTest Universal Agent. For information on how to set up the qTest Universal Agent, refer to Integrate Tricentis Tosca with Universal Agent. This process includes setting up the Tosca Continuous Integration (CI). For information on how to set up Tosca CI, refer to Tosca Continuous Integration.
-
qTest Jenkins plug-in. Configure the Jenkins Plug-in for Freestyle to Execute Tricentis Tosca Tests.